
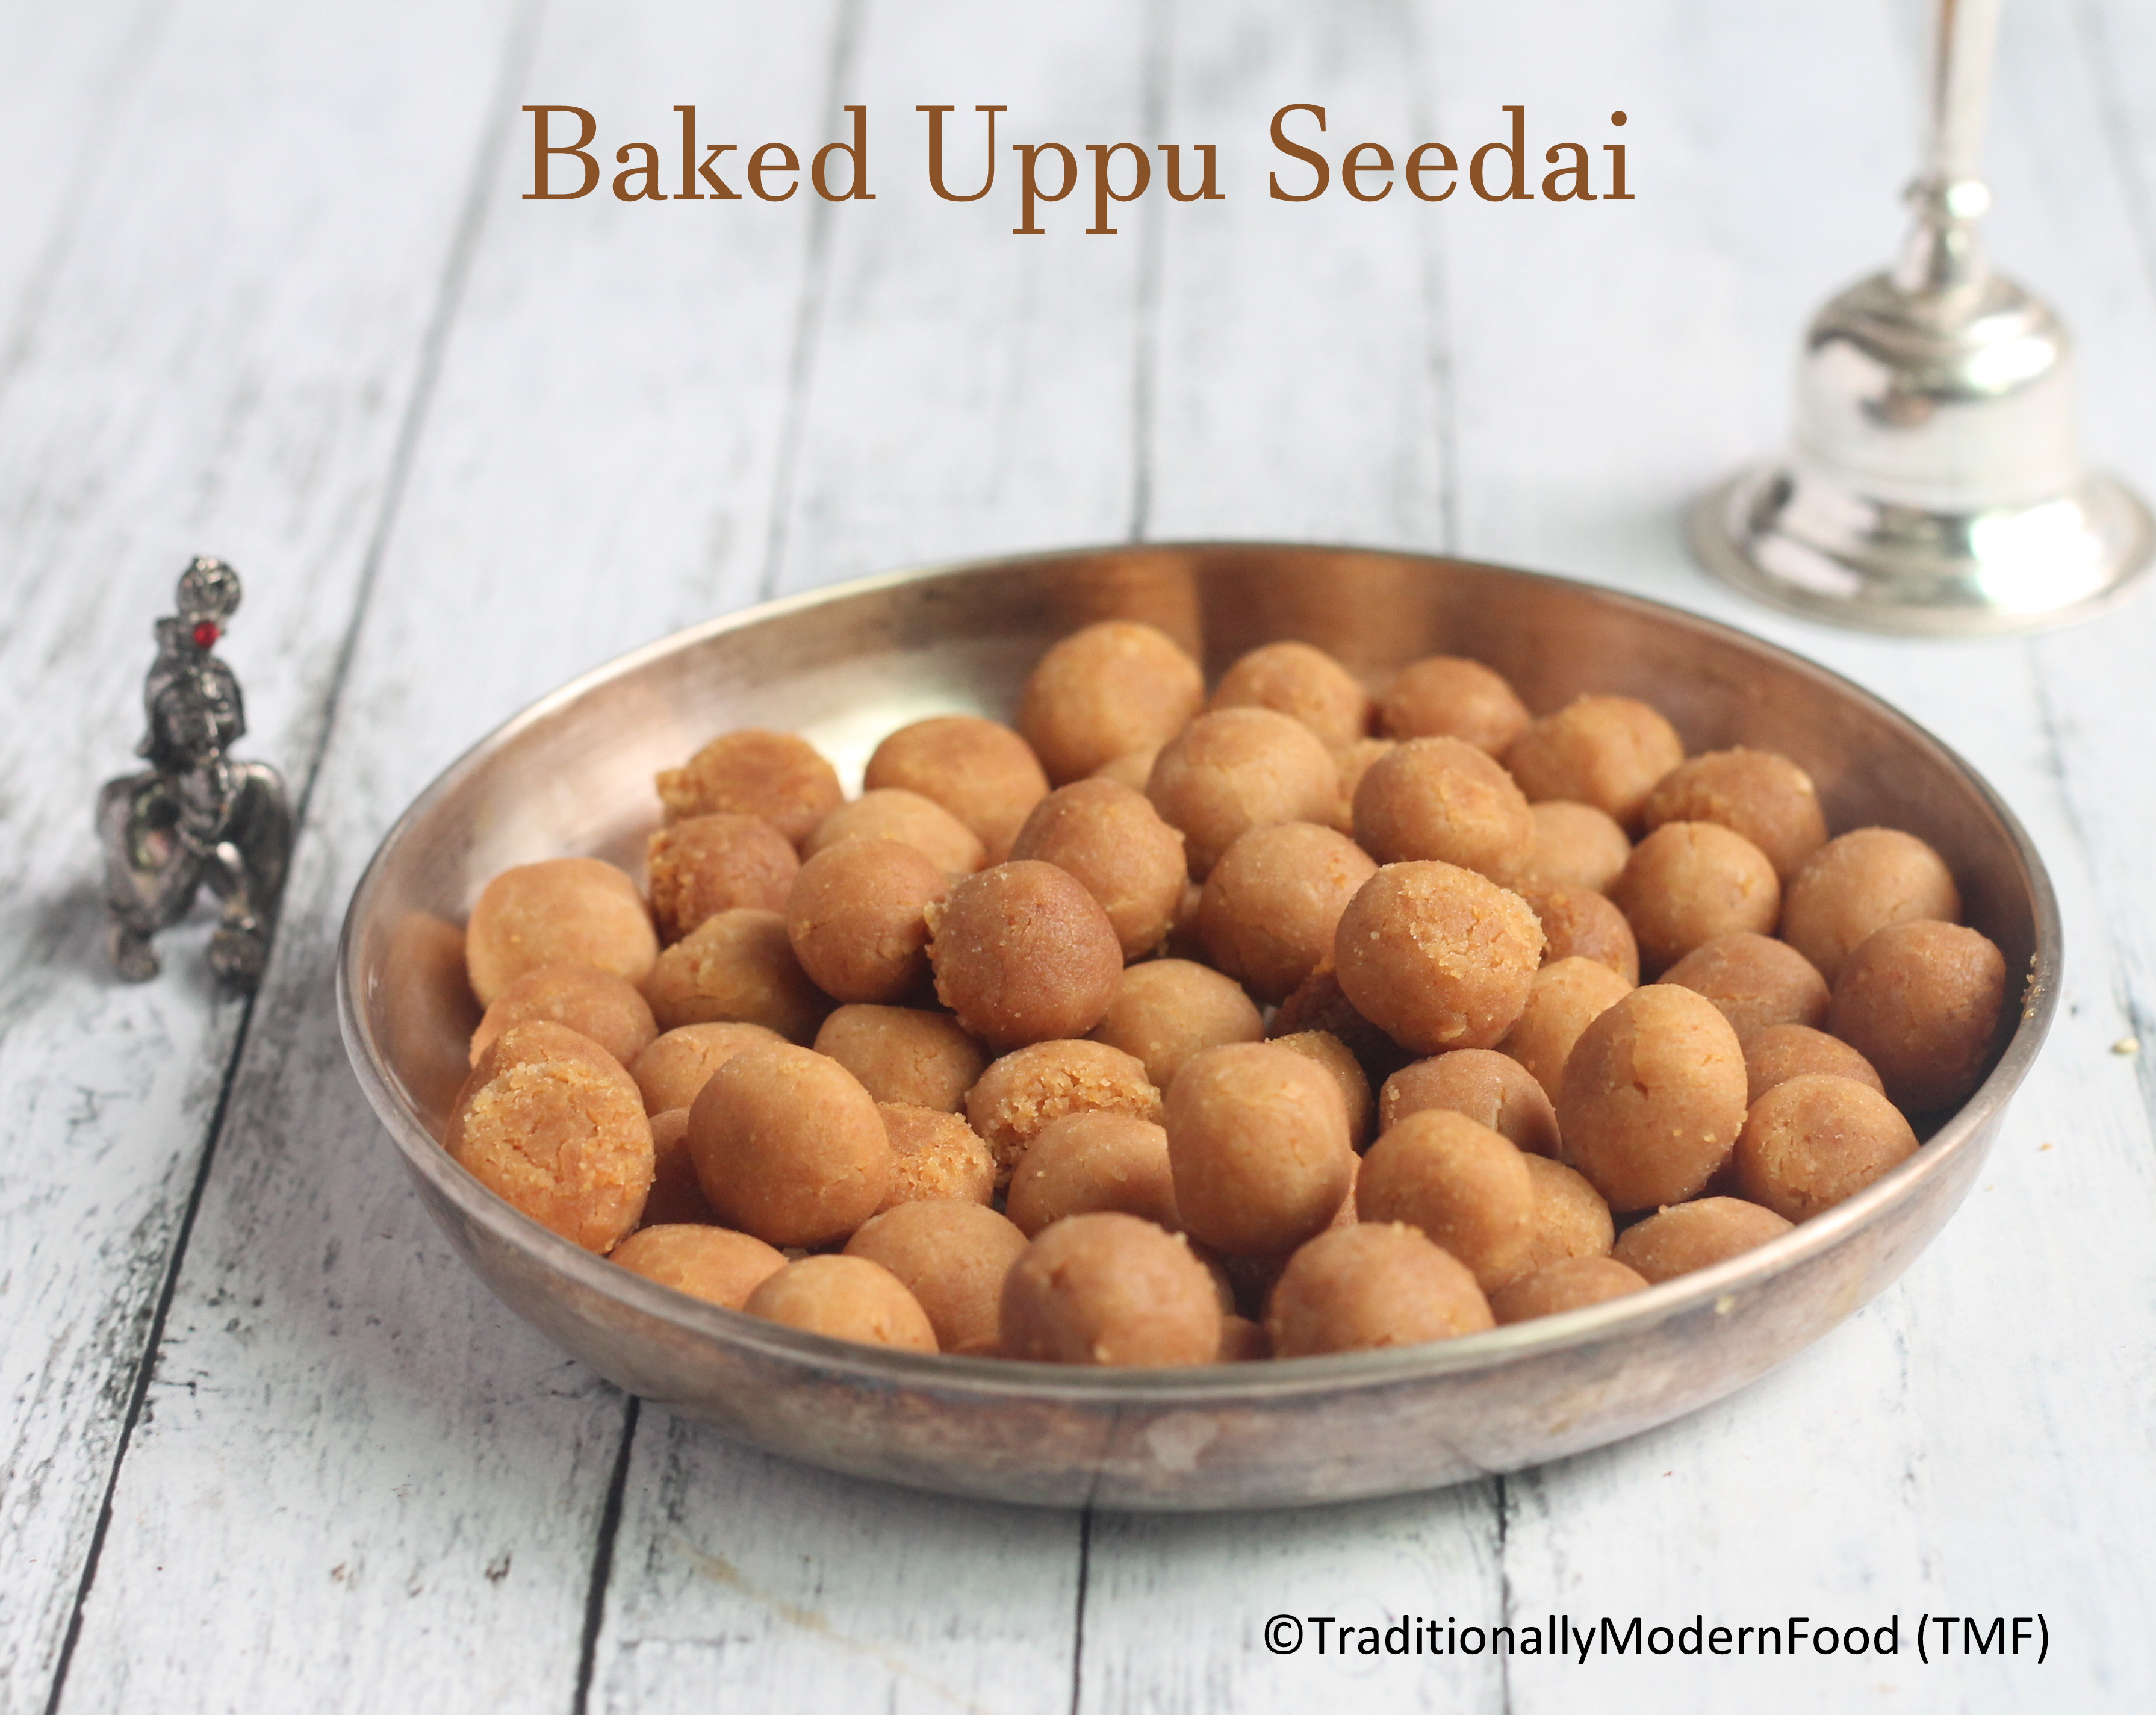
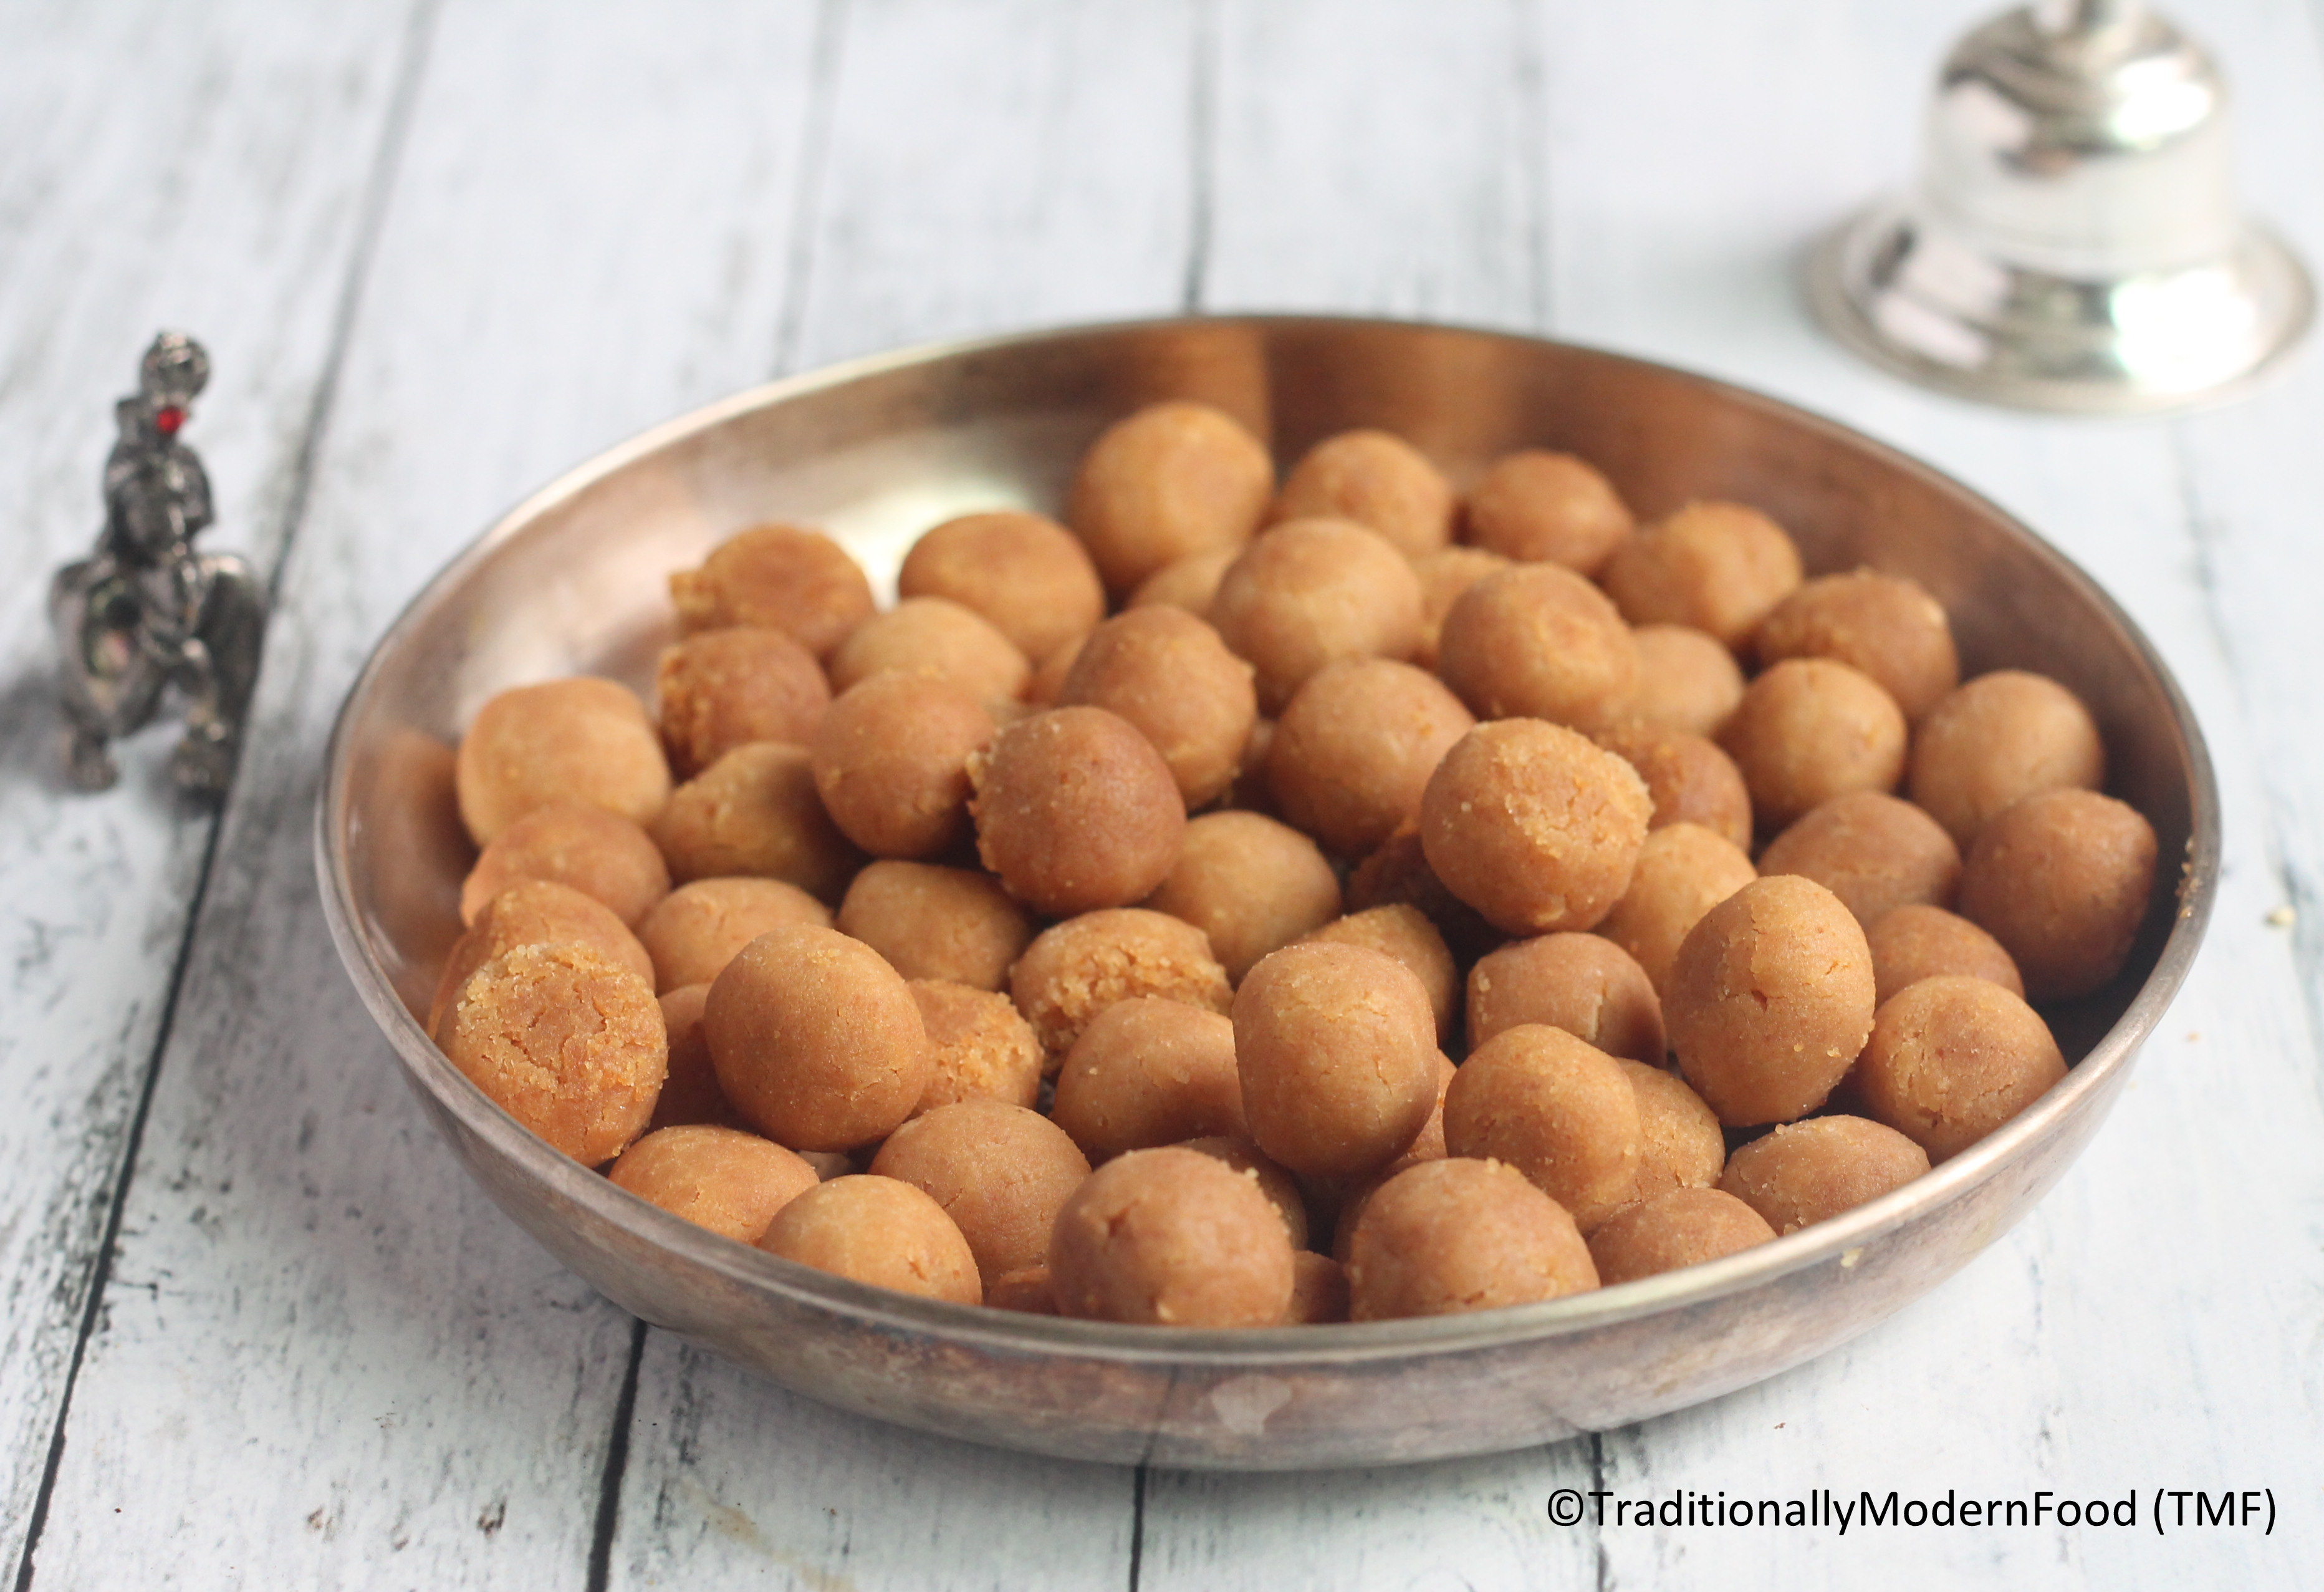
Baked Uppu Seedai
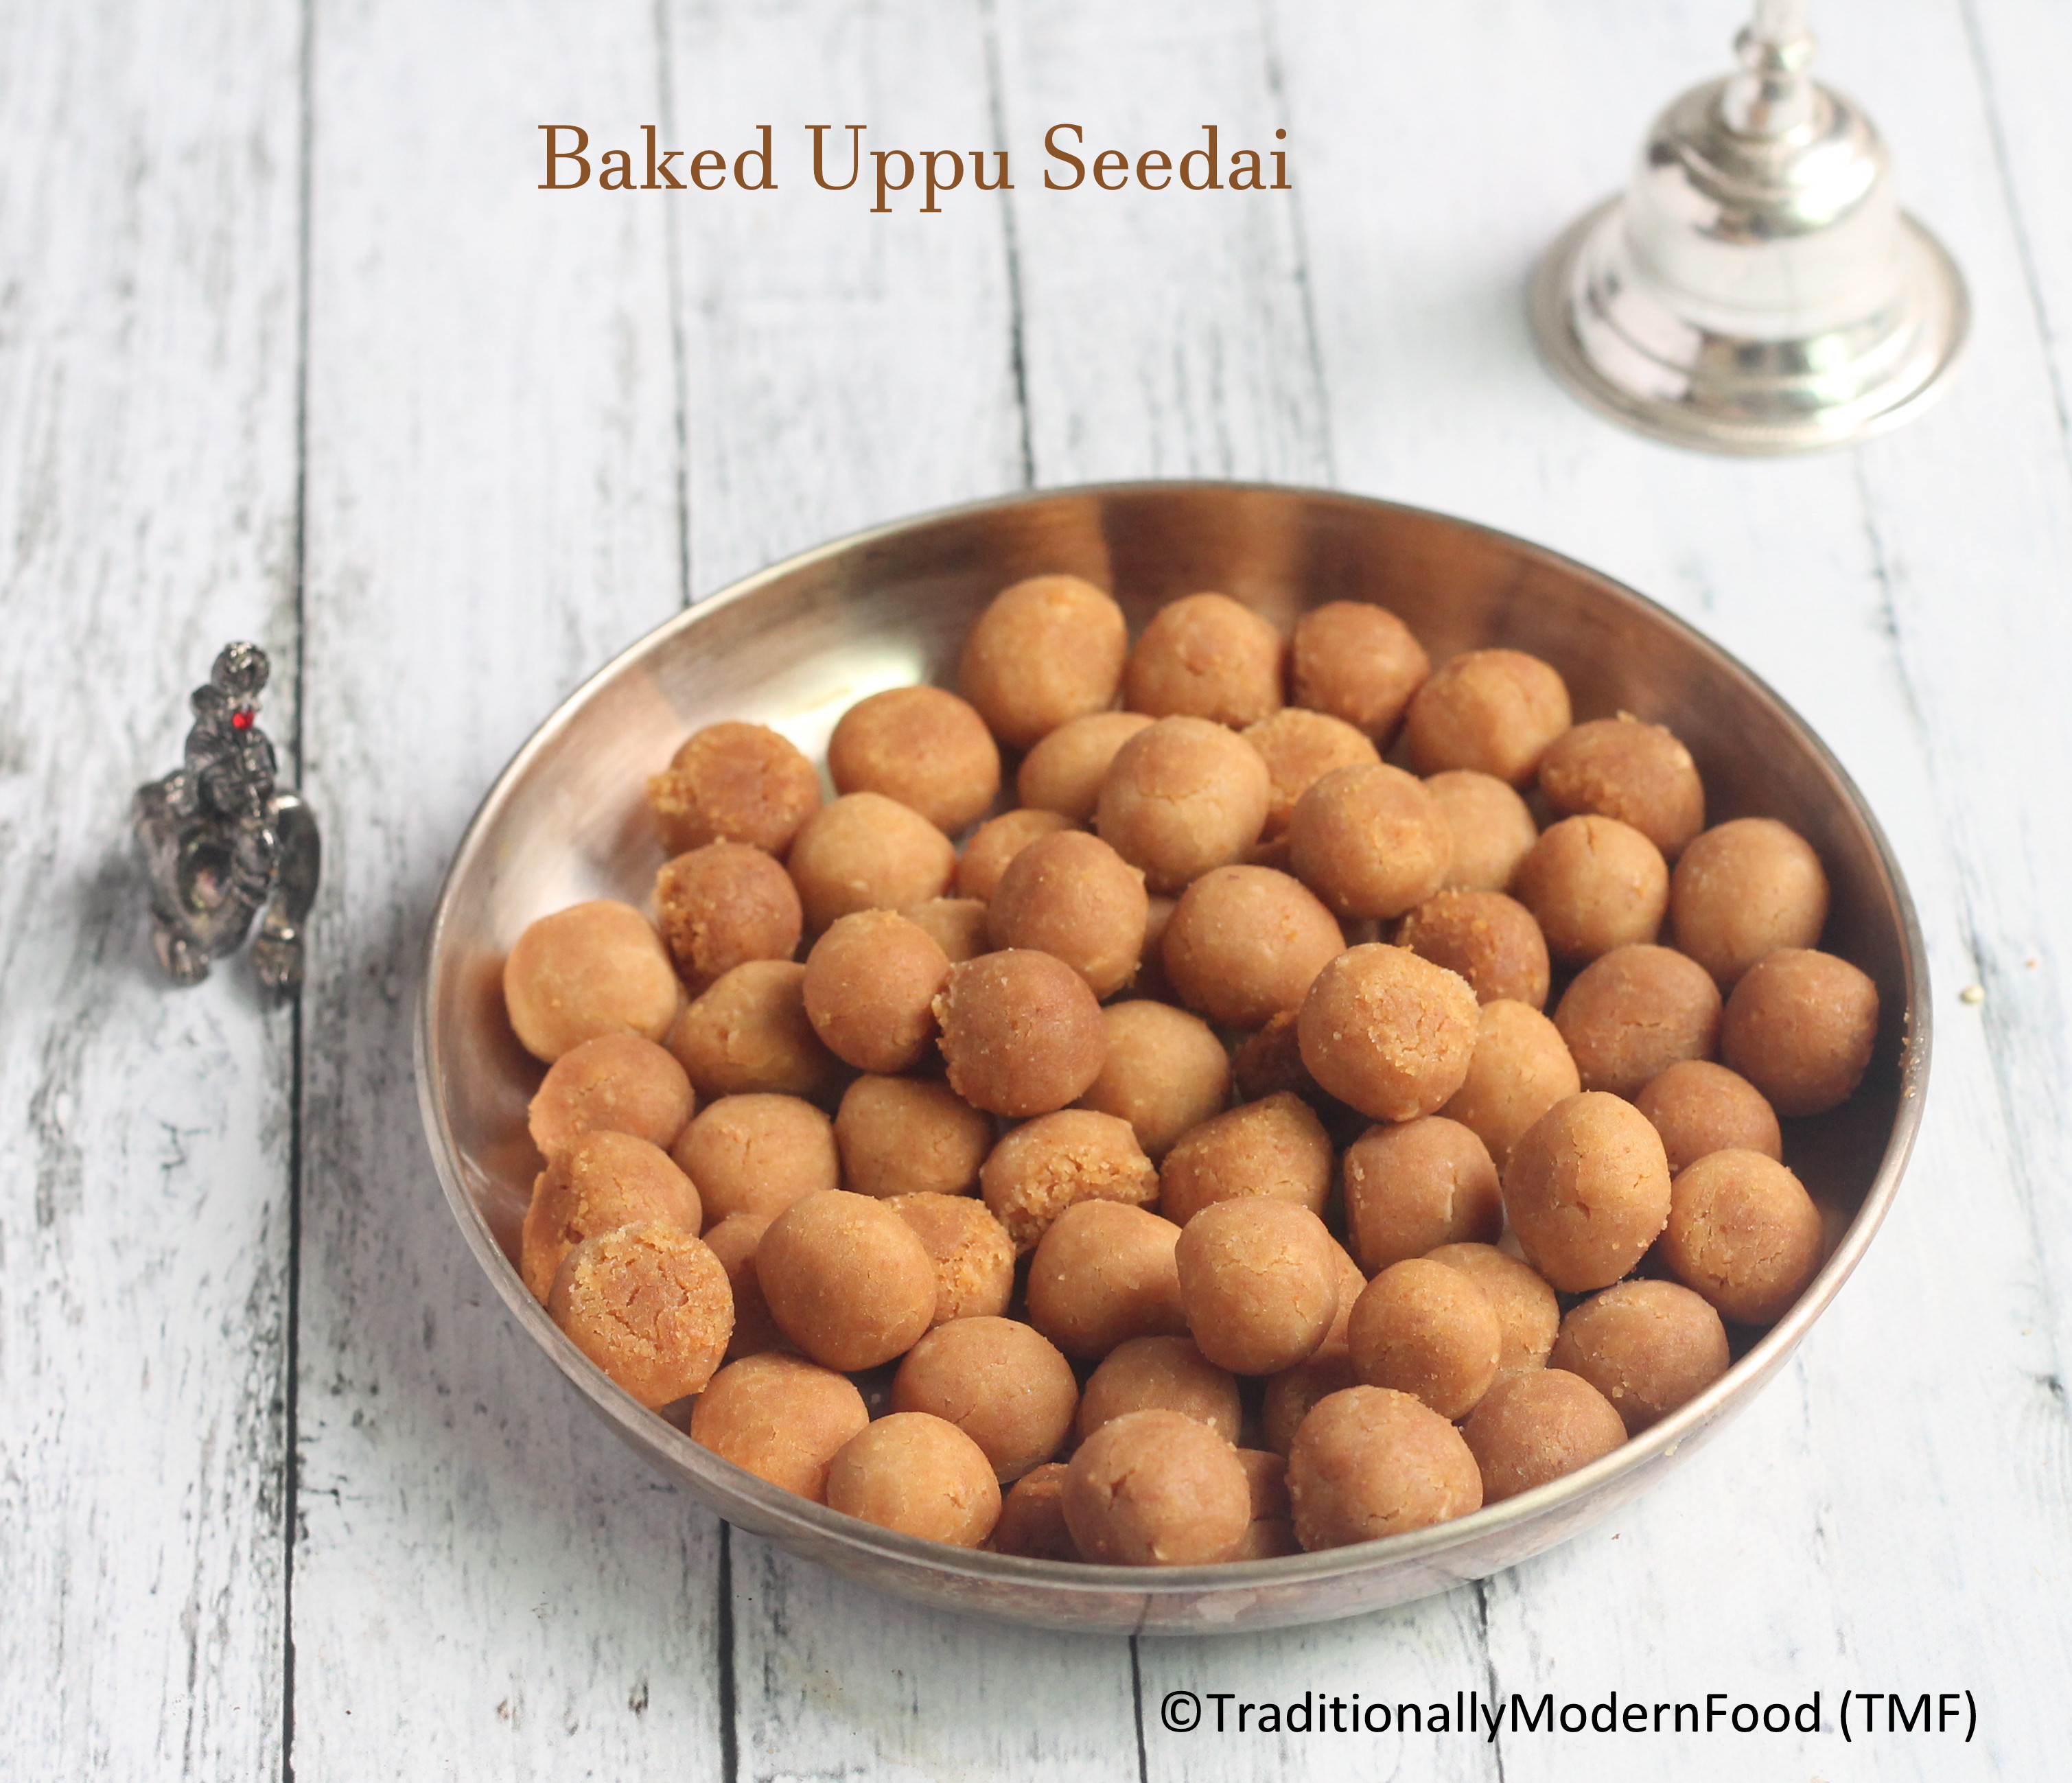
Melt-in-mouth, tasty, and healthy Uppu Seedai (Salt Seedai) for Krishna Jayanthi/ janmashtami. This Baked Indain snack can be prepared within 25 minutes. Seedai is a great evening snack with tea. Uppu seedai can also be prepared for diwali savory varieties. Try this Stepwise recipes and video uppu seedai recipe and enjoy the festive without the worrying about bursting seedai.
Back in 2014 I posted baked Uppu Seedaii recipe. Recently I have updated the pitures. The moment I think about Krishna jayanthi Seedai comes to my mind. Having a sweet tooth I was always inclined towards Vella Seedai but hubby likes Uppu Seedai. Now(2017) I have one more seedai fan, my little one. I prepared Salt Seedai 3 weeks back when my parents where here. My father likes seedai and he was asking me Baked Uppu Seedai. As always when I gave few seedai to kiddo, and he said big no intially, after tasting one he said, “Amma I like these balls, it is melting”. My father said this is one of my best baked snack 🙂 Happiness is getting such sweet comments from loved ones.
Coming back to my First Baked seedai. When we where in Bentonville, my son was around 9 months old. Since that was the first gokulashtami for my “kutti Krishnan” I wanted to make all krishna jayanthi special recipes. As usual I called Amma for the recipe. I have never made seedai before. Last year (2013) I wanted to do, but my mom alarmed me saying Seedai may burst, so I was scared!. Somehow I postoned it for next year.
This year again we had the same conversation. I called my mom to ask about seedai proportions, and she again said a big no, and this time even stronger! I was in a big dilemma whether to cook or not. My sis casually asked me why can’t you bake seedai, like baked Pakoda and Bonda, so that mom won’t get scared with you using hot oil for seedai.
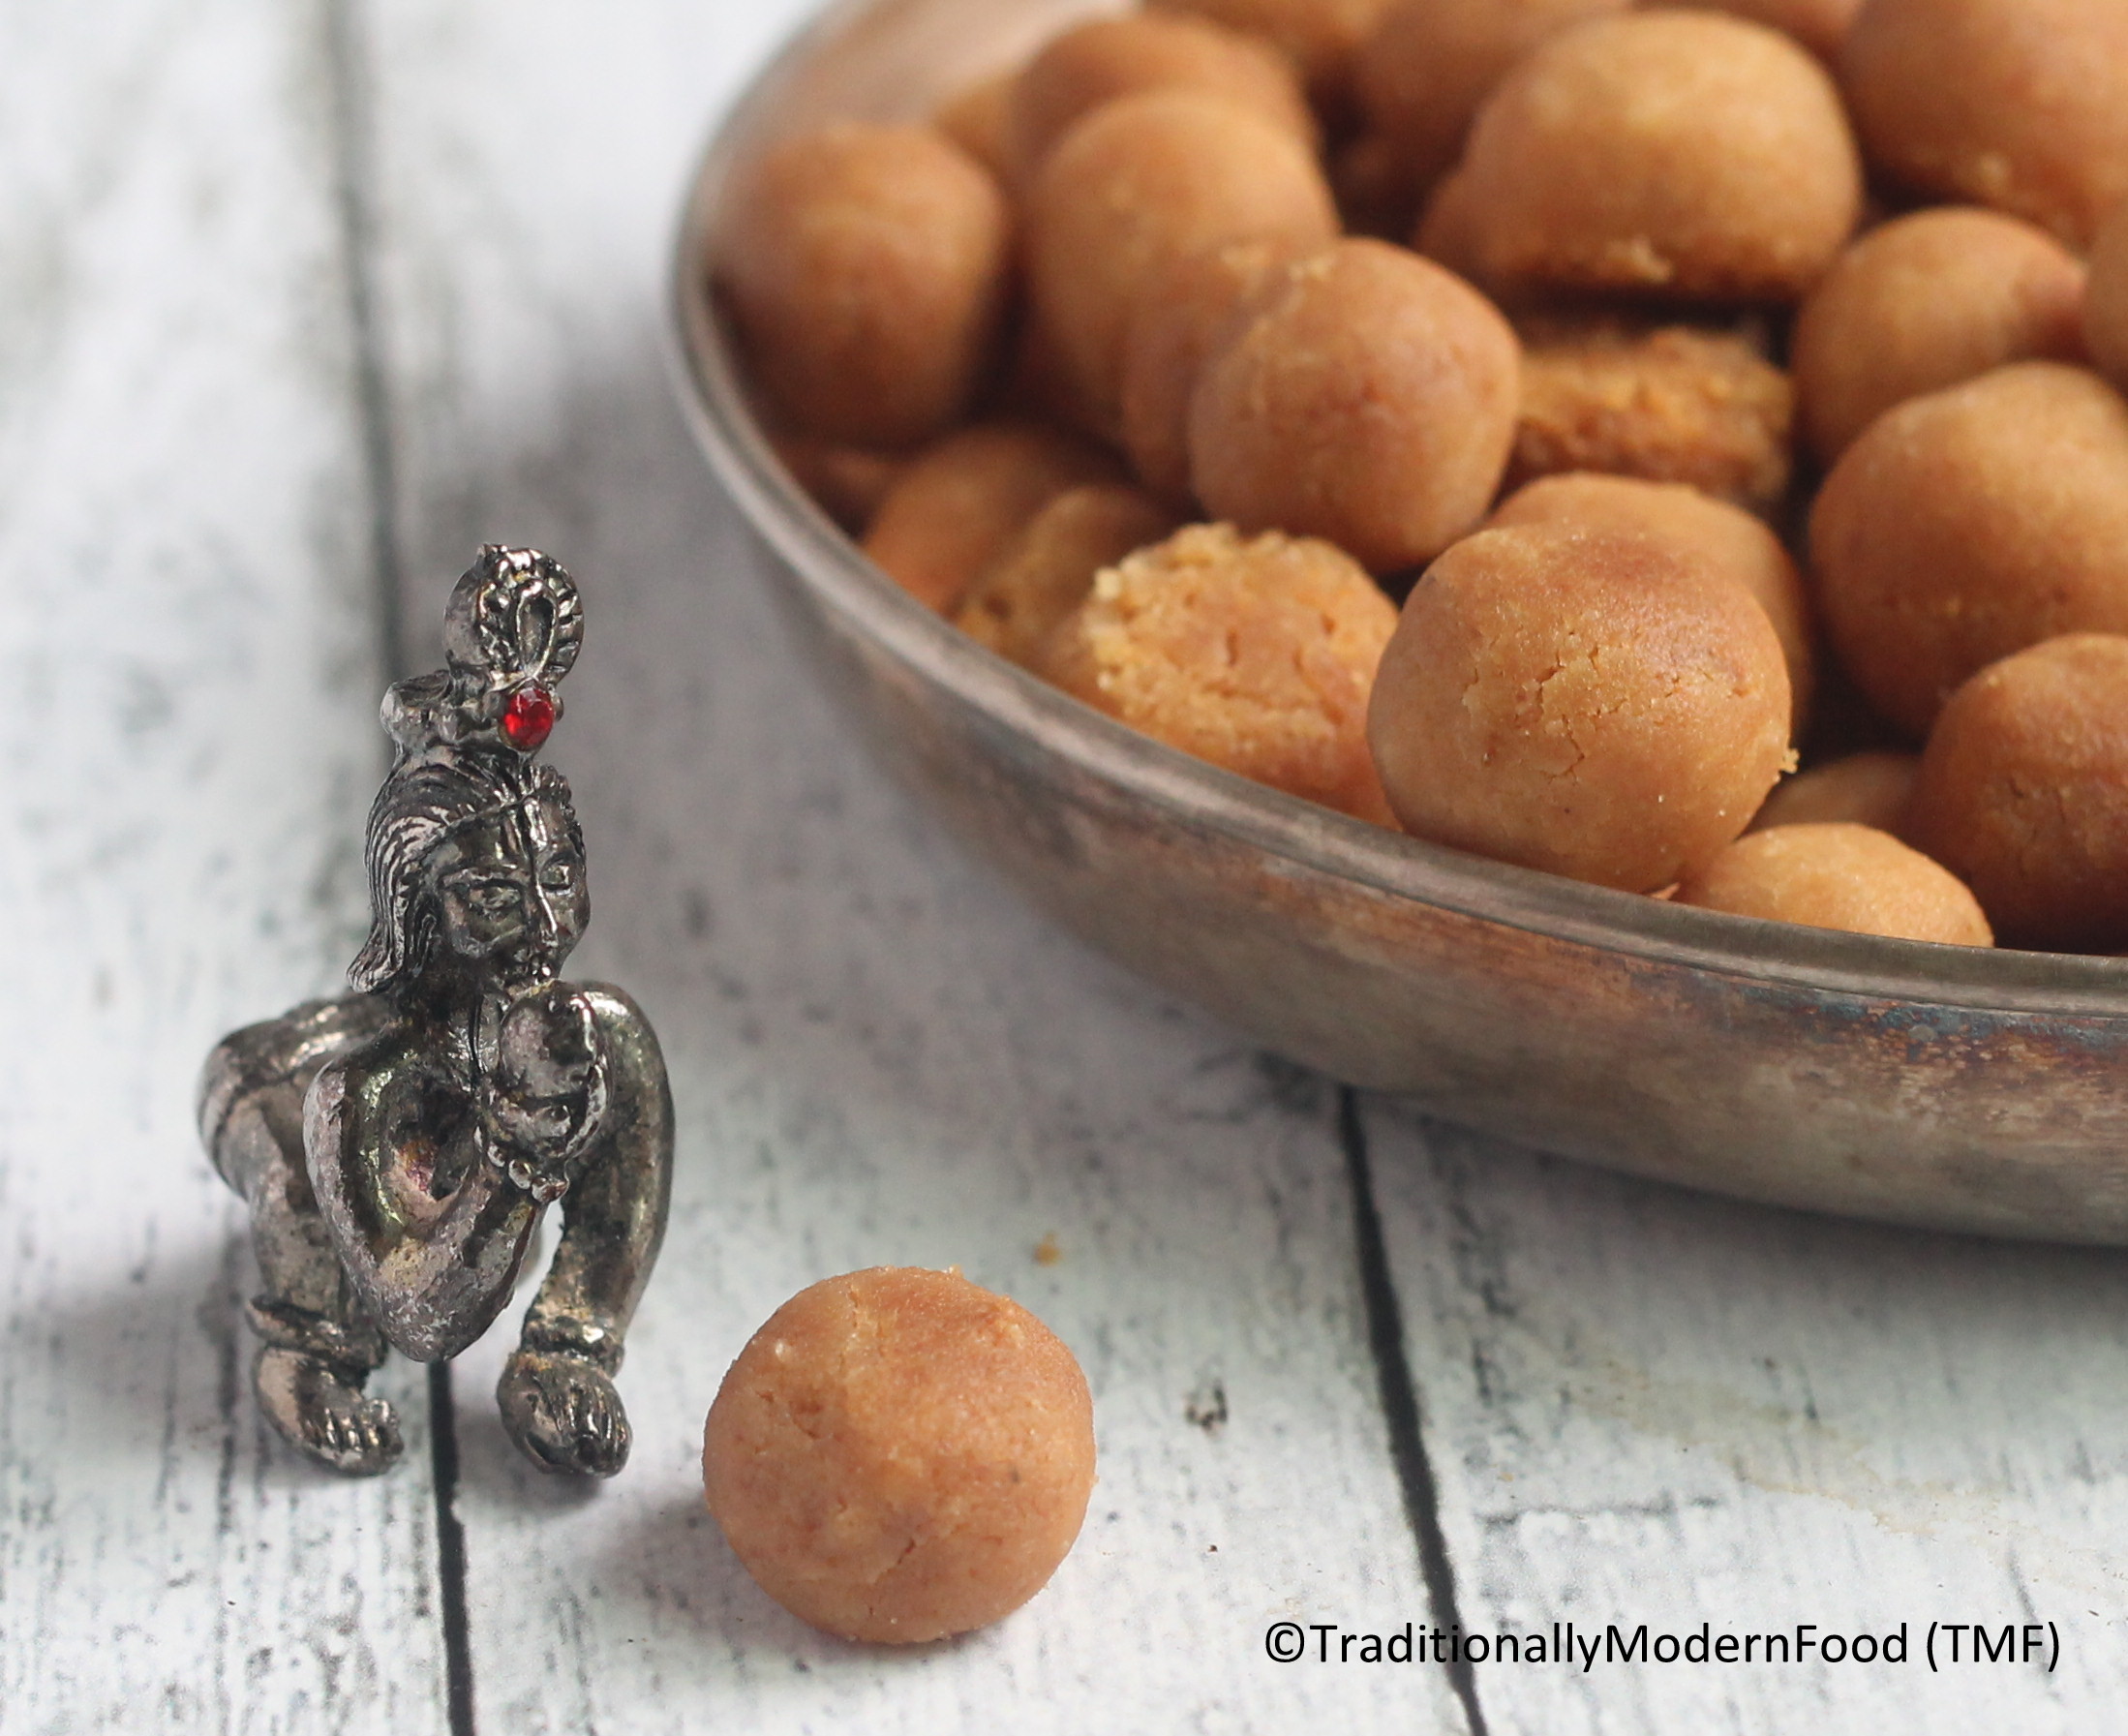
The moment I heard it I was super excited. I dont know why didn’t this strike me! I wanted to try my luck baking uppu seedai, and was happy with the result. First year I greased with very less oil so I could see color difference but it comes to the taste, it was the same. Believe me, if you give baked seedai and deep fried seedai to someone, no one can find the difference in taste (except for the color). Recently I started adding extra oil so that It becomes brown and looks similar to deep fried seedai.
Off late I have been using my oven so frequently. Trying my favorite Indian snacks with a healthy baked version. TMF has few baked Indian snacks. Do check it out
I wouldnt say Baked Uppu Seedai is oil free snacks but this is prepared with less oil compared to regular seedai. Try this for this krishna Jayanthi.

Ingredients
- Rice Flour - 1 cup
- Roasted Urad Dal Flour - 2 tbsp
- Asafoetida/Hing - 1/8 tsp
- Coconut - 2 tbsp
- Coconut Oil - 1/4 tsp to grease hands
- Salt - as needed
- Butter/Oil - 3 tbsp + 1 tsp I used Butter, use oil for vegan
- Oil - to grease parchment paper
Instructions
- For urad dhal Flour:
- Take 3 tbsp of whole urad Dal and dry roast till they are golden brown. When it comes to room temperature, grind them into fine powder
- Preheat the oven to 400 F. Line a baking tray with parchment paper and grease the parchment paper with oil
- Dry roast the rice flour in low flame for 2/3 minutes. Do not overcook till they change color.
- In a wide vessel, add the rice flour and 2 tblsp of urad dal flour and salt. Sieve them for even mixing
- Add butter and coconut to the sieved flour and mix well. Add water slowly and knead them into a pliable dough
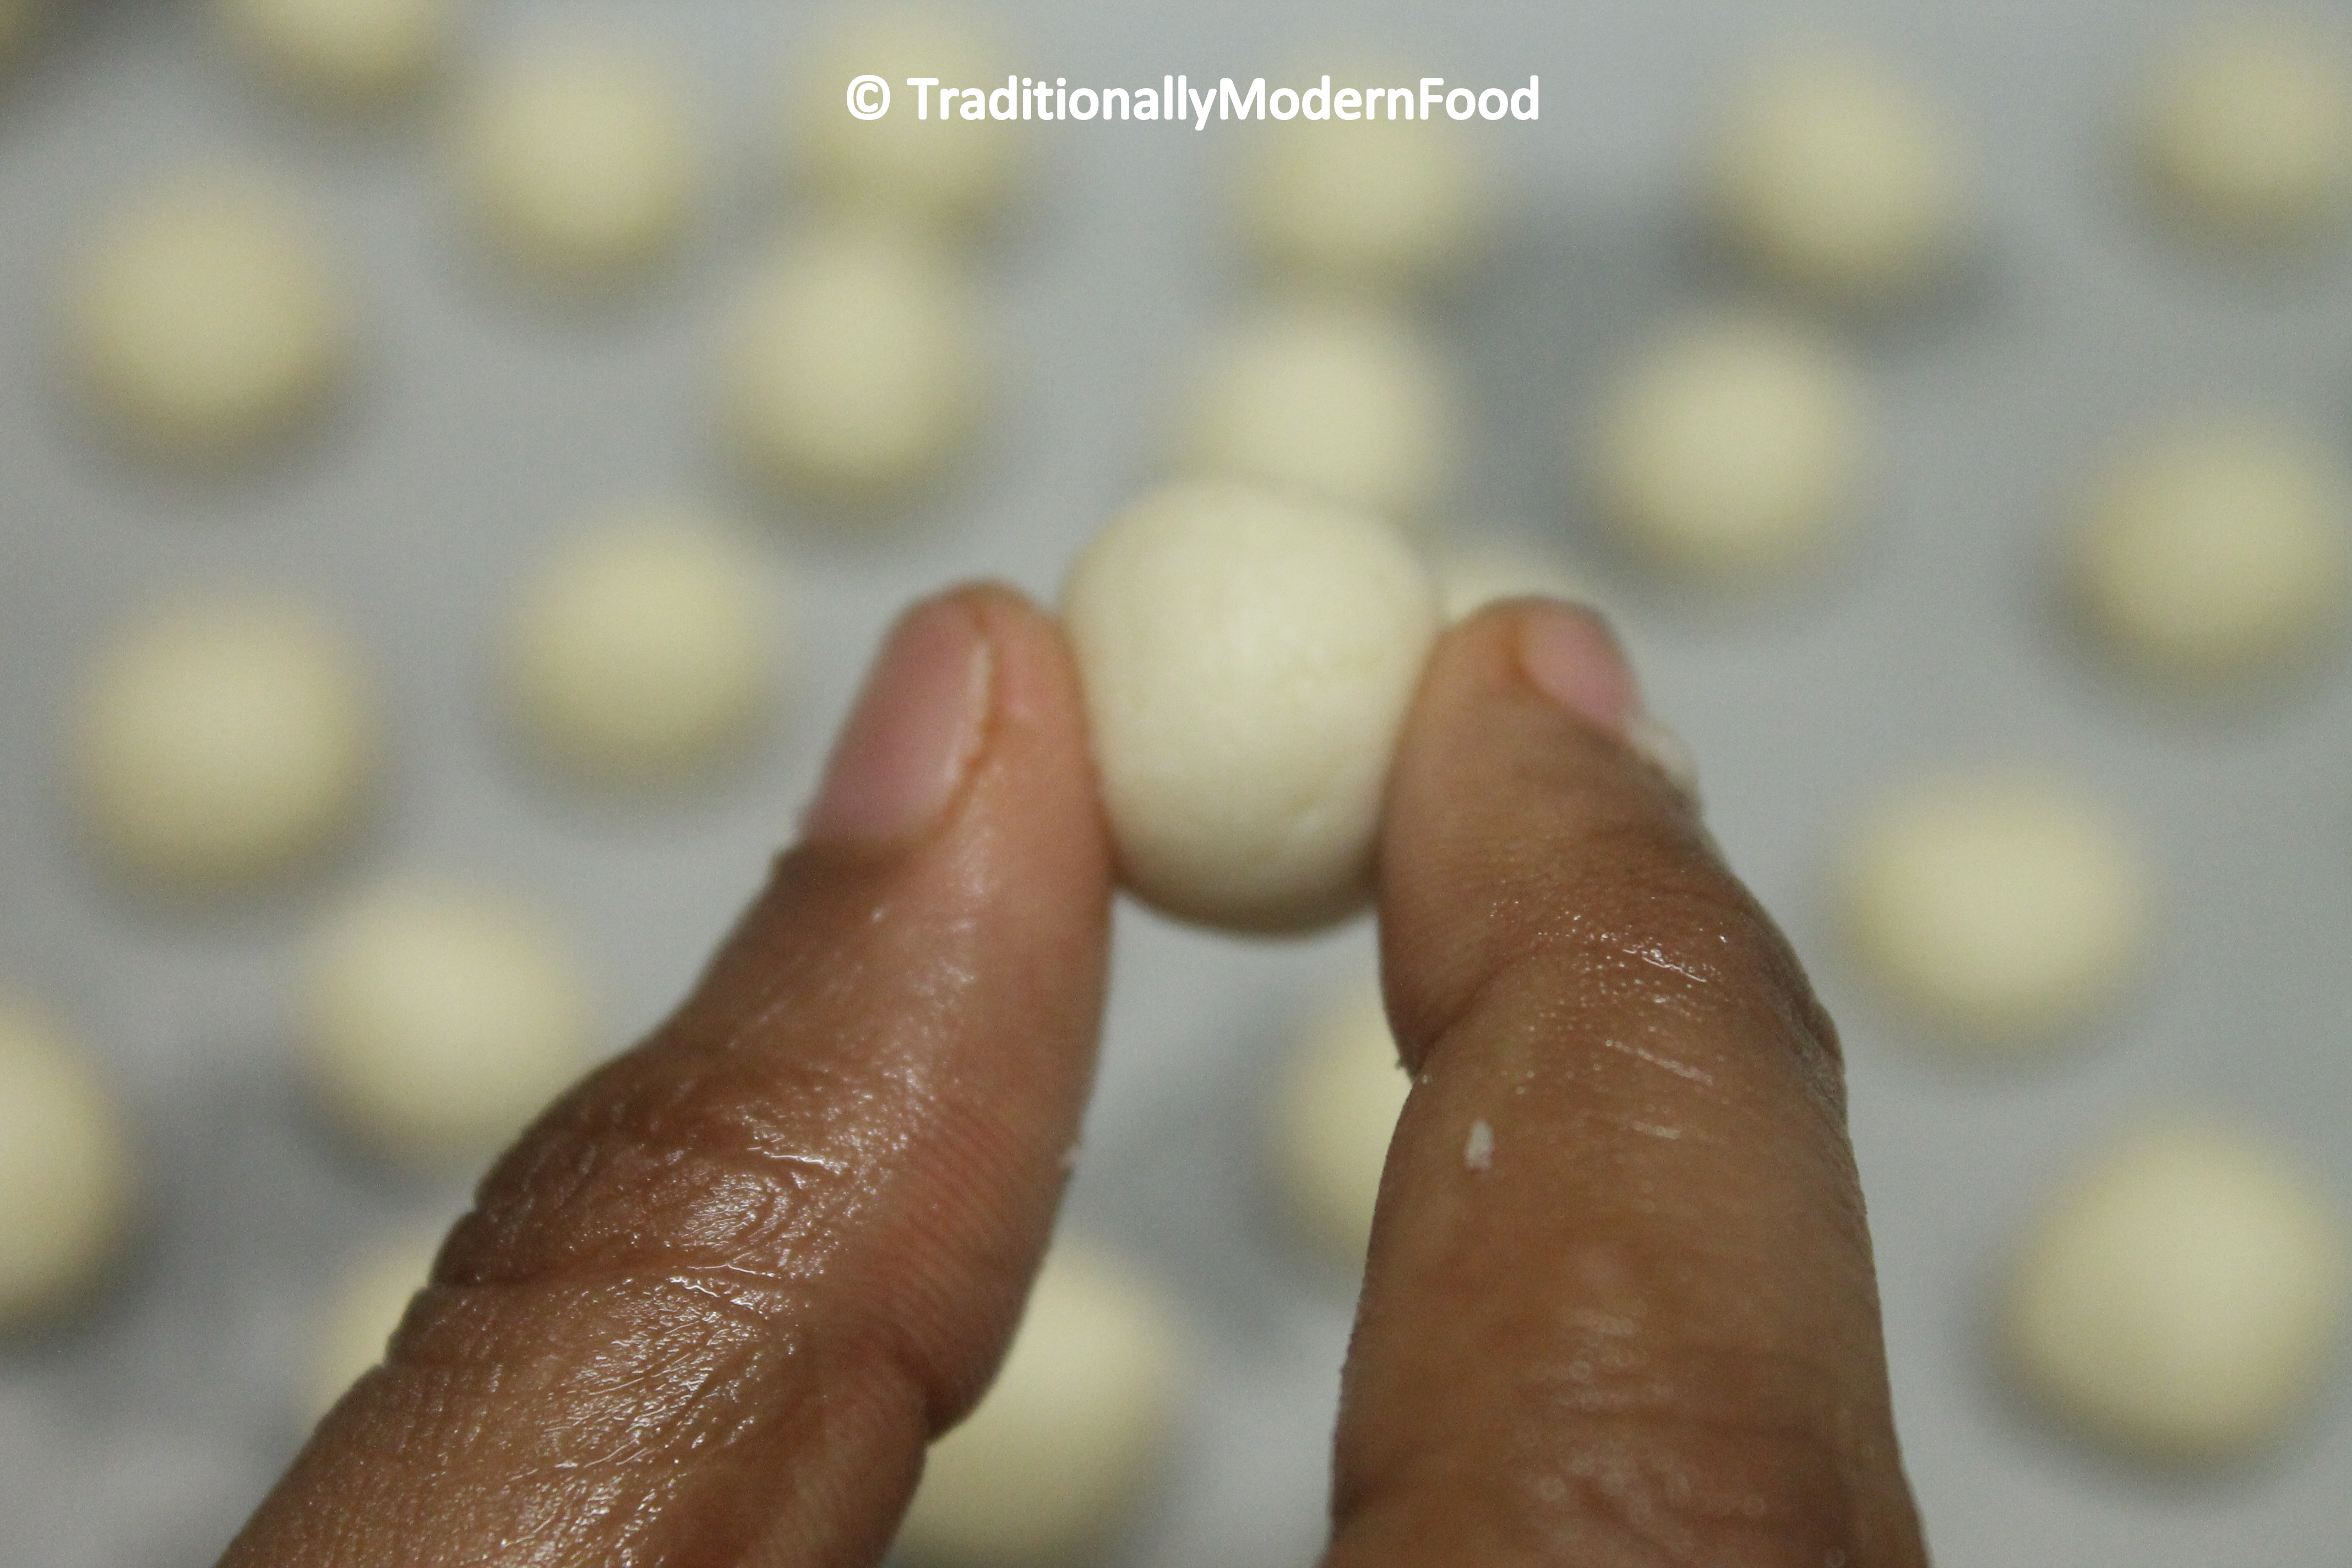
- Grease your hands with coconut oil and make small balls. Place them on the parchment paper
- Bake them for 22- 28 minutes. Check half way through and toss them for even baking. Mine got done around 25 minutes
Video
Notes
- Cumin seeds, sesame seeds and Chana Dal can be added
- If you are frying, the seedai has to be fried in a medium low flame, as it will help for even cooking. Heat oil in a pan, When the oil becomes hot gently put the seedai balls to the oil. Cook till the oil sound subsides
- I used the store-bought rice flour. Alternatively, you can wash and soak the raw rice for 1/2 hours and dry them in a cloth till mositure completely dries, and grind them into fine powder
- The seedai dough should not be too tight. Otherwise the seedai will get cracked
- Greasing the Seedai with extra oil gives a golden brown seedai
- Do not roll the seedai too hard
- Pottukadali/ roasted gram flour can be used instead of urad dal
- Make sure seedai is almost similar size for even baking
- Depending on the size of the seedai baking time may vary slightly
- Baked Seedai turns slightly big after baking. Adjust the size accordingly
For urad dhal Flour:
Take 3 tbsp of whole urad Dal and dry roast till they are golden brown. When it comes to room temperature, grind them into fine powder
Method:
- Preheat the oven to 400 F. Line a baking tray with parchment paper and grease the parchment paper with oil
- Dry roast the rice flour in low flame for 2/3 minutes. Do not overcook till they change color.
- In a wide vessel, add the rice flour and 2 tblsp of urad dal flour and salt. Sieve them for even mixing

- Add butter and coconut to the sieved flour and mix well. Add water slowly and knead them into a pliable dough

- Grease your hands with coconut oil and make small balls. Place them on the parchment paper

- Bake them for 22- 28 minutes. Check half way through and toss them for even baking. Mine got done around 25 minutes
This seems to be quite labor intensive, but well worth the effort. 🙂
Thanks Rinto:-) yes rightly said
Wow, these look so interesting. I’ve never seen anything like them. They look like they would be hard to make, but tasty.
Thanks Davegon:-) bit lengthy process but great snack to munch
I was waiting for your recipe Vidya!!! These look awesome… I have also not tried it as they say it might burst. Now that you have given baked version, I must try it!!!! Super cool dear 🙂
Thanks Dear:-) glad to have friends like you. Ya trying baking no need to worry about bursting and it was tasty as well
Nice! Healthy too. 🙂
Thanku Aruna:-)
This is the first year where I got both my vellam n uppu seedai and also thattai correctly. 🙂 Baking is cool..
Same with me Sri, first time trying seedai. Have tried thattai before but deep fried them. when bakshsanam tastes nice it always gives great feel na
True 🙂
Lovely click, less oil and look tempting! Going to try this soon 🙂
Thanks Priya:-) glad that you like it do try waiting to hear from you
They look very appetizing Vidya 🙂
Thanks Linda:-)
The tips that you have given are perfect Vidya
Thanks Jofy:-)
This sounds something interesting and cute little bites, it’s not same what we do ….baked perfect and feel like grabbing one….slurp…
Thanks dear:-)
looks super and with less oil, it is more healthy..
Thanks dear:-)
I love the baking idea as no oil .. I am becoming a old man and need to check my cholesterol’s 🙂
Thanku:-)
wow they look like little doughballs 🙂 lovely!
Thanks 🙂
Very cute. <3
Thanks Charu dear:-)
really healthy and wonderful …seedai
Thanks Vani:-)
I don’t know what they are but they look very tasty! thanks for sharing!
Thanks Liz:-)
Oh, your mom is so right! I am so scared of making these as they have burst on me some time back. But I love the taste of these tiny little globes and you have given a tested recipe to try. Thank you, Vidya! Enjoy your Kutti Krishna!
Omg that’s scary.. Now I know why my mom insisted about it. Baked version is risk free. Try this verdion Sridevi, I can gurtantee its risk free
Vidya..dis one is too good..will definitely try
We have something known as Kaliyadakka in Kerala which looks similar to this..do you know if it’s the same thing?… this looks really good.
Oh is it that’s interesting:-) No Anu first time I am hearing about Kaliyadakka. Thanks for telling:-)
Looks so yummy!!!! Thanks for sharing! 🙂
Thanks Kloe:-) its a traditional festive snack glad that you liked it
What a lovely idea, I was thinking of something similar. I’m very scared of making regular seedai as it bursts on me. I will follow your method. Beautiful clicks!
Thanks Apsara:-) Do try and let me know.. I was also scared and didn’t do Seedai last year
Vidya, I have saved this refipe to try for sure :). Baking rocks…
Glad that you liked it Sonal:-) I am eagerly waiting to hear from you
So cute!
🙂 yes tiny balls attracts a lot
hahaha your mom !! you gave it a try and it worked, hurry! 😀
Thanks M:-)
Baked seedai looks great and delicious.
Thanks Rekha:-)
Reblogged this on d'liteful cravings.
Thanks for the reblog:-)
you blow my mind with your posts–stuff I’ve never even imagined. But what fun! I would totally try these 🙂
Thanks a lot Liz for your sweet words:-)
Your seedai look just perfect Vidya!! Hope you had a lovely Gokulashtami celebration 🙂
Thanks Naina:-) yes had a great day
They look yummy but I think I’m complete ignorant when comes to certain ingredients and I will have to do some research online! But it’s worth it for sure 🙂
Ive never heard of these but these are cute! And they look like great snacks to nibble on!
Yes its a great tea time snack:-) thanku
Wow, what a labor of love. These look so good!
Thanks Patty:-)
Recipe looks yummy! How Long can we store the seedai?
Thanku Aiswarya?In our home it won’t last more than 2-3 days. Friend of mine have kept it for 8 days and she said it was fresh
Hi Vidya! Thanks for the recipe. I tried it for this diwali and the taste was really good. However, it was very crumbly and wasn’t very nice to bite into coarse bits. Could it be because I didn’t sieve the store bought rice flour? I managed to sieve the urad dal with a tea strainer. Thanks! Looking for more such healthy dessert recipes.
You can try roasted gram flour (pottukadalai) flour instead of URAD dal. If it is too crumbly try reducing the butter
Came out really well ! Couldn’t tell the difference between the fried and baked versions. Thankyou for the recipe. Please keep posting more such baked bakshanams. 🙂