Search for a recipe

  • Skip to primary navigation
  • Skip to main content
  • Skip to primary sidebar
Traditionally Modern Food
  • Home
  • About
  • Recipe Index
  • Privacy Policy
menu icon
go to homepage
  • Home
  • Recipe Index
  • About
    • Email
    • Facebook
    • Instagram
    • Pinterest
    • RSS
    • Twitter
    • YouTube
  • search icon
    Homepage link
    • Home
    • Recipe Index
    • About
    • Email
    • Facebook
    • Instagram
    • Pinterest
    • RSS
    • Twitter
    • YouTube
  • ×

    Poricha Kootu | Poritha Kootu

    November 18, 2015 By Vidya Srinivasan 26 Comments

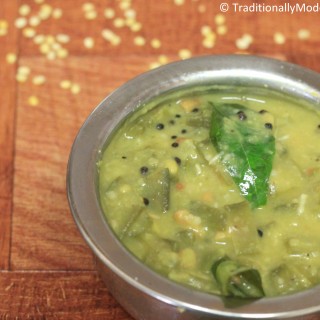
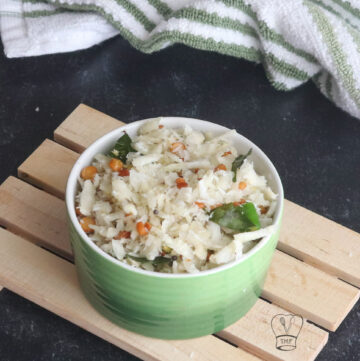
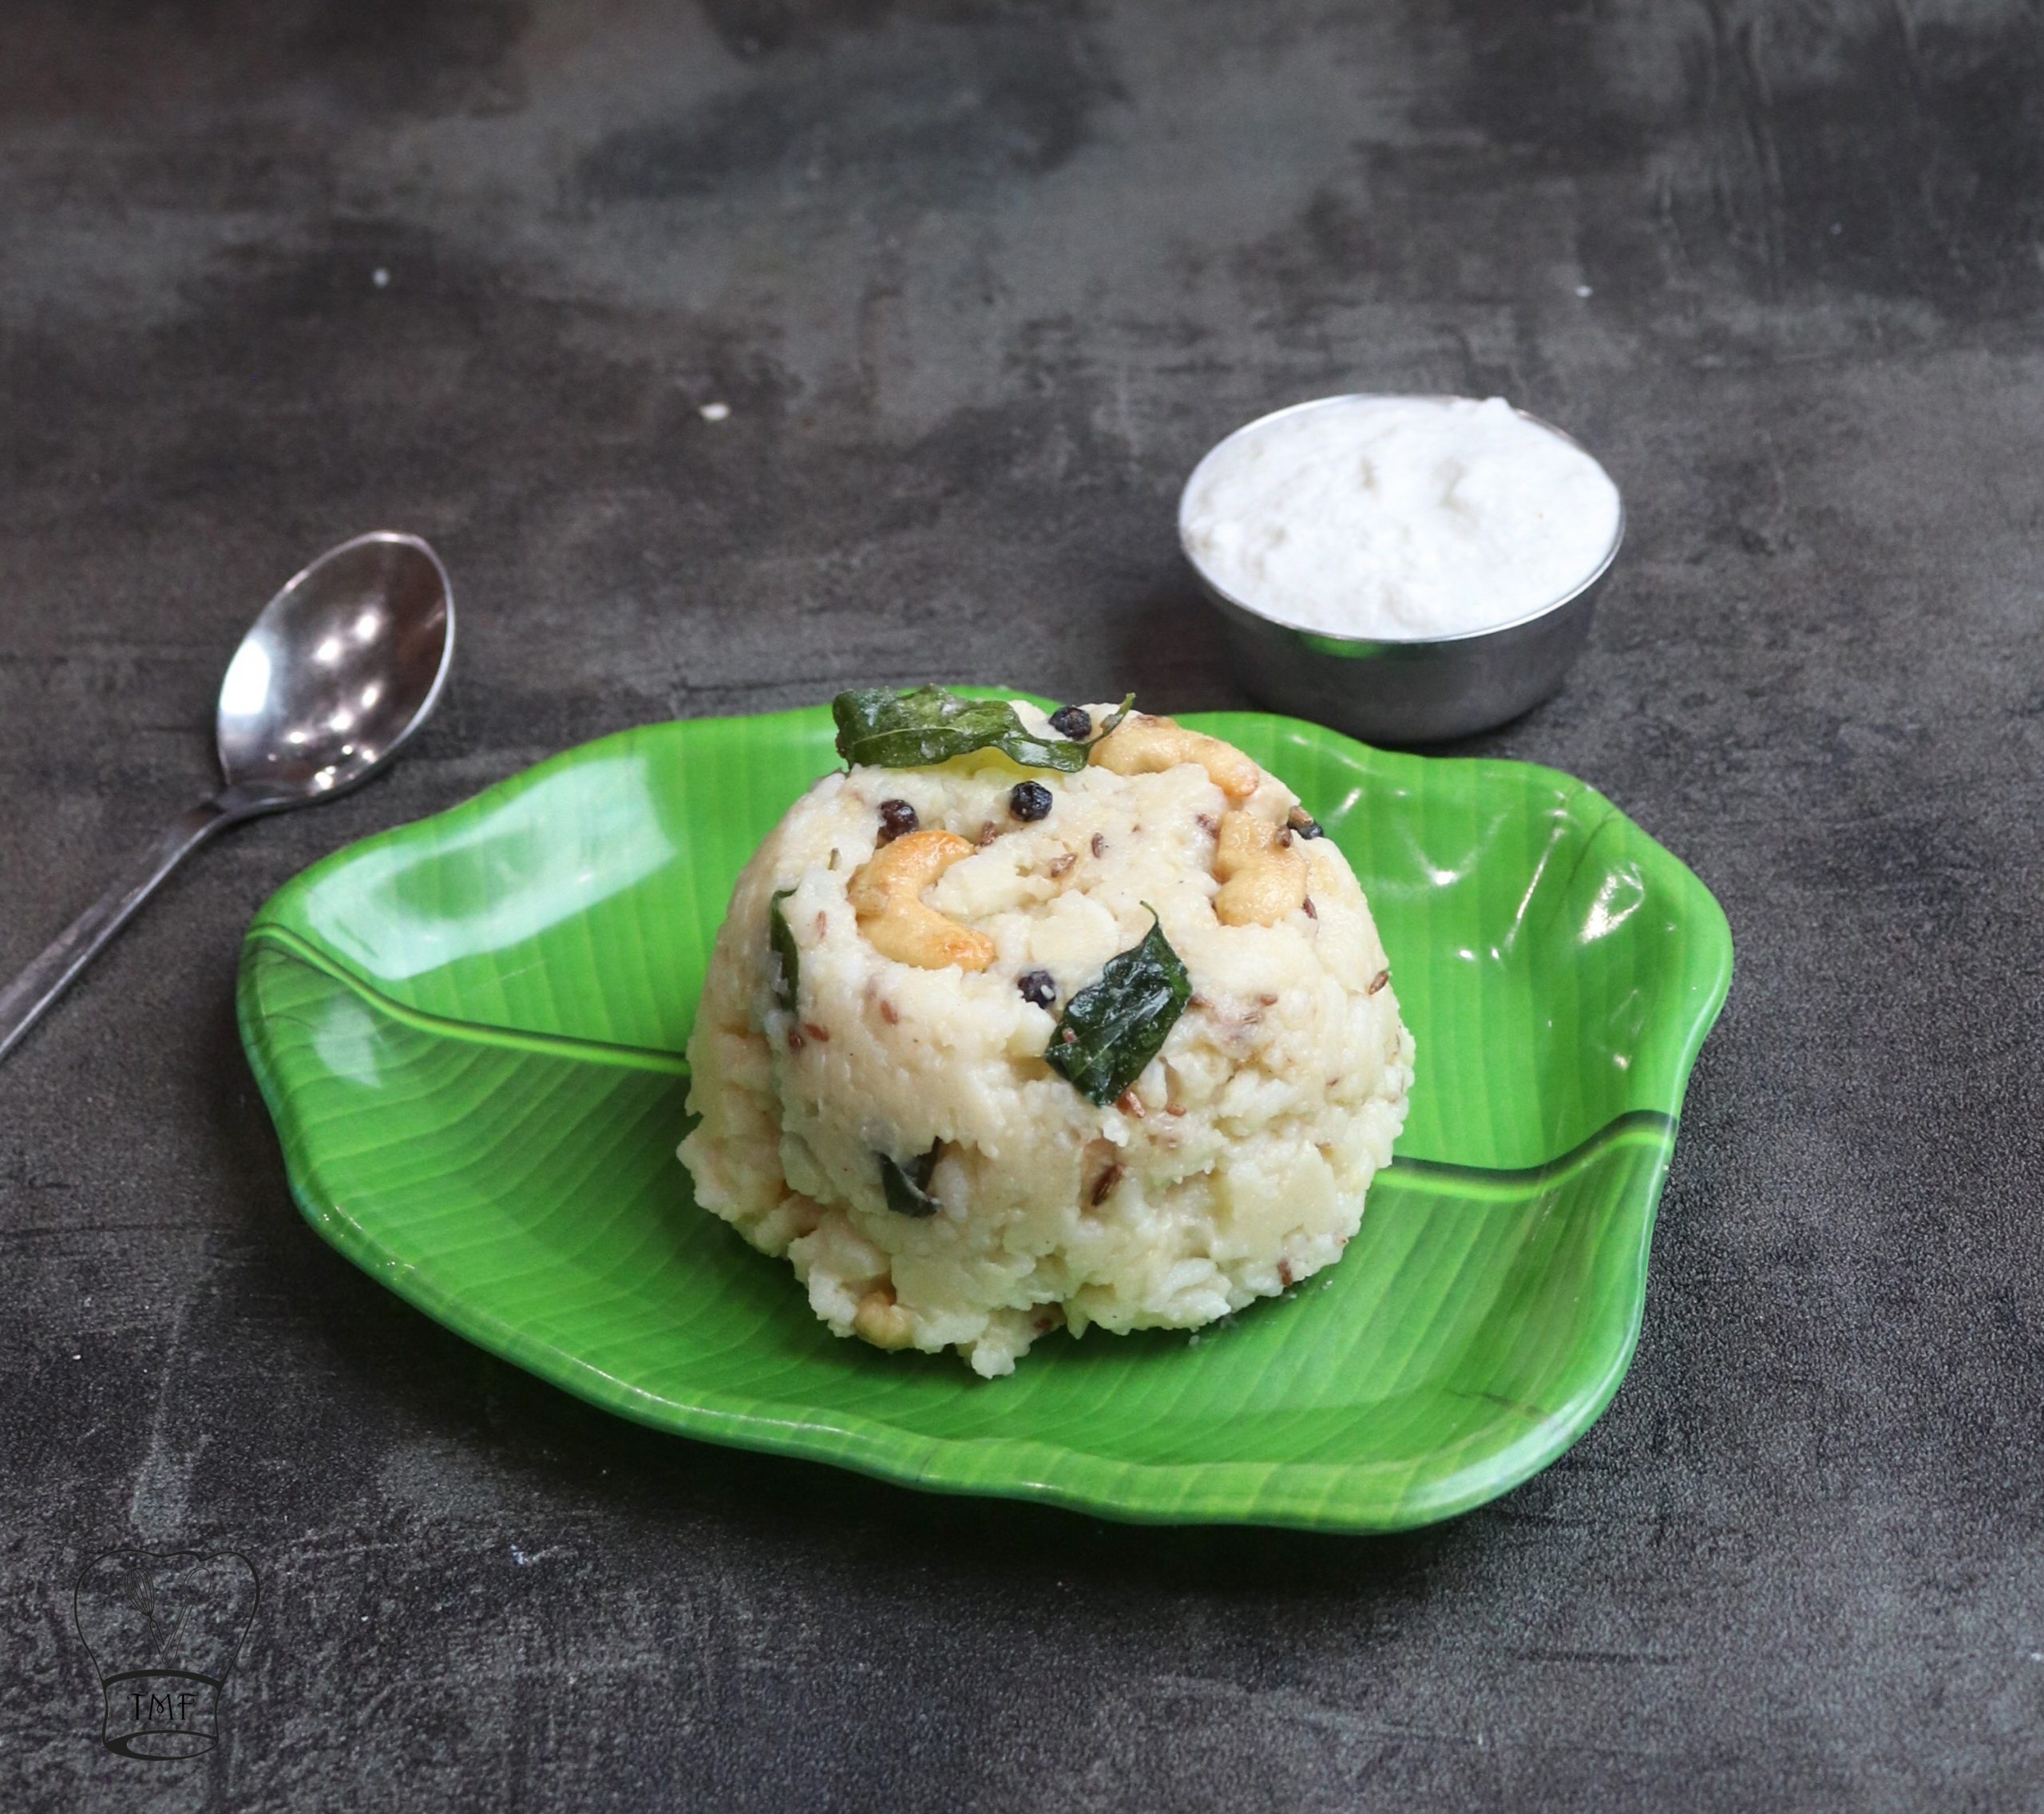
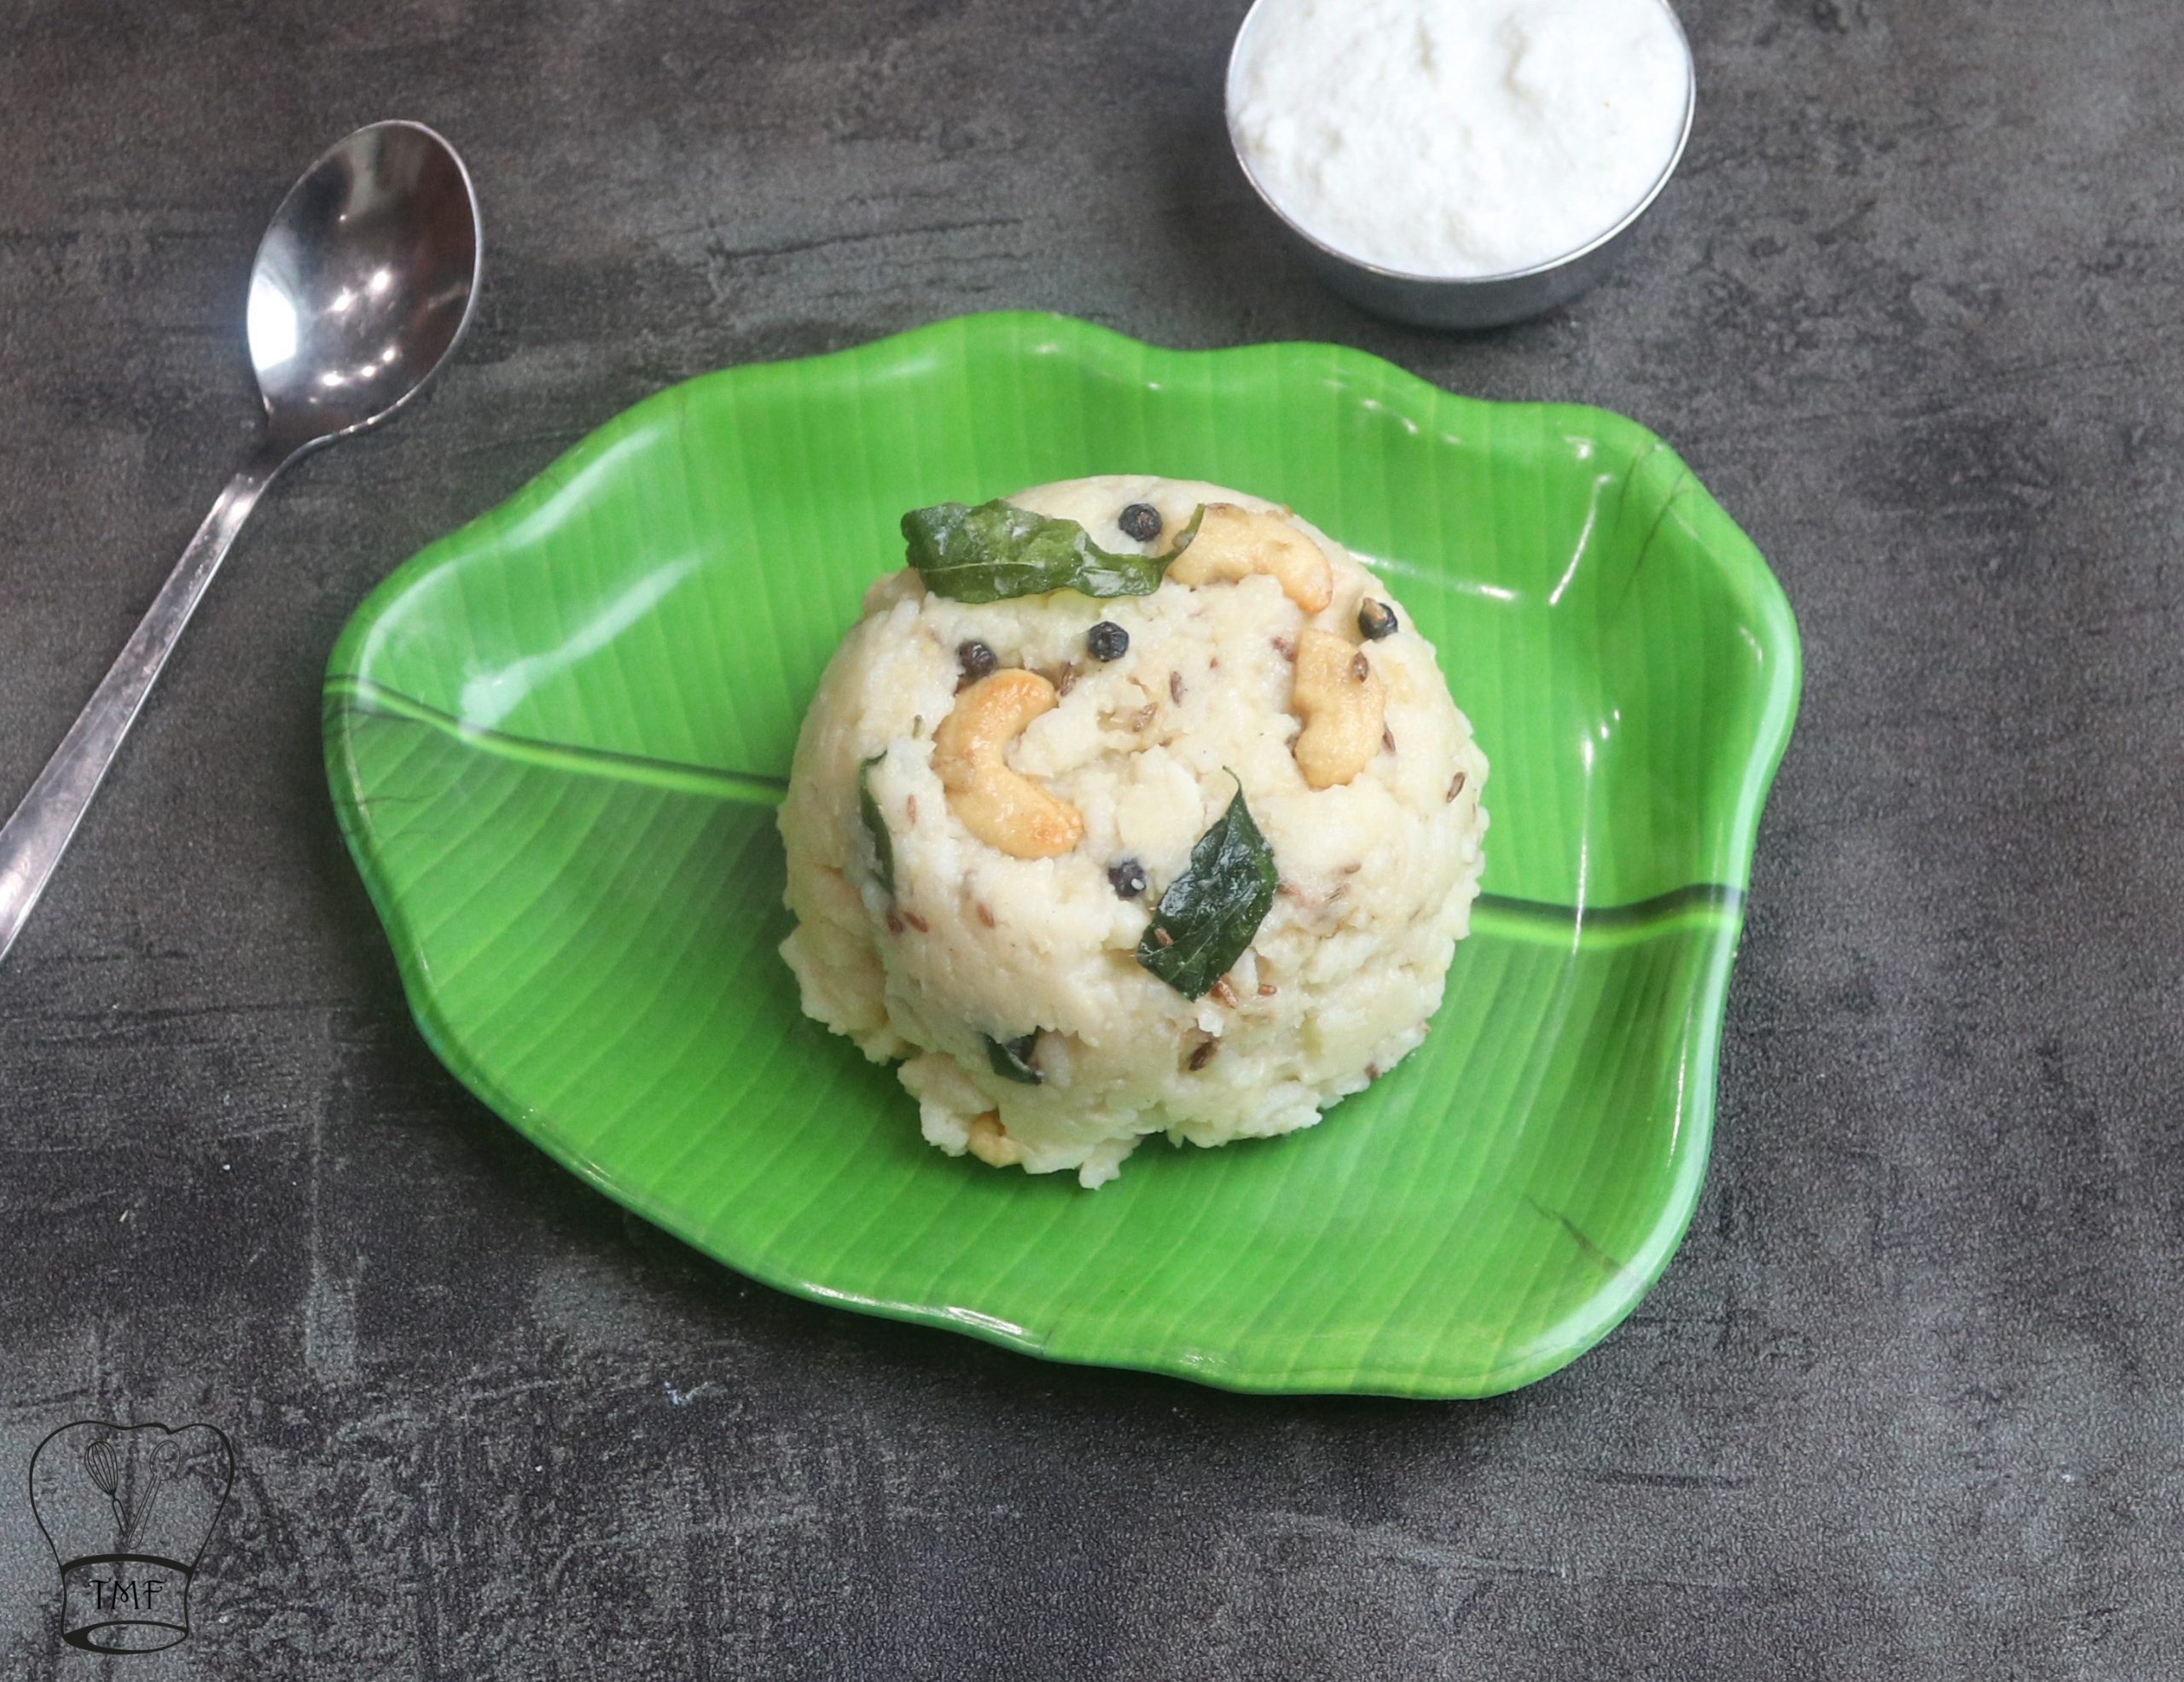
    Poricha kootu | Avarakkai Poricha kootu | Poritha kootu | Broadbeans kootu with step-by-step pictures and video recipe. Check out the Poricha Kootu recipe and if you like the video pls SUBSCRIBE to my channel.

    IMG_9508

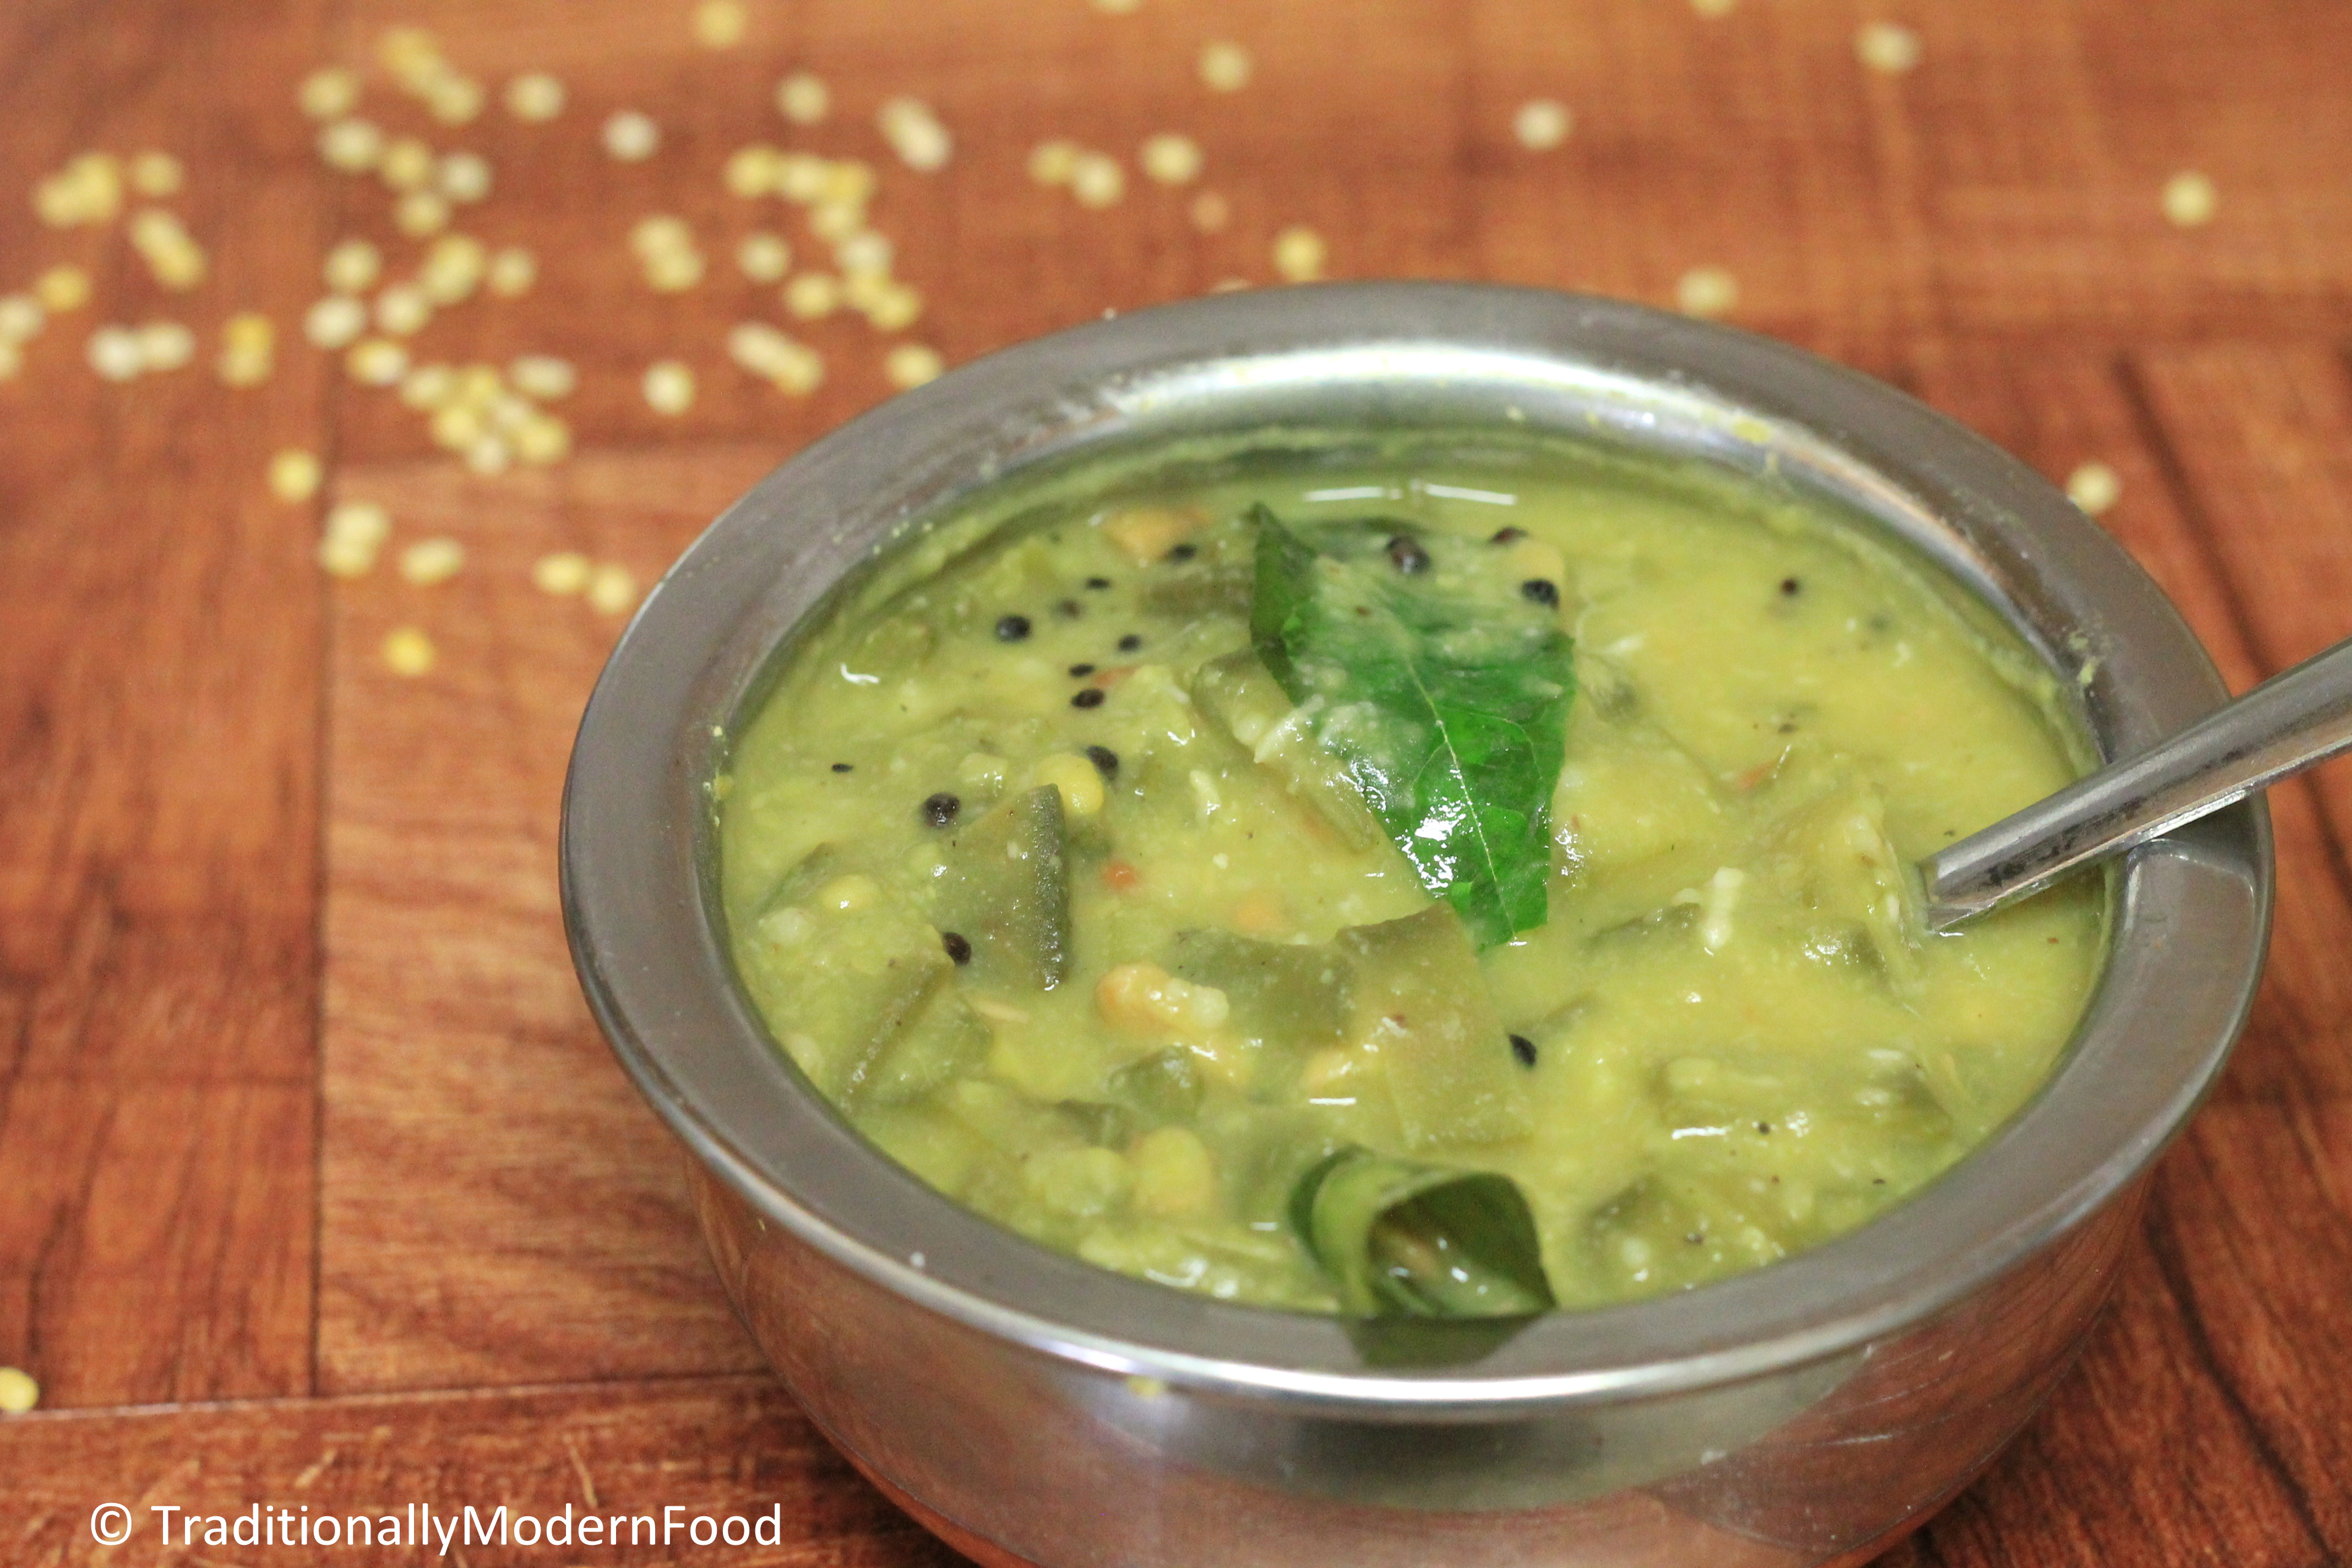
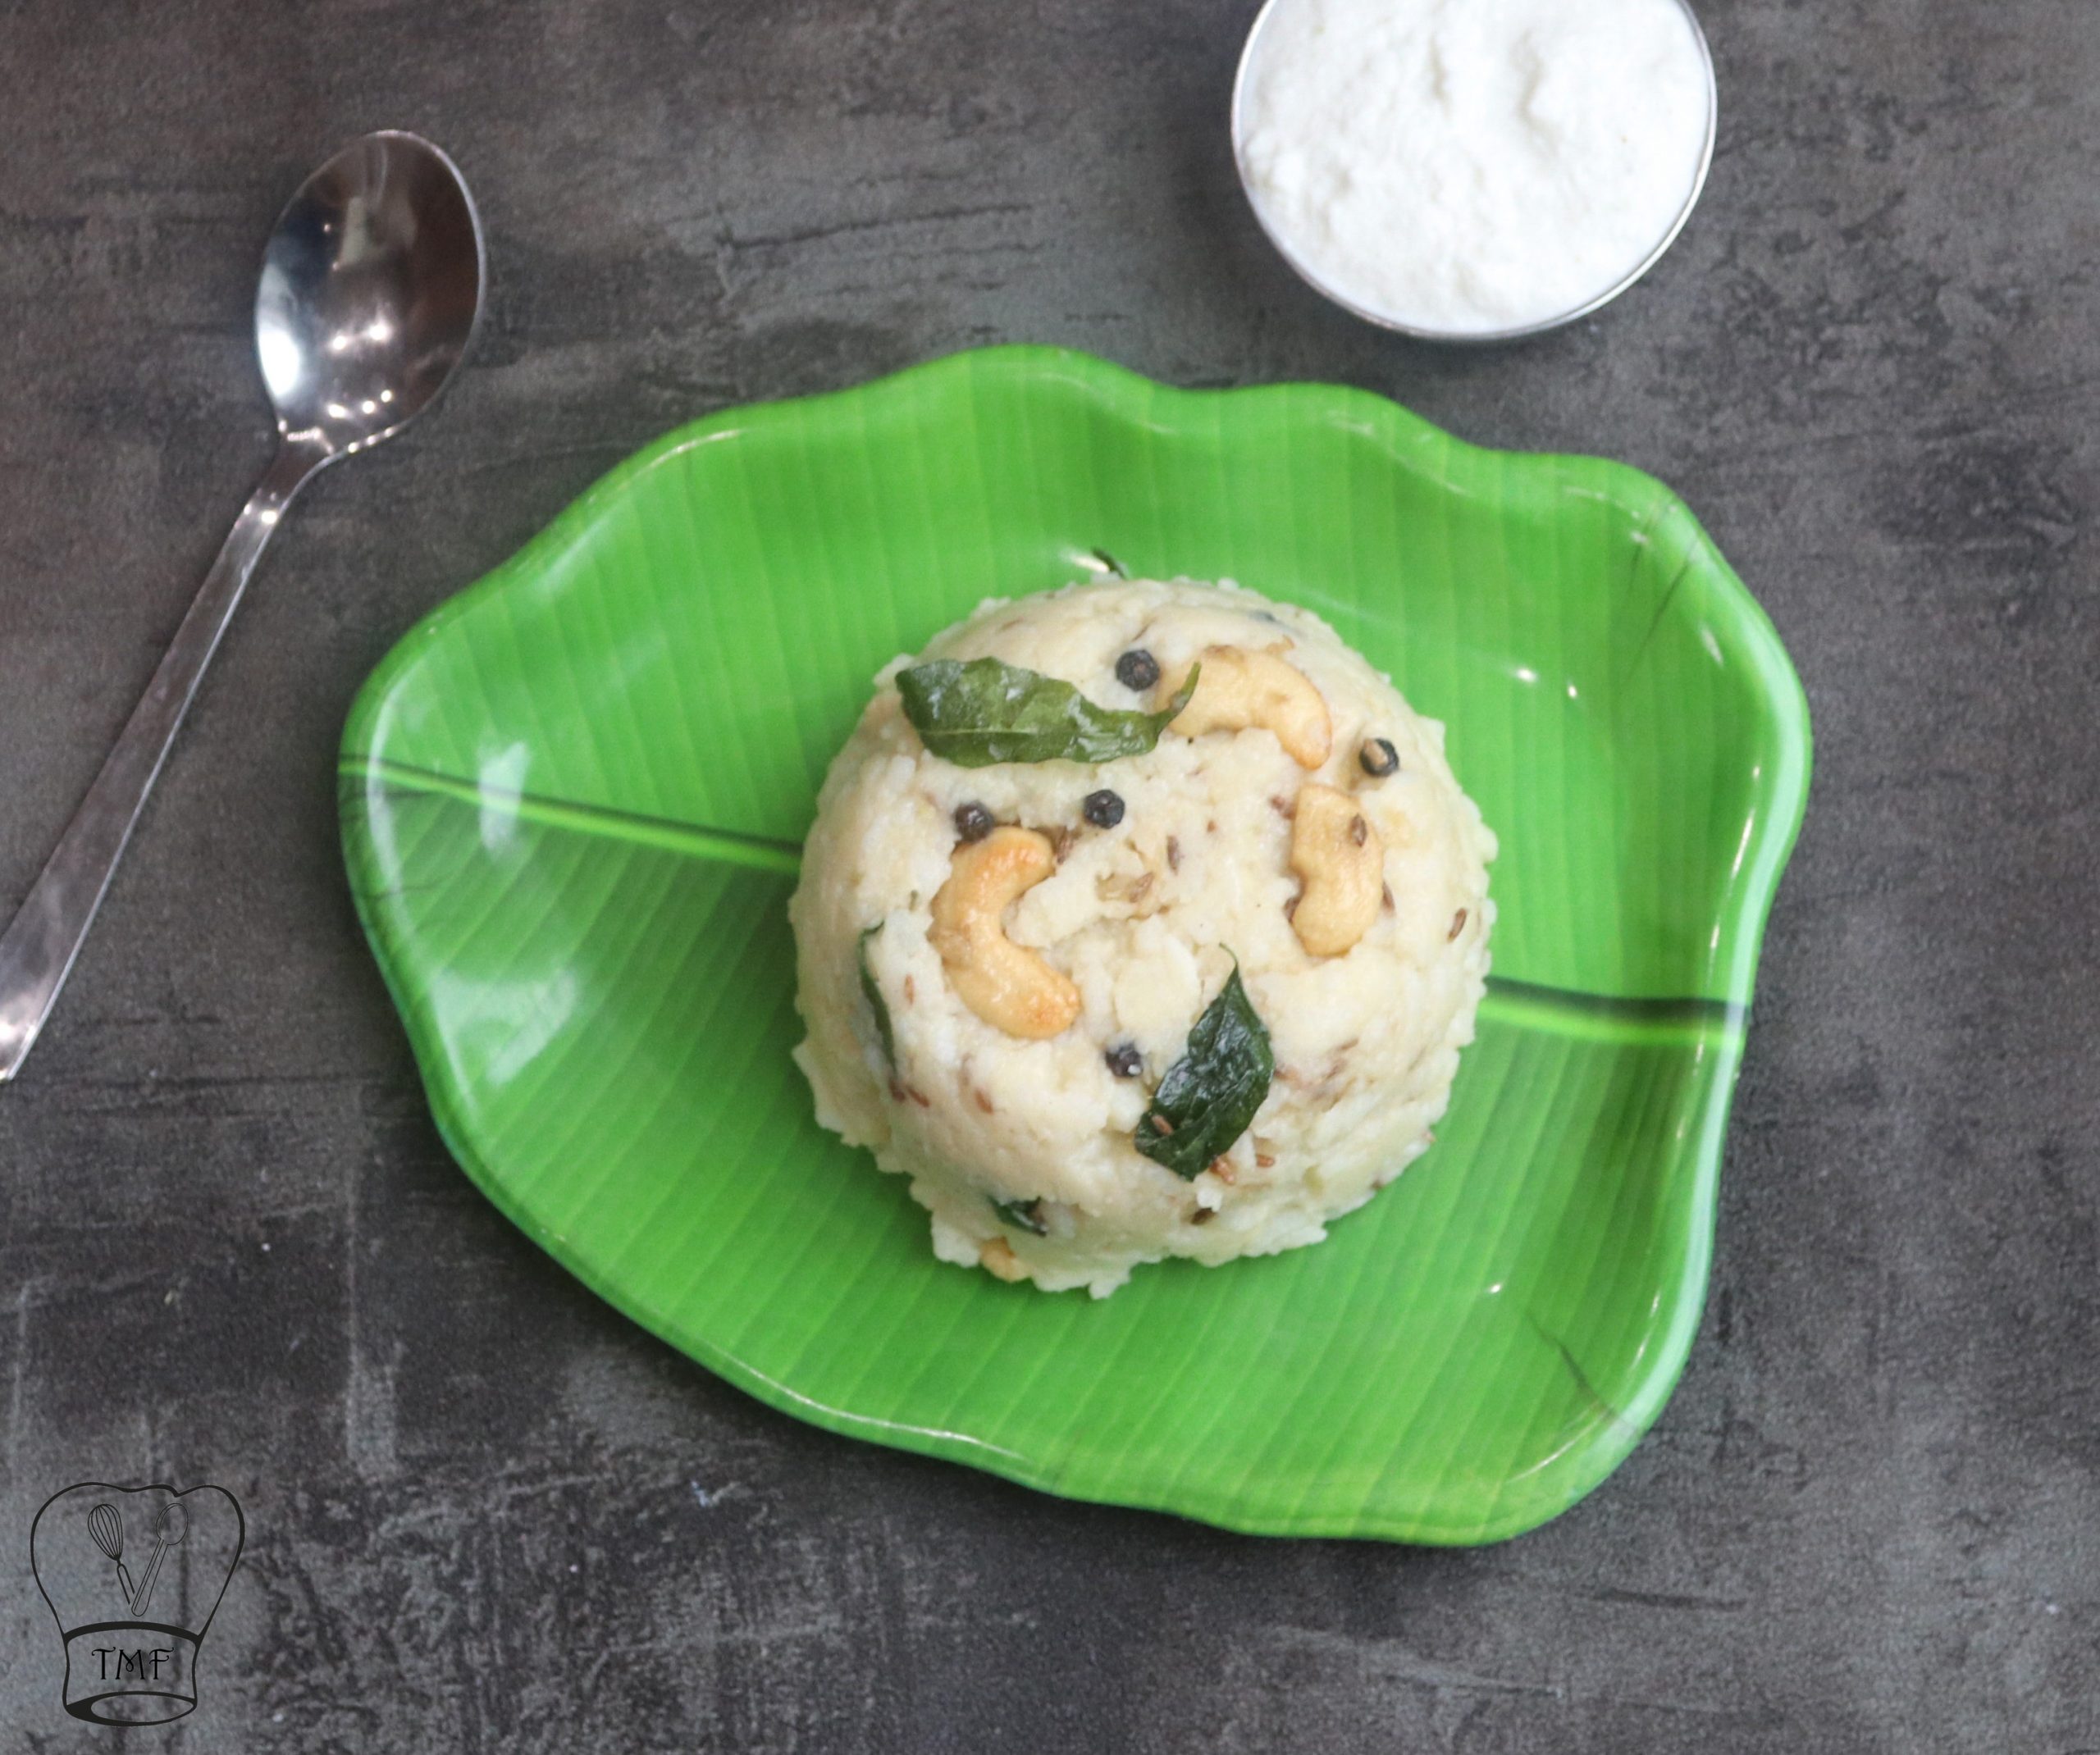
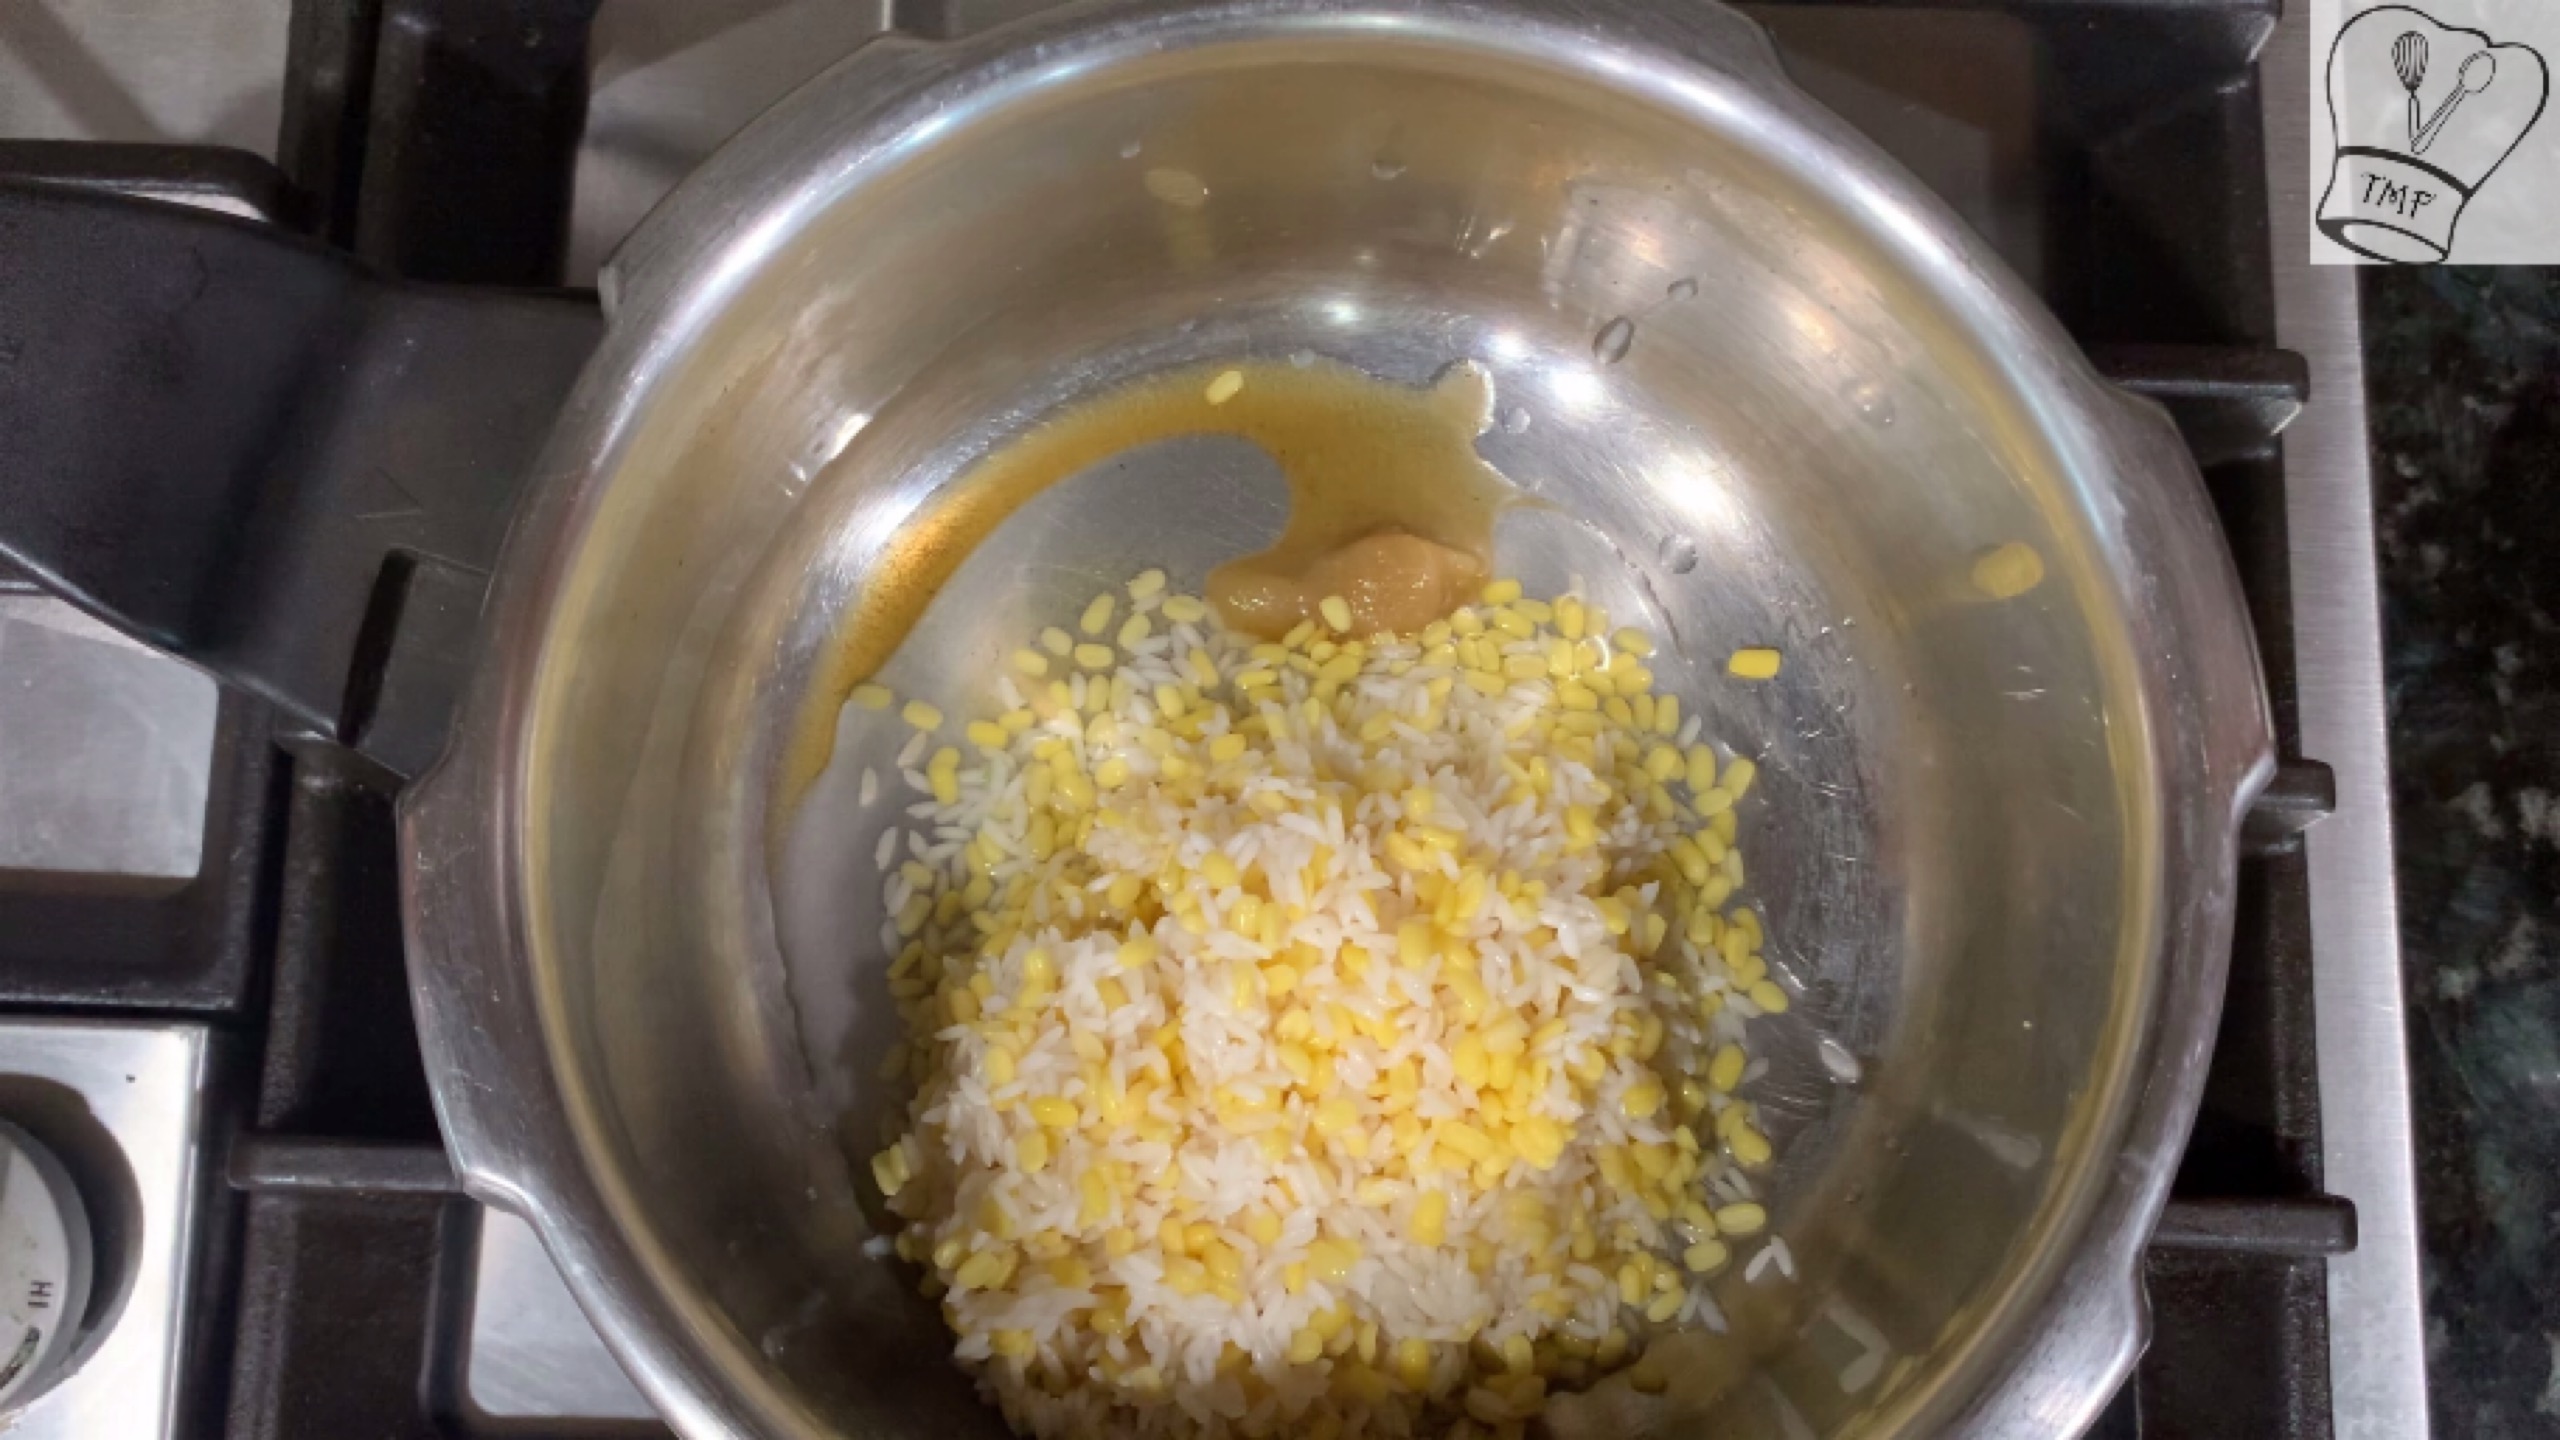
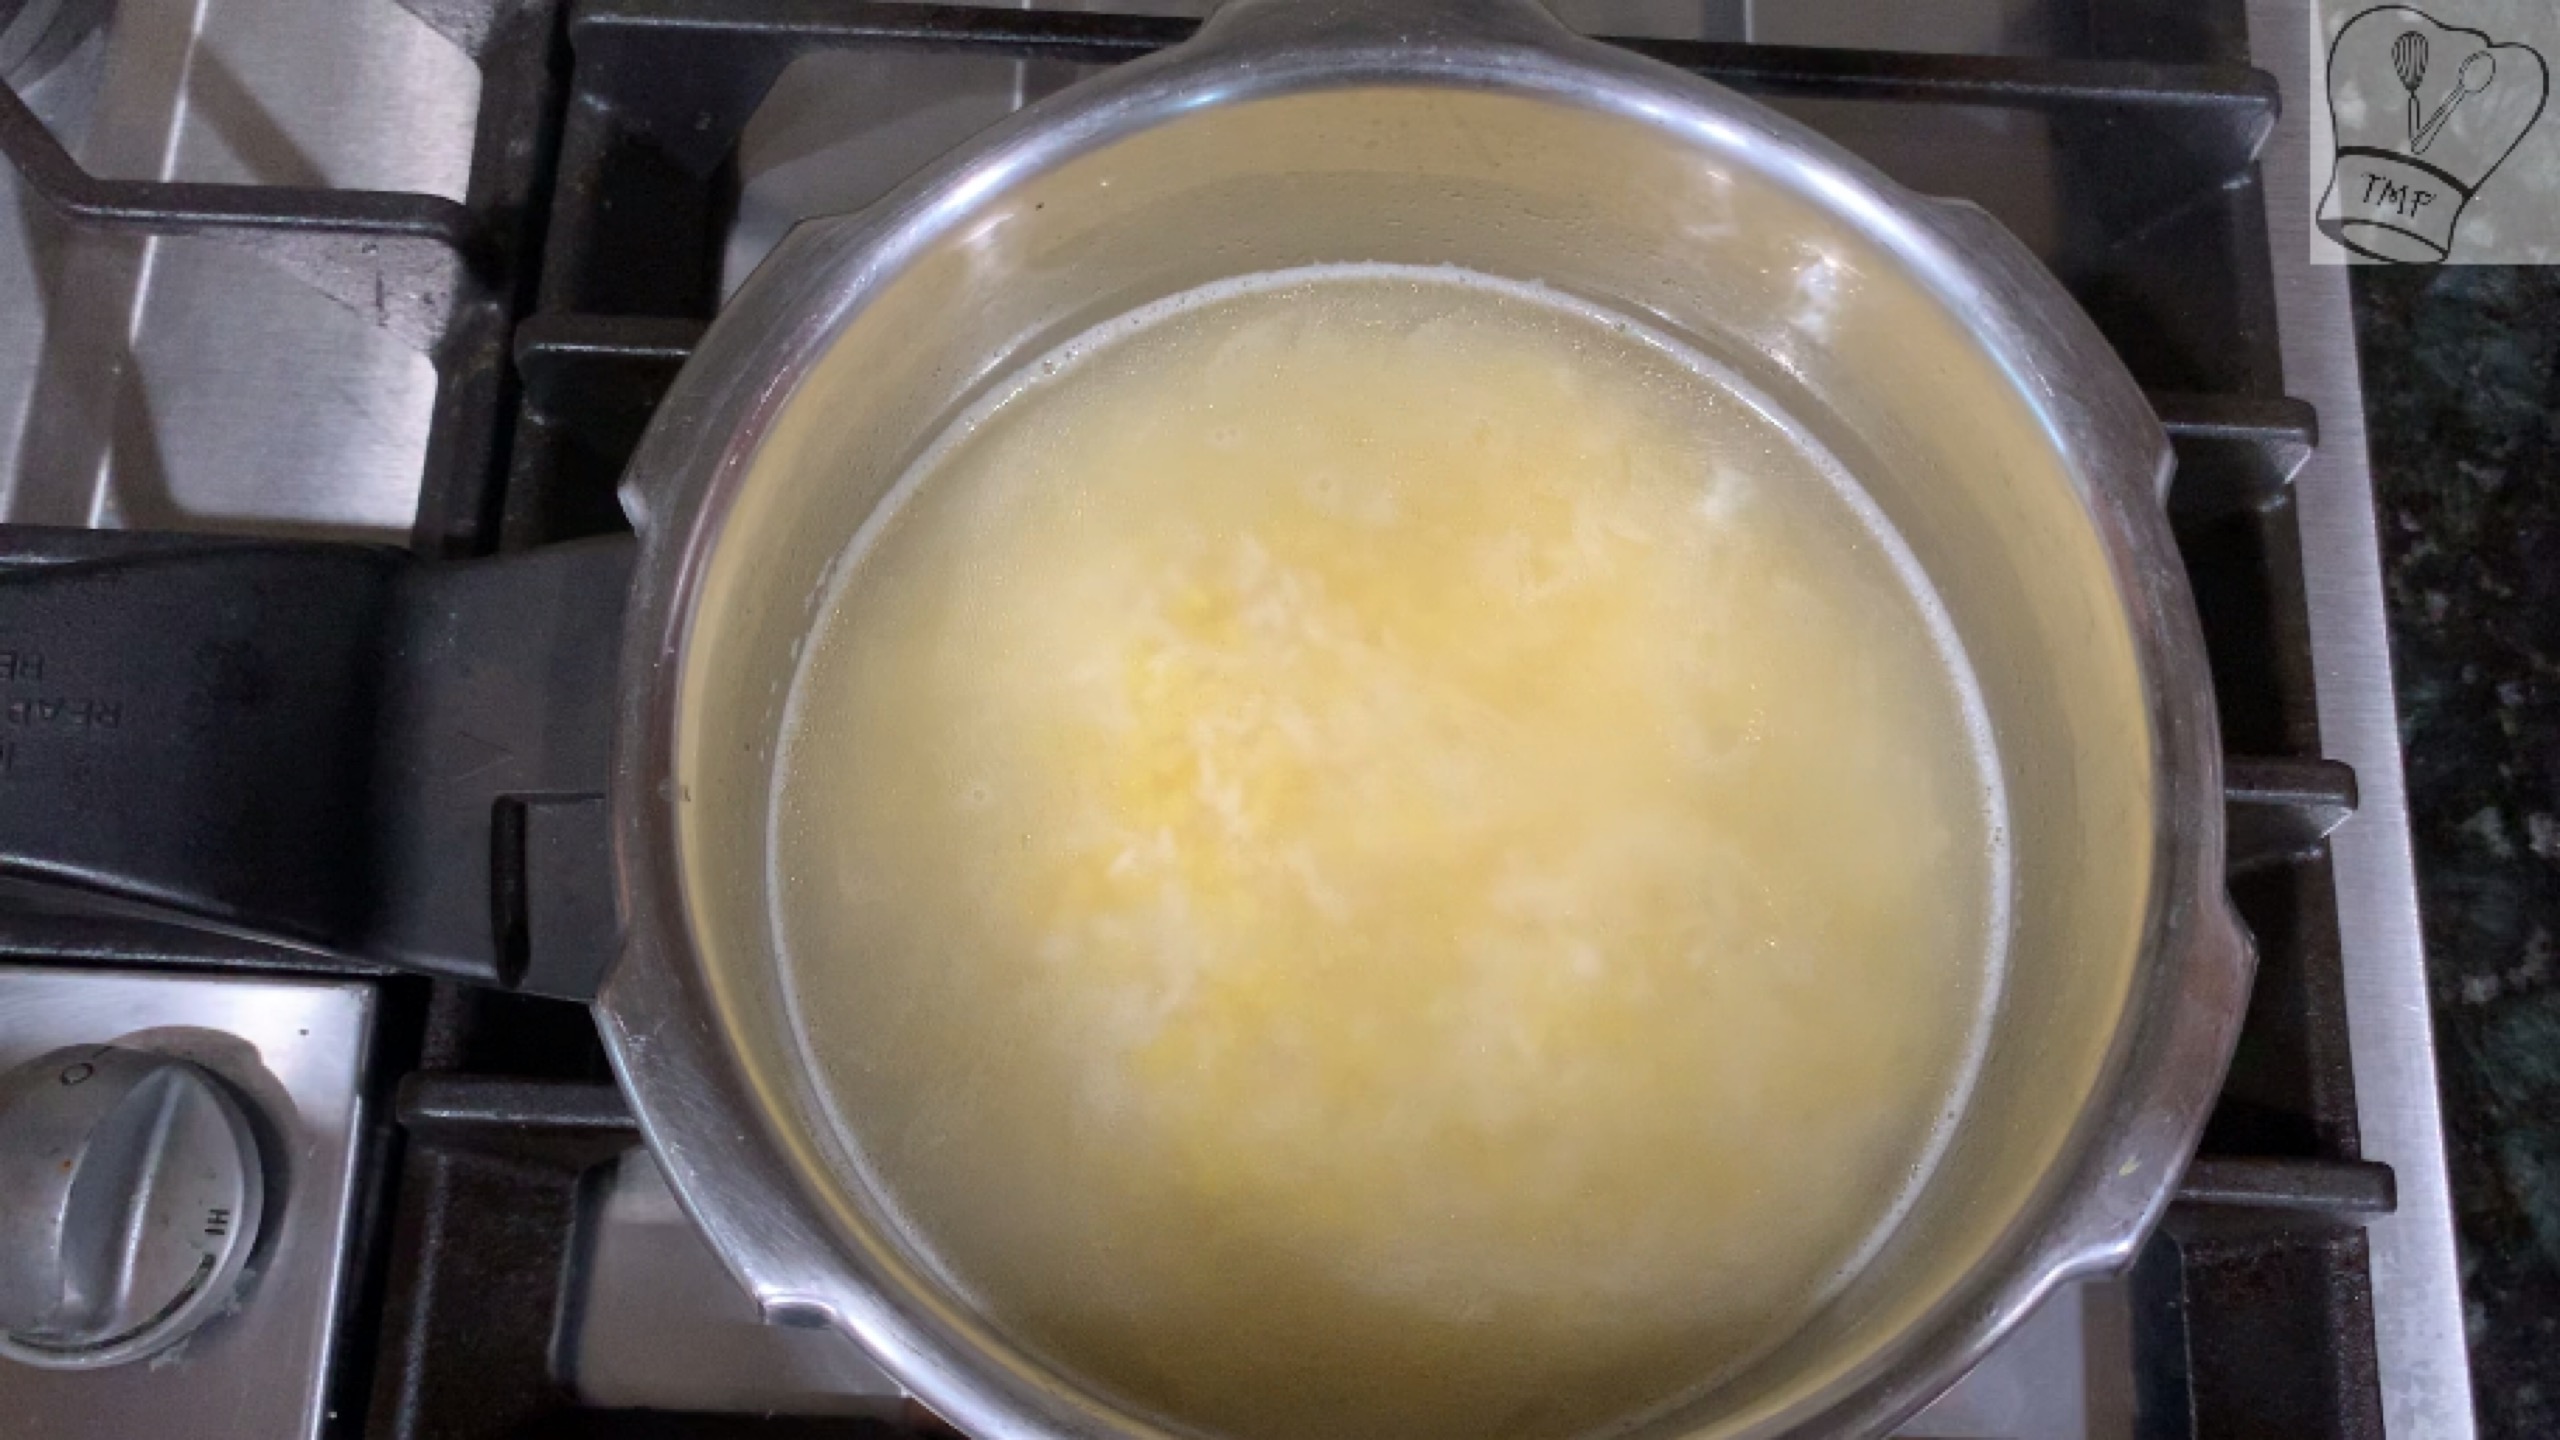
    Poricha kootu | Avarakkai Poricha kootu | Poritha kootu | Broadbeans kootu is prepared with broad beans and moong dal. It can be mixed with rice or as a side dish with tamarind based kuzhambu variety, rasam variety. . Healthy kootu is perfect for a weekday meal.

    ...

    Read More

    Baked Rajma Cutlet | Vadai | Patties

    November 16, 2015 By Vidya Srinivasan 26 Comments

    IMG_3982Baked rajma cutlet is prepared with Rajma (kidney beans). Protein-rich healthy and tasty snacks. It is a great after-school snack for kids.

    Every time we visit our pediatrician he tells us to give protein for Vishvak. I try to add Lentil in an almost everyday meal in some way. Nowadays he has become very playful while eating after a few initial Spoon he starts running around and getting bored.

    He likes food like panniyaram, bread, cutlet, fries which he can hold and eat. Their are days when even Ven Pongal goes to the panniyaram pan and result in "Pongal panniyaram".  This Rajma cutlet is one such experiment to give him beans, which become a big hit at home. Not only him even we like it.  I took pictures and even gave this recipe for " Snegedhi " magazine but somehow I forgot to post it.

    ...

    Read More

    Vazhakkai Podimas | Raw banana curry

    November 12, 2015 By Vidya Srinivasan 42 Comments

    Vazhakkai Podimas | Raw banana curry | Plaintain curry | south Indian poriyal recipe  with step-by-step pictures, and video recipe. Check out the vazhakkai podimas recipe and if you like the video pls SUBSCRIBE to my channel.

    ...

    Read More

    Milk peda | Doodh Peda

    November 9, 2015 By Vidya Srinivasan 36 Comments

    Milk peda | Doodh peda | peda recipe | how to make peda | Milk peda recipe | Doodh ka peda | Kesar peda | plain peda | chocolate peda | Pista peda | homemade peda | 3 ingredients peda sweets | Diwali milk sweets with step by step pictures and video recipe. Check out the Best milk peda in Tamil and Best milk peda recipe in English. If you like the video pls SUBSCRIBE to my channel

    Milk peda | Doodh peda | peda recipe | how to make peda | Milk peda recipe | Doodh ka peda | Kesar peda | plain peda | chocolate peda | Pista peda | homemade peda | 3 ingredients peda sweets | Diwali milk sweets | is one common Milk-based sweets that are popular in almost all sweet stall. Usual milk sweet is a lengthy process to make. Here is a quick version with just 3 main ingredients.

    ...

    Read More

    Carrot Halwa | Gajar Halwa

    November 8, 2015 By Vidya Srinivasan 31 Comments

    Carrot halwa | Gajar ke halwa | gajar halwa | pressure cooker carrot halwa | how to make carrot halwa | Indian carrot pudding | carrot halwa in cooker  | instant pot carrot halwa | easy cooker halwa is an easy and tasty Indian recipe prepared in a pressure cooker and isntant pot. This tasty one-pot Gajar dessert is a great way to make kids eats carrots. 

    My sister is not a big fan of carrots.  She would run hearing the word carrot. Only when carrot is served in sweet form she will happily eat. payasam and Carrot halwa is her favorite. 

    ...

    Read More

    Maladu | Pottukadalai Laddu | Maa Ladoo

    November 5, 2015 By Vidya Srinivasan 28 Comments

     Maladu | Maa laddu | Maa ladoo | pottukadalai urumdai | odachakadalai urundai | odachaladala laddu | maladu recipe | how to make maladu with step by step pictures and video recipe. Check out the maladu in Tamilandmaladu  recipe in English. If you like the video pls SUBSCRIBE to my channel.

     Maladu | Maa laddu | Maa ladoo | pottukadalai urumdai | odachakadalai urundai | odachaladala laddu | maladu recipe | how to make maladu  with roasted gram makes a  filling after school snacks for kids. Pottukadalai laddu is a quick sweet which can be prepared within 10 minutes. 

    Ever since my childhood days I love Laddu, and my Amma prepares a batch of  rava ladoo and puts it in a box. After returning from school I do frequent visits to kitchen and snack all evening. Now a days Almond laddu and wheat and nut laddu are my son’s favorite 

    ...

    Read More

    Banana Halwa | Banana Fudge

    November 4, 2015 By Vidya Srinivasan 46 Comments

    IMG_5879

    Do you have Over ripe bananas in your pantry and thinking what to do, try this Banana halwa. Banana fudge is not only easy but my toddler who hate banana also enjoys it.

    I started experimenting with fruit based recipes for my son. As I mentioned before my son is very choosy when it comes to fruits. I have posted few Banana based recipes before, pls check it out if you are interested.

    Banana recipes

    ...

    Read More

    Ven Pongal | Ghee pongal

    November 2, 2015 By Vidya Srinivasan 34 Comments

    Ven Pongal | Ghee Pongal | Khara Pongal | Spicy Pongal  | Ven Pongal recipe | South Indian kichadi /Khichdi with step-by-step pictures and video recipe. Check out the Pongal video recipe and If you like the video pls SUBSCRIBE to my channel. Also, check out the Ghee Pongal chutney combo recipe


    Ven Pongal | Ghee Pongal | Khara Pongal in a pressure cooker and Instant pot instructions. Pongal is a popular south Indian tiffin variety prepared with rice & moong dal. We prepare Pongal in a sweet and savory version. Ven Pongal and chakkarai Pongal are often offered to God as naivedhyam/ prasadam. In our home, we make  Ven Pongal during the Thai Pongal festival, during Navratri, Varalakshmi Pooja, etc.

    Ven Pongal is one of my favorite tiffins as it is easy to cook. For our phase of life many days we feel like wrapping up the kitchen soon. One-pot meals like Pongal are such a boon. Soak everything together, a few whistles, and Pongal is ready. Just spend a few extra minutes extra for thalippu(tadka) and cook everything together, protein-rich filling meal is ready. Green Moong bean kichadi is yet another family’s favorite dish.  


    Ven  Pongal with lots of ghee makes me lazy and I will do nothing but sit on the couch and watch some random television channel. After I started cooking, we prefer to have Pongal as a weekend brunch. Once in a blue moon, I pair Ven Pongal with Sakkarai Pongal and vadai.

    Ven Pongal using a Pressure cooker and Instant pot? 

    Pongal can be easily prepared in a pressure cooker and an instant pot. For instant pot cooking, use rice mode and cook  Pongal and follow the rest of the procedure.

    Can I use green chilli for Pongal? 

    Traditionally in our home, Ven Pongal is prepared with pepper spice. You can also add red chili or green chilli while tempering

    Checkout other Pongal varieties in TMF,

    Sakkarai Pongal

    Vella Thengai sadam

    Gothumai Rava Pongal

    Millet Pongal

    kalkandu Pongal

    Pongal recipes | bhogi recipes | kannum Pongal recipes

    Pongal varieties

    Ven Pongal (Manjal Pongal) / Ghee Pongal

    Manjal Pongal is generally prepared day (evening) before Varalakshmi Pooja and offered to God. It's nothing but Ven pongal with a touch of Turmeric powder (Manjal/yellow).
    5 from 1 vote
    Print Pin Comment
    Course: Breakfast
    Cuisine: Indian
    Prep Time: 10 minutes minutes
    Cook Time: 20 minutes minutes
    Total Time: 30 minutes minutes
    Servings: 3
    Author: Vidya Srinivasan

    Ingredients

    • Rice - 1/4 cup
    • Split yellow moong dal - 2 tbsp
    • Ghee - 1 tsp
    • Water - 2 cups + 1/4 cup
    • Salt - as needed
    • Ghee - 2 tbsp
    • Cumin seeds - 1 tsp
    • Peppercorns - 1 tsp Adjust according to your spice level
    • Fresh curry leaves - few
    • Cashew nuts - as needed
    • Ginger - 1/2 tsp peeled and grated

    Instructions

    • Wash rice and moong dal well; soak them in hot water (I soaked in hot water for 30 minutes) and set it aside
    • Add ghee to the pressure cooker, sauté rice and moong dal for 1 min in low flame
    • Furthermore add 1 cup + 1/4 cup of water and mix well; turn on the stove in medium flame and cook
    • Mix well and let it boil. After the water turns frothy boil mix well and make sure rice/ dal are not stick to the cooker
    • Pressure cook for 4-5 whistles, turn down the flame to low and keep for 15 seconds and turn off the stove
    • In a small tadka pan add ghee and let it turn warm
    • Add cashew and sauté for 30 seconds
    • Furthermore add pepper, curry leaves, cumin seeds and let them splutter
    • Finally add ginger and mix well; turn off the stove and transfer the tadka into a small cup
    • After the pressure release naturally mash the Pongal well with a ladle
    • Add 1 cup of warm water and mix well
    • Cook the Pongal on medium heat
    • Add required salt, ghee and cook the Pongal 2-3 minutes or until the Pongal comes together. Pongal thickens overtime so turn off the stove before it turns too thick

    manjal pongal

    • Add a generous pinch of turmeric powder while cooking Pongal and follow the rest of the procedure

    Video

    Subscribe to my YouTube channelCheck out Traditionally Modern Food!

    Notes

    1.  I have cooked rice and Dal directly in the cooker. If you are using a separator reduce the water accordingly 
    2. I have used some masoori rice. If you are using raw rice use less water
    3. To cook Pongal in instant pot use rice mode
    4. Adjust the water according to the consistency you desire your p 
    5. Adjust ghee according to your desire
    6. Pongal thickens overtime. Always turn off when the pongal comes together it will  come to scoopable  consistency after sometime 
    7. If you are serving the Pongal for kids use pepper- cumin powder and ginger powder. Instead of whole pepper, cumin seeds and ginger
    Tried this recipe?Mention @traditionallymodernfood or tag #traditionallymodernfood!

    Ingredient:

    Rice - 1/4 cup

    Split yellow moong dal - 2 tbsp

    Ghee - 1 tsp

    Water - 2 cups + 1/4 cup

    Salt - as needed

    To temper:

    Ghee - 2 tbsp

    Cumin seeds - 1 tsp

    Peppercorns - 1 teaspoon (Adjust according to your spice level)

    Fresh curry leaves - few

    Cashew nuts - as needed

    Ginger - 1/2 tsp, peeled and grated

    How to make Ven Pongal with step by step pictures:

    • Wash rice and moong dal well; soak them in hot water (I soaked in hot water for 30 minutes) and set them aside

    • Add ghee to the pressure cooker, sauté rice and  moong dal for 1 min in low flame

    • Furthermore, add 1 cup + 1/4 cup of water and mix well; turn on the stove on medium flame and cook

    • Mix well and let it boil. After the water turns frothy boil mix well and makes sure rice/ dal is not stick to the cooker
    • Pressure cook for 4-5 whistles, turn down the flame to low and keep for 15 seconds and turn off the stove

    • In a small tadka pan add 1 tablespoon of ghee and let it turn warm

    • Add cashew and sauté for 30 seconds

    • Furthermore add pepper, curry leaves, cumin seeds and let them splutter


    • Finally, add ginger and mix well; turn off the stove and transfer the tadka into a small cup

    • After the pressure release  naturally mash the Pongal well with a ladle

    • Add 1 cup of warm water and salt; mix well


    • Cook the Pongal on medium heat
    • Add 1 tablespoon of ghee and cook the Pongal 2-3 minutes or until the Pongal comes together. Pongal thickens overtime so turn off the stove before it turns too thick

    Varalakshmi pooja Manjal Pongal

    • Add a generous  pinch of turmeric powder while cooking Pongal and follow the rest of the procedure 

    IMG_8622


    Butter Biscuit |Shortbread Cookies

    October 30, 2015 By Vidya Srinivasan 49 Comments

    Butter biscuit  | Indian bakery-style butter biscuit | Shortbread cookies | tea kadai butter biscuit | butter cookies | 3 ingredients shortbread cookies | Eggless cookies | Holiday cookie | beginner friendly baking |  3 ingredients butter cookies | Mysore bakery biscuit | ayyengar bakery butter biscuit |  butter  shrewsbury biscuit | Benne biscuit | crispy Iyengar bakery style Indian butter biscuit/ cookies with step by step pictures and video recipe. Check out the butter biscuit recipe. If you like the video pls SUBSCRIBE to my channel

    Butter biscuit  | Indian bakery-style butter biscuit | Shortbread cookies | tea kadai butter biscuit | butter cookies | 3 ingredients shortbread cookies | Eggless cookies | Holiday cookie | beginner-friendly baking |  3 ingredients butter cookies 3 ingredients Indian bakery-style butter biscuit | cookies are melt in the mouth and super addictive. These Shortbread cookies are egg-less and it can be prepared without a Whisk or electric Mixer. Perfect for holiday treats/holiday gift basket and after school snack.

    Indian bakery-style butter biscuit:

    Ever style childhood days I love Iyengar bakery style super soft melt in mouth butter cookies. With just 3 ingredients butter cookies taste super addictive and make perfect teatime snacks. 

    Butter texture for butter biscuit?

    Butter is one key ingredient for butter cookies to get the perfect cookie always use room temperature softened butter. Keep the butter at room temperature for at least 3 hours. Avoid cold butter from the fridge. If you have planed the recipe way ahead soft the butter by microwaving for few seconds but avoid cooking for a long time as butter will starts melting down.

    Additional flavors to the cookies?

    I have made the cookie with minimal ingredients. You can play with your flavors and add vanilla extract, cardamom powder, rose essence, or any other flavor of your choice. Even without any additional flavor butter gives an amazing taste to the cookies. 

    Is Chilling the dough mandatory for butter cookies?

    I have made this cookie without chilling the dough. I feel the shape is well retained for chill the dough. Cookies made instantly taste good but the texture might turn slightly crack.   

    Can I use wheat flour instead of All purpose flour?

    If you are going to use wheat flour it might taste like tea Kadai biscuit. Ingredient quantity slightly varies, I  will soon post that recipe on the blog. A whole wheat walnut cookie is yet another favorite.

    Another Cookie recipe to try

    Saffron cookies

    Tofu cookies

    1-minute microwave cookies

    Almond flour cookies

    Eggless Whole wheat walnut cookies

    Custard powder cookies

    Double chocolate cookies


    Butter Biscuit |Shortbread Cookies| Butter Cookies (Eggless)

    Melt in mouth buttery biscuit are so addictive. This Shortbread cookies are egg-less and it can be prepared without Whisk or Mixer. Perfect for holiday treats.
    4 from 2 votes
    Print Pin Comment
    Course: Cokies
    Prep Time: 5 minutes minutes
    Cook Time: 12 minutes minutes
    Total Time: 17 minutes minutes
    Author: Vidya Srinivasan

    Ingredients

    • All-purpose flour/ Maida - 1 cup
    • Butter- 1/3 cup softened in room temperature
    • Powdered sugar - 1/3 cup tightly pressed
    • Salt - pinch

    Instructions

    • In a wide mixing bowl take 1/2 cup of softened room temperature butter and 1/3 cup of tightly pressed powdered sugar
    • Combine the butter and sugar well with your hands or whisk or electric mixer until the mixture turns creamy and fluffy
    • Make sure you use room temperature softened butter, As cold butter is difficult to bind. I prefer to keep the butter outside the fridge for atleast 3 hours
    • Gradually add flour and knead the dough gently with the hand or a mixer. Avoid over kneading
    • After the dough comes together roll the dough into a cylinder of your desired thickness
    • Cover the dough with a cling wrap and refrigerate the dough for at least one hour or overnight or until the dough turns firm. I generally keep it for one hour
    • Preheat the oven to 350 degrees Fahrenheit and line the cookie tray with parchment paper. Grease it with butter/baking spray
    • Remove the cling wrap and cut the dough about 1/2 inch thick and spread it onto a baking sheet
    • Gently press the cookie and bake for 10 - 15 minutes until it is slightly golden brown on the bottom side
    • Initially, Cookies look underdone but they turn fine as they cool down. Tasty butter cookies are ready

    Video

    Subscribe to my YouTube channelCheck out Traditionally Modern Food!

    Notes

    1. Adjust sugar according to your taste. If you prefer sweet cookies use 1/2 cup
    2. Vanilla extract/cardamom powder or any other flavoring of your choice can be used but even without any additional flavoring cookies tastes good on it's own 
    3. You can also make the cookies without resting but it might not hold the shape
    Tried this recipe?Mention @traditionallymodernfood or tag #traditionallymodernfood!

    Ingredients:

    All-purpose flour/ Maida - 1 cup

    Butter- 1/3 cup, softened at room temperature

    Powdered sugar - 1/3 cup, tightly  pressed

    Salt - pinch

    How to make Iyengar bakery style butter biscuit with step by step pictures:

    • In a wide mixing bowl take 1/2 cup of the softened room temperature butter and 1/3 cup of tightly pressed powdered sugar

    • Combine the butter and sugar well with your hands or whisk or electric mixer until the mixture turns creamy and fluffy

    • Make sure you use room temperature softened butter, As cold butter is difficult to bind. I prefer to keep the butter outside the fridge for at least 3 hours
    • Gradually add flour and knead the dough gently with the hand or a mixer. Avoid over kneading

    • After the dough comes together roll the dough into a cylinder of your desired thickness

    • Cover the dough with a cling wrap and refrigerate the dough for at least one hour or overnight or until the dough turns firm. I generally keep it for one hour

    • Preheat the oven to 350 degrees Fahrenheit and line the cookie tray with parchment paper. Grease it with butter/baking spray
    • Remove the cling wrap and cut the dough about 1/2 inch thick and spread it onto a baking sheet
    • Gently press the cookie and bake for 10 - 15 minutes until it is slightly golden brown on the bottom side

    • Initially, Cookies look underdone but they turn fine as they cool down. Tasty butter cookies are ready


    Dry fruits Laddu | healthy no sugar laddu

    October 28, 2015 By Vidya Srinivasan 47 Comments

    Dry fruits laddu | Dry fruits ladoo | Dates laddu | Nuts and dates laddu | Energy Balls | Laddu recipe | ladoo recipe | dry fruits laddu recipe | healthy laddu | dry fruits recipe | Dates laddu | Dry fruits balls | indian sweet laddu recipe with step by step pictures and video recipe. Check out the dry fruits laddu in Tamil and dry fruits laddu recipe in English. If you like the video pls SUBSCRIBE to my channel.

    Dry fruits laddu | Dry fruits ladoo | Dates laddu | Nuts and dates laddu | Laddu recipe | ladoo recipe | dry fruits laddu recipe | healthy laddu | dry fruits recipe | Indian sweet laddu recipe is a healthy laddu with mixed nuts and dates.  Healthy nuts laddu for kids, Pregnant women, and of course everyone. Zero sugar dry fruits laddu make a great mid-morning and mid-evening snacks to overcome the sweet addiction.

    They say celebrate a happy occasion with sweet ( I remember famous Dairy milk chocolate commercial "Sweet Edu kondadu" (celebrate happiness with a sweet).

    We are relocating to Seattle. After spending an amazing 2 years and  7 months in Bentonville. We have lot of cherishing moments in this small town.. My bundle of happiness was born here, he took his step here, spit his first food, told his first letter, the first mischief,  got his first friend, first word, first favorite things, the first sentence oh man I can write a full post about many things based on him. Well, change is a permanent thing, but after living in a place for some years it creates many moments which I can treasure for ages.

    Having a 2-year-old, my biggest concern is to give him healthy snacks. Like me, many moms have a big question about mid-morning and evening snacks for kids. These days my son wants to hold his food and eat by himself – yet another point to be considered.  Suddenly this “dry fruits laddu” sprung to my mind, my mom uses to prepare this dey fruits laddu for me when I was pregnant.

    Should healthy and tasty treat always involve complex cooking process or spending more time in the kitchen, defiantly no. With minimal cooking, these energy balls can be prepared in no time. Loaded with nuts and without sugar (Yes Dates is there, but I believe it to be healthier compared to white sugar), this is a healthy bite.

    Dates laddu is a filing healthy snack after a workout and also good after school snacks for kids.

    Nuts and dates laddu combo works perfectly in our home.. Recently I posted Oats &Nuts Burfi. This is a quicker version of that with few changes.

    Indian sweet recipes in TMF

    Laddu recipes 

    Diwali special sweets

    Nuts & Dates Balls |Nuts & Dates Ladoo | Nuts & Dates Laddu

    Nutes and Dates Balls are loaded with goodness. Healthy laddu for kids, Pregnant women and of course everyone.
    5 from 3 votes
    Print Pin Comment
    Course: Laddu
    Cuisine: Indian
    Prep Time: 3 minutes minutes
    Cook Time: 10 minutes minutes
    Total Time: 13 minutes minutes
    Servings: 4
    Author: Vidya Srinivasan

    Ingredients

    • Mixed nuts - 1 cup I used Walnut, Almonds, cashew and Pista
    • Finely chopped Dates - 25 or 1 cup loosely packed
    • Cardamom powder - 1/4 tsp
    • Ghee - 1/2 teaspoon + grease

    Instructions

    Method 1:

    • Take the mixed nuts into the mixie jar and pulse them into a coarse mixture
    • In a wide pan add 1/4 teaspoon of ghee and saute the mixed nuts in low flame until you get a nice aroma; mix well and saute
    • Add chopped dates, cardamom powder, and 1/4 teaspoon of ghee, cook on low flame
    • Mix well and smash dates with a spatula, this helps dates to separate out and mix uniformly with other dry fruits.
    • Sauté till the dates start releasing oil
    • Then turn off the flame and transfer the mixture into a plate and let the mixture turns warm
    • When the mixture is warm enough to handle, Grease your hands and take a small portion of the dough and roll them into balls
    • serve them immediately or store them in an airtight container

    Method 2 :

    • Dry roast the nuts till the aroma fills the room. Cool and grind it in a mixie/ blender/food processor, without adding water
    • In the same pan sauté the dates till they turn soft. Alternatively they can be microwaved for about 30 to 60 seconds. Cool and pulse the dates
    • Combine the nuts flour, cardamom powder and dates; mix well
    • Take small portions and roll them to balls

    Video

    Subscribe to my YouTube channelCheck out Traditionally Modern Food!

    Notes

    1. If you have a toddler grind  dates and nuts; make laddu
    2. Chopped dates and pulsed nuts give a nice texture to the laddu
    3.  Can add coconut, sesame seeds, pumpkin seeds, etc. for extra flavor
    4. Use nuts of your choice; pecans, peanuts, etc.  can also be used
    5. Raisins, fig, apricot extra can be added for extra flavor
    6. Adjust the dry fruits according to your taste
    7. Make dates ball when it is warm. If the mixture cools down completely you can't make laddu
    8. If the mixture for cool down warm the mixture in the microwave or saute in a pan
    Tried this recipe?Mention @traditionallymodernfood or tag #traditionallymodernfood!

    Ingredients:

    Mixed nuts - 1 cup (I used Walnut, Almonds, cashew and Pista )

    Finely chopped Dates - 25 or 1 cup loosely packed 

    Cardamom powder - 1/4 tsp

    Ghee - 1/2 teaspoon + grease 

    Method 1: 

    • Take the mixed nuts into the mixie jar and pulse them into a coarse mixture

    • In a wide pan add 1/4 teaspoon of ghee and saute the mixed nuts in low flame until you get a nice aroma; mix well and saute

    • Add chopped dates, cardamom powder, and 1/4 teaspoon of ghee, cook on low flame

    • Mix well and smash dates with a spatula, this helps dates to separate out and mix uniformly with other dry fruits.

    • Sauté  till the dates start releasing oil

    • Then turn off the flame and transfer the mixture into a plate and let the mixture turns warm

    • When the mixture is warm enough to handle, Grease your hands and take a small portion of the dough and roll them into balls

    • serve them immediately or store them in an airtight container 

    Method 2 : 

    • Dry roast the nuts till the aroma fills the room. Cool and grind it in a mixie/ blender/food processor, without adding water
    • In the same pan sauté the dates till they turn soft. Alternatively they can be microwaved for about 30 to 60 seconds. Cool and pulse the dates

    nutsdatesroll

    • Combine the nuts flour, cardamom powder and dates; mix well
    • Take small portions and roll them to balls

    nutsdatesroll1

    It's my guest post for Sreelatha from Framed recipes. Sreelatha’s “Oats Banana Smoothie” for my “Toddler Friendly” recipes is very popular at home, and my LO loves it.

    IMG_5475

    • « Go to Previous Page
    • Page 1
    • Interim pages omitted …
    • Page 87
    • Page 88
    • Page 89
    • Page 90
    • Page 91
    • Interim pages omitted …
    • Page 113
    • Go to Next Page »

    Primary Sidebar

    Vidya's portrait in a circle

    Hi, I am Vidya Srinivasan. Thanks for visiting my page.

    Discover traditional Indian recipes with a modern twist - Indian vegetarian recipes, South Indian recipes, and simply the best Indian recipes you can find online. Sign up to stay tuned for my updates!

    More about me →

    Let's Connect

    • Facebook
    • Instagram
    • Mail
    • Pinterest
    • RSS Feed
    • Twitter
    • YouTube

    Sign Up

    Sign up to my Newsletter and receive my new recipes straight into your e-mail box!

    Featured on Google for Publishers

    click on the image to read more

    Hot beverages recipes

    • Hot Apple Cider | Spiced Apple cider
    • Kashayam | Herbal tea
    • Kashmiri Chai | Pink tea | noon tea
    • Ragi Malt | Ragi porridge | Ragi Kanji

    See more hot beverages recipes

    See More →

    Footer

    ↑ back to top

    Shortcuts

    • About Vidya
    • Privacy Policy

    Traditionally Modern Food retina mobile menu logo
    • Sign up for my recipe updates!

    Let's Connect

    • Mail
    • Facebook
    • Instagram

    Copyright © 2021 • Traditionally Modern Food

    Rate This Recipe

    Your vote:


    A rating is required
    A name is required
    An email is required