Search for a recipe

  • Skip to primary navigation
  • Skip to main content
  • Skip to primary sidebar
Traditionally Modern Food
  • Home
  • About
  • Recipe Index
  • Privacy Policy
menu icon
go to homepage
  • Home
  • Recipe Index
  • About
    • Email
    • Facebook
    • Instagram
    • Pinterest
    • RSS
    • Twitter
    • YouTube
  • search icon
    Homepage link
    • Home
    • Recipe Index
    • About
    • Email
    • Facebook
    • Instagram
    • Pinterest
    • RSS
    • Twitter
    • YouTube
  • ×

    Eggless Strawberry Pancakes | wheat pancake

    November 11, 2014 By Vidya Srinivasan 42 Comments

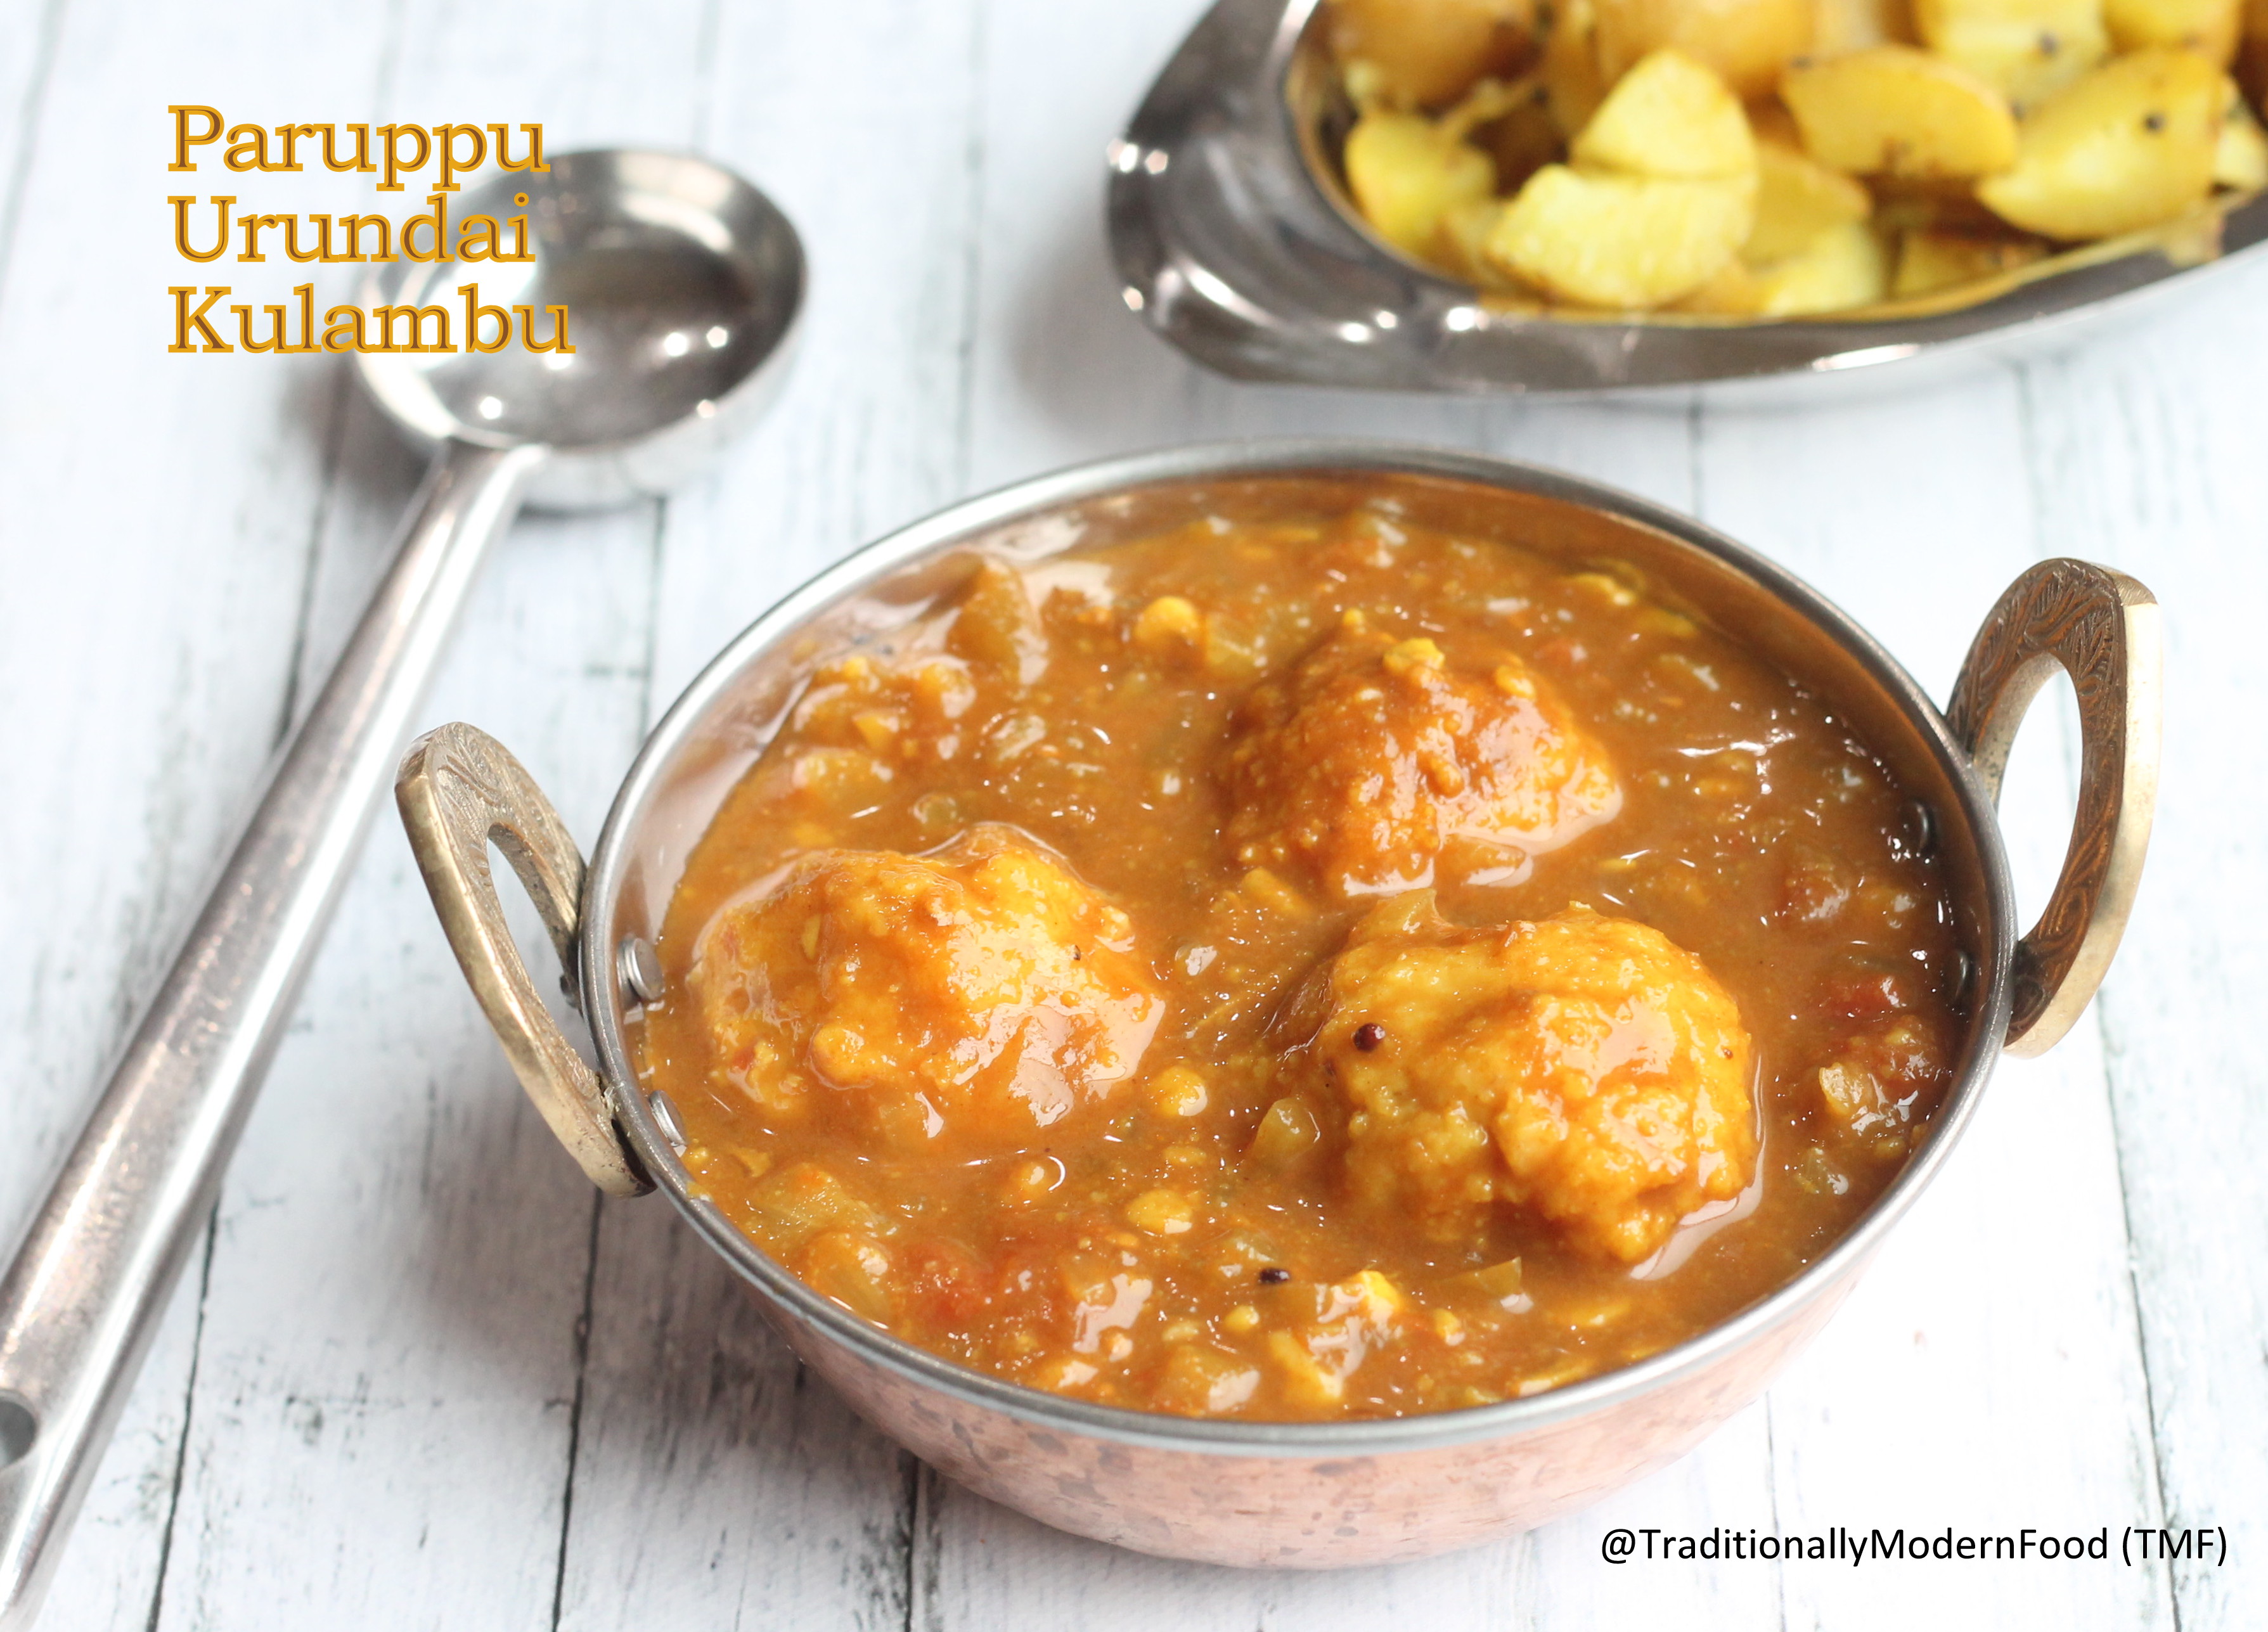
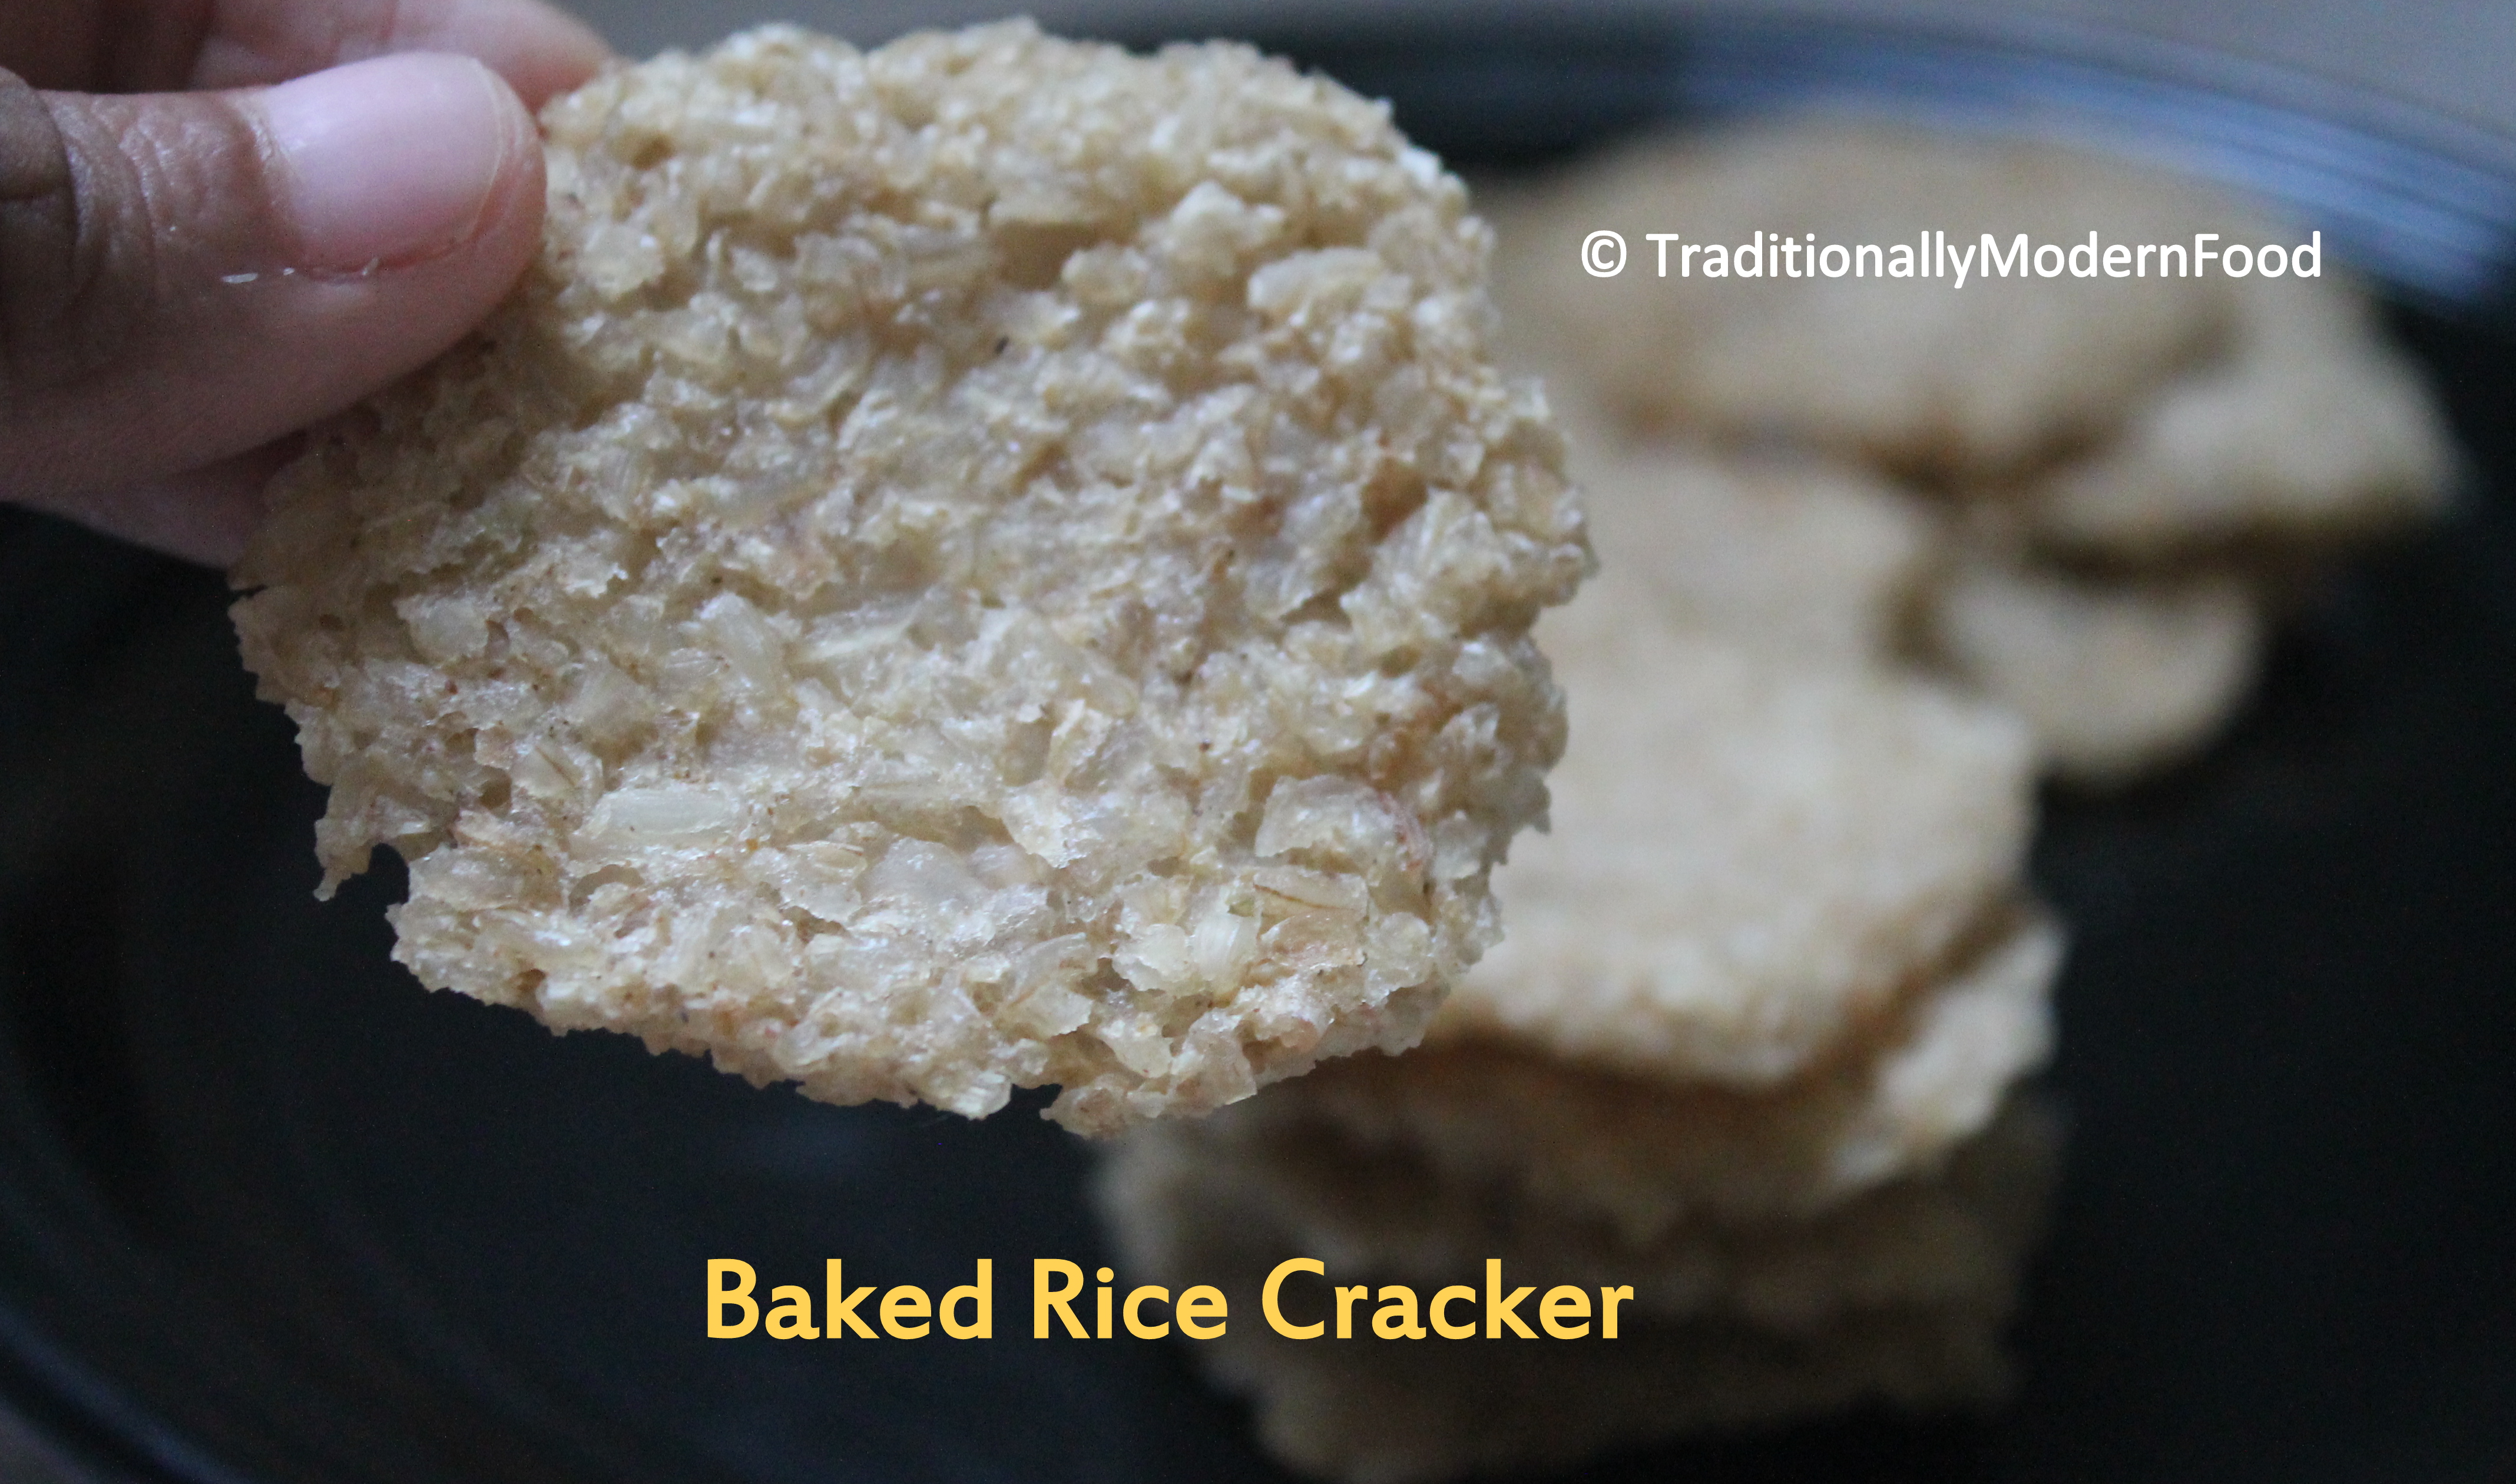
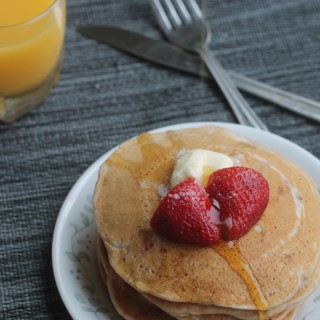
    Eggless strawberry pancake, wheat pancake, eggless pancake recipes step-by-step pictures, and video recipes. Check out the eggless strawberry pancake recipe and if you like the video pls SUBSCRIBE to my channel.

    © TraditionallyModernFood

    Eggless strawberry pancake, wheat pancake, eggless pancake recipe is a tasty eggless pancake. Quick beginner-friendly whole wheat pancakes.

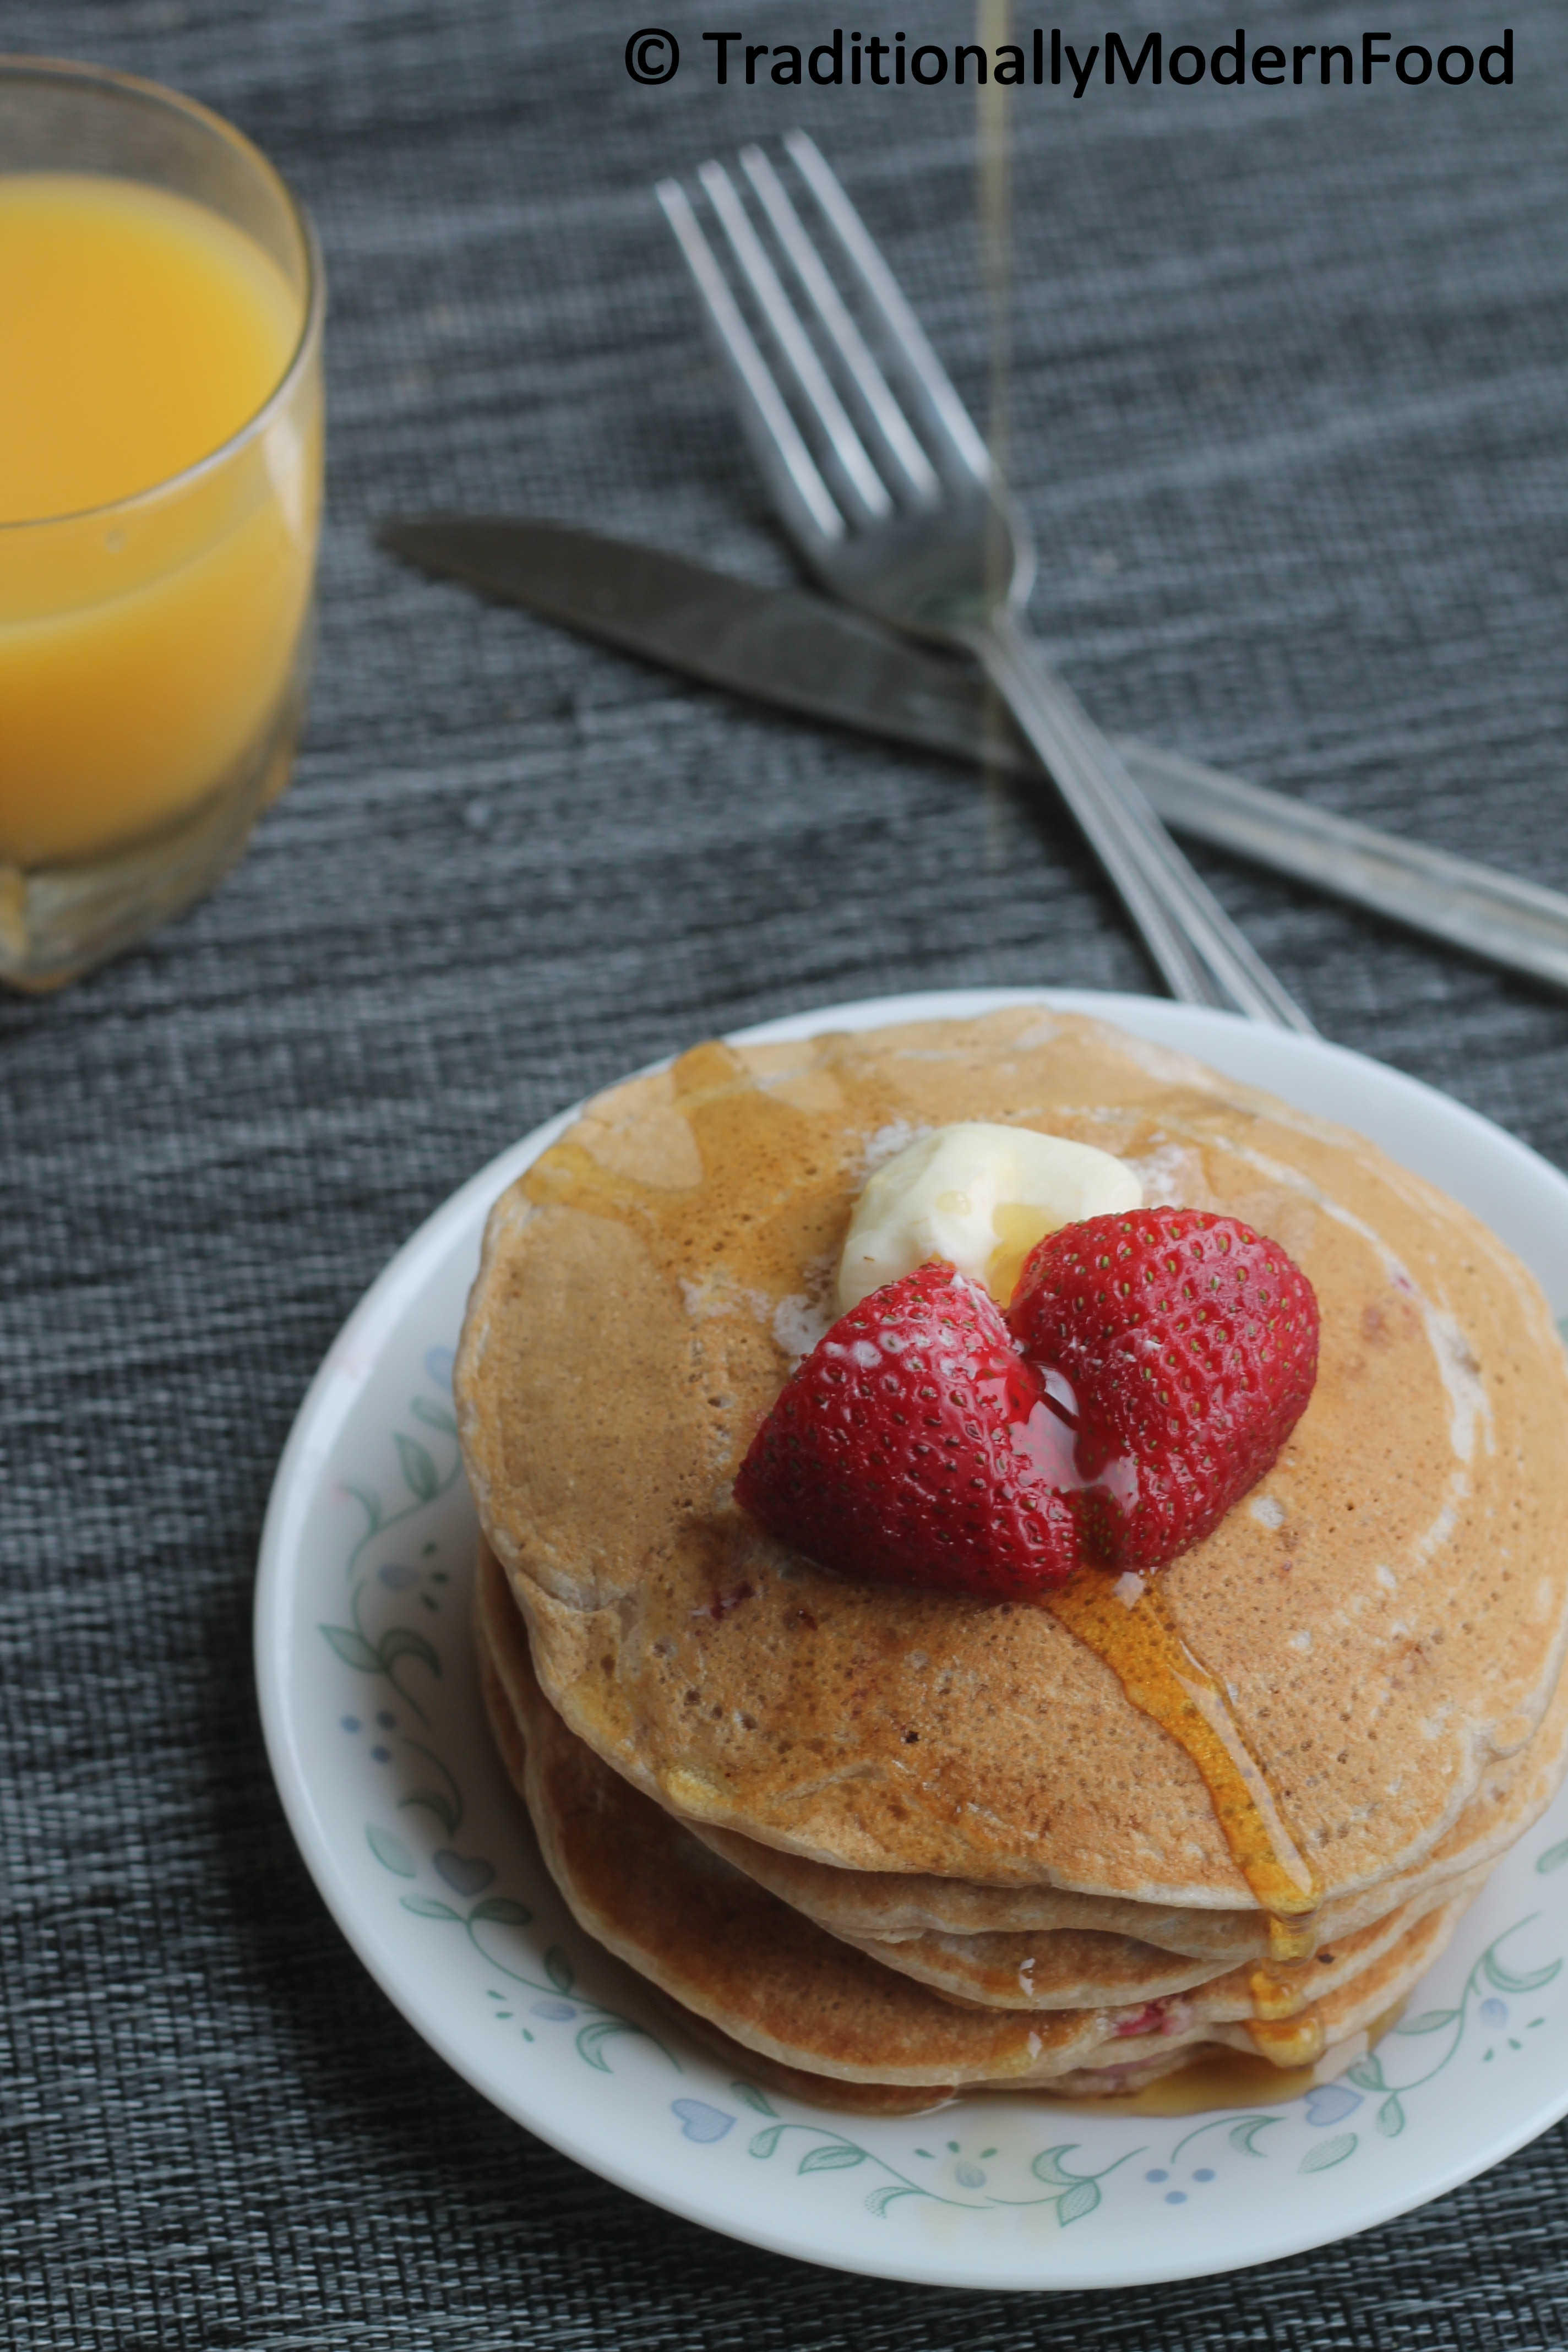
    A couple of months ago, I had posted Eggless Pancake using All-purpose flour. Pancake has become my son's favorite breakfast.  As a healthy alternative, I tried whole wheat. Luckily he didn't find differences in taste and enjoyed them with maple syrup.

    ...

    Read More

    Paal Kesari | Sooji Halwa

    September 30, 2014 By Vidya Srinivasan 60 Comments

    Paal Kesari is a tasty Indian sweet. Milk gives nice flavour to the kesari. Paal kesari can be easily made in Stove top and pressure cooker.

    Kesari is one of the common sweets prepared at home. Having a sweet tooth, sis and I ask Amma to frequently prepare kesari with any snack like bhajji, pakoda , Bonda etc. My mom used to tease us asking "Entha Mapalai varar ungala parka ;-)"

    In our culture, there was a trend when bride and groom meet for first time, kesari is served. Kesari is usually prepared with water, but replacing water with milk gives a good taste. 

    I have posted  easy pressure cooker Kesari. This one is rich and tastes paal (milk)kesari. Traditionally Paal kesari is prepared without food color,Saffron gives nice yellow color. My son got used to enjoying orange kesari so I sometimes add orange color for my Paal kesari too. Rava laddu is yer another favorite sweet prepared with sooji


    I initially posted Paal kesari recipe with stove top method but offlate I have been using my Instant pot a lot so recently I updated the recipe with IP. I common problem while making kesari is lumpness that comes after adding sugar. Without much stirring Instant pot makes a tasty creamy paal kesari without any lump.

    Instant pot Paal kesari

    ✅ Kesari without any lump

    ✅ 10 minutes cooking

    ✅ Stays good for 2 days

    ✅ Instant pot  cooking

    ✅Rich and creamy 


    Paal Kesari | Sooji Halwa - Instant pot

    5 from 2 votes
    Print Pin Comment
    Course: Sweet
    Cuisine: Indian
    Author: Vidya Srinivasan

    Ingredients

    • Rava Sooji/Semolina - 1 cup
    • Sugar - 2 cups + 1/2 cup Adjust according to your taste
    • Milk - 2 cups + 1/2 cup
    • Butter / Ghee - 4 tablespoon + 1 tbsp
    • Cardamom powder - 1/4 tsp
    • Nuts and raisin - to garnish I used cashew
    • Saffron - few strands

    Instructions

    • Turn on Instant pot in sauté mode
    • Add butter and let it melts
    • Add cashew and sauté till cashews turns golden brown
    • Add raisins and give it quick mix
    • Transfer the nuts and raisins into a cup
    • Add Rava and sauté well
    • Mix well and sauté to avoid Rava from turning brown
    • Sauté for 2 minutes, turn off IP
    • Add sugar and mix well
    • Add pinch of salt and cardamom powder; mix well
    • Add hot boiling milk. Mix well and deglaze the IP well
    • Add few saffron and mix well
    • Add butter and close the IP lid. Pressure cook for 4 minutes in LP
    • NPR. Mix the kesari well and add sautéd nuts and raisins . Instant pot Paal Kesari is ready😊

    Video

    Subscribe to my YouTube channelCheck out Traditionally Modern Food!

    Notes

    1. Adjust sugar according to your taste
    2. Pinch of food color can be added (I didn’t add any food color for instant pot kesari)
    3. Adjust butter according to your preference. Kesari can be prepared even with just 1 teaspoon of butter or without any butter 
    4. Always add hot boiling milk. Room temperature or warm milk won’t give the same texture kesari
    5. Regular kesari can be prepared in the same way using instant pot. Use hot boiling water (kettle auto cut off water) instead of milk
    6. Deglaze the IP well to avoid the kesari from getting burn
    7. If the instant pot shows burnt it means rava/sugar stuck to the pot. Release the pressure immediately 
    8. Make sure the pressure setting is low. High pressure will burn the pot
    9. Milk quantity may vary according to the Rava 
    Tried this recipe?Mention @traditionallymodernfood or tag #traditionallymodernfood!


    Ingredients
    :

    Rava (Sooji)/Semolina - 1 cup

    Sugar - 2 cups + 1/2 cup (Adjust according to your taste)

    Milk - 2 cups + 1/2 cup

    Butter / Ghee - 4 tablespoon + 1 tbsp

    Cardamom powder - 1/4 tsp

    Nuts and raisin - to garnish (I used cashew)

    Saffron - few strands:

    How to make Paal kesar in instant pot method with step by step pictures:

    • Turn on Instant pot in sauté mode

    • Add butter and let it melts

    • Add cashew and sauté till cashews turns golden brown

    • Add raisins and give it quick mix

    • Transfer the nuts and raisins into a cup
    • Add Rava and sauté well

    • Mix well and sauté to avoid Rava from turning brown
    • Sauté for 2 minutes, turn off IP
    • Add sugar and mix well

    • Add pinch of salt and cardamom powder; mix well

    • Add hot boiling milk. Mix well and deglaze the IP well


    • Add few saffron and mix well

    • Add butter and close the IP lid. Pressure cook for 4 minutes in LP

    • NPR. Mix the kesari well and add sautéd nuts and raisins . Instant pot Paal Kesari is ready😊

    Paal Kesari | Sooji Halwa

    Paal Kesari is a tasty Indian sweet prepared with rava/ sooji. It can be easily prepared in Instant pot
    5 from 1 vote
    Print Pin Comment
    Course: Sweet
    Cuisine: Indian
    Author: Vidya Srinivasan

    Ingredients

    • Rava Sooji/Semolina - 1 cup
    • Sugar - 2 + 1/2 cup Adjust according to your taste
    • Milk - 2 cup + 1/2 cup
    • Butter / Ghee - 4 tablespoon + 1 tbsp
    • Cardamom powder - 1/4 tsp
    • 40 grams Cashew nuts
    • 25 grams raisins
    • few saffron

    Instructions

    • Add 1 tablespoon of ghee and roast nuts and raisins till they are golden brown, and set aside
    • In the same pan dry roast the rava for 2 minutes (Roast them till aroma comes) and transfer it to a plate.
    • In medium flame add milk to the same pan and when milk starts boiling add the rava and stir continously to avoid lumps
    • Continue cooking till its cooked. Check whether Rava is cooked before adding sugar
    • Add sugar, and cook till sugar melts completely and Kesari thickens. stir it occassionally
    • Add butter and food color, continue cooking till food color dissolves and mixs completely
    • Turn off when kesari separates from the pan. Add nuts and raisins, and serve the Kesari hot/cold. Kesari thickens with time so switch it off accordingly

    Video

    Subscribe to my YouTube channelCheck out Traditionally Modern Food!

    Notes

    1. Instead of adding food color at the end can also add them while boiling milk. I have used orange food color instead yellow, green or any other food color can be used
    2. I have used brown sugar instead white sugar can also be used
    3.  Can add almond/vanilla/pineapple extract or any other essence for taste
    4. Saffron can also be added
    5.  Pachai karpuram can also be added for flavour
    Tried this recipe?Mention @traditionallymodernfood or tag #traditionallymodernfood!

    How to make Paal kesari in Stove top with step by step pictures: 

    • Add 1 tablespoon of ghee and roast nuts and raisins till they are golden brown, and set aside

    IMG_0487

    • In the same pan dry roast the rava for 2 minutes (Roast them till aroma comes) and transfer it to a plate.

    IMG_0488

    • In medium flame add milk to the same pan and when milk starts boiling add the rava and stir continously to avoid lumps

    © TraditionallyModernFood

    • Continue cooking till its cooked. Check whether Rava is cooked before adding sugar

    IMG_0491

    • Add sugar, and cook till sugar melts completely and Kesari thickens. stir it occassionally

    IMG_0492

    • Add butter and food color, continue cooking till food color dissolves and mixs completely

    IMG_0493

    IMG_0494

    • Turn off when kesari separates from the pan. Add nuts and raisins, and serve the Kesari hot/cold. Kesari thickens with time so switch it off accordingly

    IMG_0512


    Pattani Sundal | Green Peas Sundal

    September 25, 2014 By Vidya Srinivasan 54 Comments

    Pattani Sundal | Green Peas Sundal | Peas sundal | kids after school snacks | sundal recipe | sundal without soaking | Navaratri sundal step by step pictures and video recipe. You can also check out the Pattani Sundal recipe.  If you like this recipe pls SUBSCRIBE to my channel  and check out other Sundal varieties in TMF

    Pattani sundal | Frozen green peas sundal is a quick and tasty instant - 10 mins sundal variety with frozen peas. Freshly ground sundal spice gives an amazing flavor to the Pattani sundal.

    ...

    Read More

    Arisi Thengai Payasam | Coconut payasam |

    September 23, 2014 By Vidya Srinivasan 38 Comments

    Arisi Thengai payasam | Coconut payasam | Rice coconut Kheer recipe is a traditional south Indian festive special Payasam Variety with coconut and rice. Check out the Thengai payasam video and If you like the video pls SUBSCRIBE to my channel Arisi Thengai payasam | Coconut payasam | Rice coconut Kheer recipe is a traditional south Indian festive special Payasam Variety with coconut and rice. Jaggery-based healthy payasam is widely made on Tamil new year, aadi pandigai, and many other Tamil festivals. 

    We usually make jaggery-based Payasam on festival days as it is preferred for neivedhyam. When it comes to traditional jaggery Payasam,  In our home it will be either Arisi Thengai Payasam or  Moong Dal and Channa Dal Payasam.  Aadi Paal is a tasty offering prepared on day 1 of Tamil calendar Aadi month.
    This quick Payasam with coconut flavor makes it delicious. Today being Navaratri day 1, I prepared this Payasam for neivedhyam.  

    Back in India we used to keep golu in steps. Inviting people to see our golu, visiting friends and relative houses and getting Sundal, along with gifts - omg so many amazing memories. Navaratri is something I miss here. This time with my kutti krishar, I couldn't keep bhommai outside, but happy with few bhoomai inside our Pooja room:-) Coconut gives a nice flavor to the Arisi Thengai payasam is a tasty payasam. Payasam can be quickly prepared in no time. 

    See more Payasam recipes

    Indian sweet recipes in TMF

    coconut-based recipes in TMF

    Milk-based recipes in TMF


    Arisi Thengai Payasam

    5 from 1 vote
    Print Pin Comment
    Course: Payasam
    Cuisine: Indian
    Author: Vidya Srinivasan

    Ingredients

    • Fresh Grated Coconut - 1/2 cup
    • Raw rice - 1 tablespoon + 1 tsp
    • Grated jaggery - 3/4 cup Adjust according to your taste
    • Cardamom powder - 1/4 tsp
    • Milk - 1/4 cup
    • Cashew nuts - 10
    • Raisins - 1 tbsp
    • Ghee - 1/2 tbsp
    • Salt pinch

    Instructions

    • Wash and soak rice in water for 30 mins or in hot water for 10 - 15 minutes
    • In a mixie jar add coconut, soaked rice and grind by adding water little by little
    • I added around 1/4 cup of water and ground like a chutney
    • In a heavy-bottomed pan add ghee and let it melt and gets hot
    • Add cashew and saute till the cashews turn golden brown. keep stirring well for even roasting
    • After cashew is well roasted add raisins and cook till it's done
    • Transfer the cashew and raisins into a small bowl
    • Simmer the gas stove and add the ground paste
    • Add 1 cup of mixie water to the ground paste and mix well
    • In medium flame cook the mixture. Keep stirring in between to avoid lumps and coconut mixture from sticking to the pan
    • Cook for around 4- 5 mins
    • The mixture thickens and turns into a porridge-like consistency, keep stirring well
    • Turn off the gas stove and add jaggery and 1 cup of water
    • Mix well to avoid lumps
    • Add a pinch of salt and cook the payasam
    • Keep mixing for even cooking and cook till the payasam boils
    • Once when the payasam boils well add cardamom powder and mix well
    • Cook till the payasam  boils well
    • Add roasted cashew and raisin, give a quick mix and turn off the stove
    • Let the payasam cools down completely
    • After the payasam is cool add 1/4 cup of boiled cool milk and mix well. Arisi thengai payasam is ready

    Video

    Subscribe to my YouTube channelCheck out Traditionally Modern Food!

    Notes

    1. Avoid adding hot milk to the payasam as it might curdle
    2. Adjust the jaggery according to your sweetness
    3. Keep stirring payasam well to avoid lump-free payasam
    4. Add coconut milk for a vegan version
    5. Color of the payasam depends on the jaggery
    Tried this recipe?Mention @traditionallymodernfood or tag #traditionallymodernfood!

    Ingredients: Fresh Grated Coconut - 1/2 cup Raw rice - 1 tablespoon + 1 tsp  Grated jaggery - 3/4 cup ( Adjust according to your taste) Cardamom powder - 1/4 teaspoon Milk -  1/4 cup Cashew nuts - 10  Raisins - 1 tablespoon Ghee -  1/2 tablespoon Salt pinch Method:

    • Wash and soak rice in water for 30 mins or in hot water for 10 - 15 minutes

    • In a mixie jar add coconut, soaked rice and grind by adding water little by little
    • I added around 1/4 cup of water and ground like a chutney


    • In a heavy-bottomed pan add ghee and let it melt and gets hot

    • Add cashew and saute till the cashews turn golden brown. keep stirring well for even roasting

    • After cashew is well roasted add raisins and cook till it's done

    • Transfer the cashew and raisins into a small bowl
    • Simmer the gas stove and add the ground paste

    • Add 1 cup of mixie water to the ground paste and mix well 

    • In medium flame cook the mixture. Keep stirring in between to avoid lumps and coconut mixture from sticking to the pan
    • Cook for around 4- 5 mins

    • The mixture thickens and turns into a porridge-like consistency, keep stirring well

    • Turn off the gas stove and add jaggery and 1 cup of water

    • Mix well to avoid lumps
    • Add a pinch of salt and cook the payasam
    • Keep mixing for even cooking and cook till the payasam boils

    • Once when the payasam boils well add cardamom powder and mix well

    • Cook till the payasam  boils well
    • Add roasted cashew and raisin, give a quick mix and turn off the stove
    • Let the payasam cools down completely
    • After the payasam is cool add 1/4 cup of boiled cool milk and mix well. Arisi thengai payasam is ready


    Paruppu Urundai Kuzhambu

    September 22, 2014 By Vidya Srinivasan 78 Comments

    Paruppu Urundai Kuzhambu | Urunda kara kuzhambu | urunda kulambu | Puli Kuzhambu with step by step pictures and video recipe. Check out the Urundai kara Kuzhambu in Tamil and Urundai kara kuzhambu in English.If you like the video pls SUBSCRIBE to my channel

    Paruppu Urundai Kuzhambu

    Paruppu Urundai Kuzhambu | Urunda kara kuzhambu | Puli Kuzhambu is a traditional South Indian kuzhambu. Lentil balls are cooked in tangy flavorful kuzhambu. Kara Kulambu is so tasty and filling.

    Usually, I prefer quick recipes which demand fewer times in the kitchen, but there is certain food which is worth the extra effort spent. Paruppu Urundai Kuzhambu definitely takes a special place on that list. Soaking, grinding cooking lentils make sounds like a lengthy process but with little planning, Kara kuzhambu can be prepared within an hour.

    Growing up Amma makes a version of Paruppu Urundai kuzhambu and Paruppu Urundai moor kuzhambu which doesn't have onion ad garlic. It will a typical Tamil Brahmin style.

    ...

    Read More

    Gobi 65 recipe - Baked | Grilled Caulifower

    September 11, 2014 By Vidya Srinivasan 84 Comments

    IMG_2581Gobi 65 is a delicious Crispy baked cauliflower. Usually it is deep fried here is a baked and broiled version, but no compromise in taste. It can be served as a appetizer or side for fried rice.

    When I was in school I tasted fried gobi for the first time. My aunt is a excellent cook every time we go and visit her she makes tasty dishes for us. During one summer vacation she prepared gobi manchurian. It was super yum😊

    After marriage when I started cooking I use to deep fry gobi. Recently I started exploring oven based recipe and wanted to give a try with baking gobi.

    IMG_2577

    Ever since I had Gobi 65 for the first time, I have been having a big question in my mind – why is it named 65?. As I mentioned in Cauliflower Peas Masala, cauliflower is my sister’s favorite veggie, and this is her default order in most restaurants.  

    First time when I tried baking cauliflower, it was total flopshow. Invited Hubby’s friends for dinner and  thought of baking cauliflower. That day I added yellow corn meal. I marinated cauliflower for 2 hours, overlapped cauliflower it was soggy and I didn’t get proper fried texture. It turned out more like a curry instead of gobi 65 texture.

    Again I wanted to try this with white corn flour, and reduce my marination time, and final kept cauliflower without overlapping. Crispy baked gobi is ready

    Off late I have been using my oven so frequently. Trying my favorite Indian snacks with a healthy baked version. TMF has few baked Indian snacks. Do check it out

    Baked Thattai

    Baked Seedai

    Baked Idli Fry

    Masala vadai

    Baked bonda

    Baked pakoda

    Baked Potato Tikka

    Baked Paneer tikka

    Baked Rajma vadai

    Baked healthy mixture

    IMG_2592

    Gobi 65 - Baked | Grilled Caulifower

    Gobi 65 is a delicious Crispy baked cauliflower. Usually it is deep fried here is a baked and broiled version, but no compromise in taste. It can be served as a appetizer or side for fried rice.
    5 from 2 votes
    Print Pin Comment
    Course: Appetizer
    Cuisine: Indian
    Prep Time: 10 minutes minutes
    Cook Time: 30 minutes minutes
    Total Time: 40 minutes minutes
    Servings: 3
    Author: Vidya Srinivasan

    Ingredients

    • Cauliflower -1 medium sized flower
    • Cornflour - 1/3 cup
    • Rice flour/ All purpose flour - 2 tbsp I used all purpose flour
    • Ginger Garlic paste - 1/4 tsp
    • Red chilli powder - 1 tsp Adjust according to your taste
    • Garam Masala - 1/4 tsp
    • Oil - 1 tablespoon + 1 tsp
    • Turmeric powder - a pinch
    • Salt - to taste
    • To grease:
    • Oil - 3 tbsp

    Instructions

    • Parboil cauliflower and strain them
    • Preheat the oven to 400 degree Fahrenheit and place the baking paper (I used Aluminum foil) on baking tray and grease
    • Combine all spice powder and mix well. Add cornflour and rice flour and mix well, and if required sprinkle some water to make a thick batter and let it marinate for 20 -30 minutes
    • Place the marinated cauliflower in the baking tray and grease it with oil, and bake them for 8 minutes stir and bake for another 8 minutes
    • Broil for 13-18 minutes based on the crispness you desire, taking out every 3 minutes stirring inbetween
    Subscribe to my YouTube channelCheck out Traditionally Modern Food!

    Notes

    1. Broil helps to get the fry texture so don't skip it. Can broil for some more minutes if you need it crispier
    2.  The amount of corn flour may vary depending on the cauliflower size so adjust accordingly
    3. Grease the oil helps cauliflower to sticking to the foiL
    4. After turning the oven to broil, keep monitoring frequently to avoid burnt texture
    5.  Avoid overlapping for even cooking
    6. If there is excess moisture, they turn out to be sticky. So avoid adding much water, also grease the foil throughout to avoid sticking
    7.  Alternatively, you can also deep fry them in oil
    8. Ajwain can be added while marinating cauliflower
    9.  Chat Masala or any spice powder can be added for taste
    10.  cooking time vary depends on the size of the cauliflower florets
    11.  Sprinkle some water if you think the flour and cauliflower is not binding properly. I didn't use, moisture in the cauliflower was enough
    12. Strain the cauliflower well and avoid overcooking for crispy texture
    Tried this recipe?Mention @traditionallymodernfood or tag #traditionallymodernfood!

    Method:

    • Parboil cauliflower and strain them

    IMG_0150

    • Preheat the oven to 400 degree Fahrenhait and place the baking paper (I used Aluminum foil) on baking tray and grease
    • Combine all spice powder and mix well. Add cornflour and all purpose flour and mix well; let it marinate for 20 -30 minutes
    • Place the marinated cauliflower in the baking tray and grease it with oil, and bake them for 8 minutes stir and bake for another 8 minutes
    • Broil for 13-18 minutes based on the crispness you desire, taking out every 3 minutes stirring inbetween

    IMG_7602

    IMG_2600

    Tomato Jam

    September 8, 2014 By Vidya Srinivasan 78 Comments

    Sugarless Tomato Jam

    Tomato jam | easy homemade jam

    IMG_0139

    Having a sweet tooth, I always prefer to have a little sugar in my plate while having breakfast. Seeing this, my mother in law used to prepare tomato jam exclusively for my breakfast purposes! I became so addictive to that and learnt the recipe from her. But seeing the sugar addition, I was alarmed, and so thought of trying Jam with honey instead of Sugar, like I did for Eggless Dry fruit and nut cake. My friend Lori was my inspiration in cooking with honey. We liked the taste of this jam, and I didn't find any difference in taste between honey and sugar. This has now become my new way of preparing jam!

    Sugarless Tomato Jam

    No ratings yet
    Print Pin Comment

    Ingredients

    • Firm and ripe Tomatoes – 10
    • Water - 3 tbsp
    • Honey - 3/4 cup Adjust according to your sweetness
    • Cardamom powder - 1/8 tsp Optional

    Instructions

    • Add honey and water to the pan and cook for a minute.
    • Add the tomato puree to the honey syrup and stir it occasionally, till it thickens
    • Cook till moisture is completely observed. Tomato and water should not run separately. If the jam is taken in a spoon, it should flow as a paste
    • Allow the jam to cool completely. Store in an airtight container
    Subscribe to my YouTube channelCheck out Traditionally Modern Food!

    Notes

    1. Sugar (White/Brown) can also be used instead of honey. Add sugar and water in a pan and cook till sugar melts completely
    2. Jam stays good upto a month
      Can also boil tomatoes and then blend that
    3. Agave nectar can be used instead of honey
    Tried this recipe?Mention @traditionallymodernfood or tag #traditionallymodernfood!

    Ingredients:

    Firm and ripe Tomatoes – 10

    Water - 3 tbsp

    Honey - 3/4 cup (Adjust according to your sweetness)

    Cardamom powder - 1/8 teaspoon (Optional)

    IMG_0140

    Method:

    • Add  honey and water to the pan and cook for a minute.

    IMG_0121

    • Add the tomato puree to the honey syrup and stir it occasionally, till it thickens

    IMG_5801

    • Cook till moisture is completely observed. Tomato and water should not run separately. If the jam is taken in a spoon, it should flow as a paste

    IMG_0126

    IMG_0134

    • Allow the jam to cool completely.  Store in an airtight container

    IMG_0146


    Baked Rice Cracker

    September 7, 2014 By Vidya Srinivasan 45 Comments

    IMG_9035

    Yesterday being a weekend evening, felt like having some quick snack. I fist thought of doing Baked Besan Bonda/ Baked Onion Pakoda, but I didn't have enough Besan flour. I also didn't have enough patience to soak and do anything. Suddenly I noticed I had some leftover rice.  One of my friends had once told me that her mom makes Vathal (Fryums) with leftover rice. My mom prepares Vadam with rice flour and tapioca sago, dries them in sun for 2 days and it is deep fried in oil. OMG, I love it.  I wanted to try something similar to my friend's mom version.  I won't say it was as crispy as fried version, but soft and a bit chewy snack.

    Baked Rice Cracker

    Preparation Time : 5 mins | Cooking Time : 20 - 25 mins

    Recipe Category: Snack

    Ingredients:

    Cooked Rice - 1 cup (I used Brown rice, any rice can be used)

    Lemon juice - 1 tbsp

    Coriander powder - 1/4 tsp

    Garlic Powder - 1/8 esp

    Salt - as needed

    Oil/ Cooking spray - to grease (I used cooking spray )

    IMG_9041

    Method:

    • Preheat the oven to 350 degree Fahrenheit. Place baking paper on baking tray and grease it
    • Add cooked rice, lemon juice, garlic powder, coriander powder and salt, and Combine well

    IMG_9012

    IMG_9014

    • Add water if required and make a dough. Make some balls (Marble size). Gently press them to flat thin circles ( around1/8 inch approximately)
    • Bake them for 18 -24 minutes, turning sides

    IMG_9024

    IMG_9033

    My Notes:

    • Try to make small flat crackers, else the edges will dry out while the centers remain too moist
    • Instead of garlic powder, you can add chilli powder, onion powder, cumin powder etc.
    • Can make the dough flat and cut with cookie cutter
    • Over cooking may tend to dry out the rice completely

    Spinach Corn curry

    September 4, 2014 By Vidya Srinivasan 67 Comments

    Spinach corn curry is something I regularly cook, but for a change tried without using Oil/ butter, and I am surprised with the outcome. Hubby couldn't believe I didn't use oil! In fact he ate some extra gravy appreciating the taste:-) 

    IMG_0068

    • Keerai Paruppu Sadam | Spinach Khichdi
    • Keerai Pachai payaru masiyal
    • Keerai Molagootal Recipe | South Indian Spinach KooTu
    • Godhumai rava dosai | Wheat rava dosai

    Other Spinach based recipes

    No ratings yet
    Print Pin Comment

    Ingredients

    • Spinach - 2 cups
    • Frozen Corn - 1 cup
    • Onion - 1 big
    • Cashew - 7
    • Ginger garlic paste - 1/2 tsp
    • Garam Masala powder - 1 tsp
    • Green Chilli - 1 Adjust according to your spice level
    • Coriander powder - 1/2 tsp
    • Cumin powder - 1/4 tsp
    • Salt - as needed
    • Sugar - generous pinch

    Instructions

    • Boil onion and cashew in hot water till the raw smell in onion goes off. Strain the water. When it comes to room temperature, blend them into fine paste without adding water
    • Rinse the spinach well in water. Boil water with pinch of sugar and salt. Add the spinach to the boiling water. Cook and switch off the flame, after 3-5 mins drain and quickly pour cold water over the spinach. Transfer them into a blender and make fine paste, with green chilli
    • Heat the non stick pan/heavy bottomed/andoized pan in medium heat and add ginger garlic paste and 1 teaspoon of water.  Sauté till the water is absorbed and raw smell goes off. If water evaporated before raw smell goes spinkle some more water
    • Add Onion and cashew puree and cook for 3-4 minutes  keep stirring occasionally
    • Add spinach puree, garam masala, coriander powder, cumin powder and allow it to cook for 2-3 mins
    • Add corn and combine well and cook for 2-3 minutes
    Subscribe to my YouTube channelCheck out Traditionally Modern Food!

    Notes

    1. I have used frozen corn so I didn't steam them. If you are using fresh corn, steam them before adding
    2. Add water if you think the gravy is too thick
    3. Sugar helps to retain the green color in spinach
    4. Green peas, tofu/ paneer can also be added
    5. Can add milk/fresh cream/coconut milk to the gravy
    6. Whole spices (bay leaf, cinnamon, cardamom, etc) can be added
    7. This gravy goes well with any variety of rice like fried rice/ pulao as well as with naan/rotis
    8. Butter can be added for flavour
    9. Tomatoes can be added while cooking onion
    Tried this recipe?Mention @traditionallymodernfood or tag #traditionallymodernfood!

    Spinach Corn Gravy

     Ingredients:

    Spinach -  2 cups

    Frozen Corn - 1 cup

    Onion - 1 big

    Cashew - 7

    Ginger garlic paste - 1/2 tsp

    Garam Masala powder - 1 tsp

    Green Chilli - 1 ( Adjust according to your spice level)

    Coriander powder - 1/2 tsp

    Cumin powder - 1/4 tsp

    Salt - as needed

    Sugar -  generous pinch

    IMG_0075 Method:

    • Boil onion and cashew in hot water till the raw smell in onion goes off. Strain the water. When it comes to room temperature, blend them into fine paste without adding water

    IMG_0047

    • Rinse the spinach well in water. Boil water with pinch of sugar and salt. Add the spinach to the boiling water. Cook and switch off the flame, after 3-5 mins drain and quickly pour cold water over the spinach. Transfer them into a blender and make fine paste, with green chilli

    IMG_0048

    IMG_0054

    • Heat the nonstick pan/heavy bottomed/andoized pan in medium heat and add ginger garlic paste and 1 teaspoon of water.  Sauté till the water is absorbed and raw smell goes off. If water evaporated before raw smell goes spinkle some more water

    IMG_0050

    • Add Onion and cashew puree and cook for 3-4 minutes  keep stirring occasionally

    IMG_0055

    •  Add spinach puree, garam masala, coriander powder, cumin powder and allow it to cook for 2-3 mins

    IMG_0062

    • Add corn and combine well and cook for 2-3 minutes

    IMG_0066 IMG_0076  

    Aval mixture | poha chivda

    September 3, 2014 By Vidya Srinivasan 53 Comments

    Aval mixture | aval mixture recipe | poha chivda | baked healthy mixture is tasty after school /evening snacks. Check out the baked aval mixture video and If you like the video pls SUBSCRIBE to my channel Aval mixture | aval mixture recipe | poha chivda | baked healthy mixture is tasty after school /evening snacks. Baked version consumes very less oil compared to the deep fried aval mixture. This is also one healthy mixture for Diwali / get together. I lived in west mambalam for two decades and mixture has become my favorite because of venkatramana poli stall. After coming to US I missed a mixture of time. I tried buying mixture but nothing is close to the taste. My mother -in -law makes a great tasty mixture but I have never learned the recipe from her. Traditional mixture recipe is a bit lengthy, though it tastes yummy process and the oil alarms me.  A lazy cook like me wanted to make it quick and simple. I frequently do Puffed Rice Mixture and roasted makhana for a teatime snack. Baking fever (that's how hubby calls my addiction to baking) told me to try aval mixture with puffed and flattened rice, and with nuts. It took me a few attempts to bake a perfect crispy aval. Luckily puffed rice was such an easy bake. Honestly, baked aval mixture is definitely time-consuming compared to regular deep-fried chivda. I mostly do my baked chivda while I am in the kitchen doing sometime else so I have had a problem with the extra baking time. I try to load my aval mixture with nuts because that is my favorite way to make my son eat nuts.  Poha flattened rice and nuts get cooked at different times so I have cooked everything separately for this Aval mixture. Puli Aval, aval upma and Aval pidi kozhukattai are other tasty aval based recipes in TMF  
    • Aval Appam | inipu panniyaram | poha appam
    • Aval vadai | Poha vadai
    • Aval laddu | Poha ladoo
    • Aval murukku | Poha murukku

    Other Aval recipes in TMF

    5 from 1 vote
    Print Pin Comment

    Ingredients

    • Thin Flattened Rice/ Poha White/ Red - 2 cups (I used white)
    • Puffed Rice / Pori – 1 cup + 1/4 cup
    • Roughly chopped Walnuts - 1/4 cup
    • Roasted Peanuts – 1/4 cup
    • Cashew - 12
    • Turmeric powder – 1/4 tsp
    • Asafoetida/Hing – a generous pinch
    • Oil – 2 tablespoon + 1 tsp
    • Salt – as needed
    • Cooking Spray/ Oil - to grease I used cooking spray

    Instructions

    • Preheat the oven to 200 degrees Fahrenheit. Line the baking tray with aluminum foil or any parchment paper and grease with cooking spray/oil
    • In a wide bowl add flattened rice, turmeric powder, salt and 2 teaspoon of oil; mix well
    • Spread the seasoned flattened rice in the baking tray. Avoid overlapping
    • Bake the flattened rice for 15 minutes
    • Take out from the oven and mix well, bake again for 15 minutes
    • Mix well and bake again for 10 minutes or till the flattened rice turns crispy, Transfer it to a separate bowl
    • In a flattened rice marinated bowl add pori, turmeric powder, 2 teaspoon of oil and salt; mix everything  well
    • Use the same baking sheet but grease it with extra oil
    • Bake for 12 minutes or till poha turns crispy
    • Mix well and add to the flattened rice marinated bowl
    • In the used bowl add cashew, peanut, curry leaves, walnut and 2 teaspoon of oil; mix well
    • Bake for 10 minutes
    • Mix everything well and bake for 6 minutes or until nuts and curry leaves turn crispy
    • Combine roasted flattened rice, poha and nuts
    • Add 1 teaspoon of coconut oil and mix well
    • Spread them in a baking tray
    • Bake again for 10 minutes. Baked aval mixture is ready

    Video

    Subscribe to my YouTube channelCheck out Traditionally Modern Food!

    Notes

    1. Can add Fried gram, almonds , raisin or any other Nuts or dry fruits  of your choice
    2. Instead of baking, you can also deep fry flattened rice, and shallow fry puffed rice. Combine everything together
    3. Baking time may vary from oven go oven 
    4. I have a never user thick poha
    5. Poha can also be microwaved for 3/4 minute in small batches
    6. If you prefer more pori adjust accordingly 
    7. Chilli powder, garlic powder,garam masala, etc. can be added for extra flavor
    8. Hing can be added for extra flavor
    9. Store it in an airtight container to retain freshness
    Tried this recipe?Mention @traditionallymodernfood or tag #traditionallymodernfood!
    Ingredients: Thin Flattened Rice/  Poha (White/ Red) - 2 cups (I used white) Puffed Rice / Pori – 1 cup + 1/4 cup Roughly chopped Walnuts - 1/4 cup Roasted Peanuts – 1/4 cup Cashew - 12 Turmeric powder – 1/4 tsp Asafoetida/Hing – a generous pinch Oil –  2 tablespoon + 1 tsp Salt – as needed Cooking Spray/ Oil - to grease (I used cooking spray) Method
    • Preheat the oven to 200 degrees Fahrenheit. Line the baking tray with aluminum foil or any parchment paper and grease with cooking spray/oil
    • In a wide bowl add flattened rice, turmeric powder, salt and 2 teaspoon of oil; mix well
    • Spread the seasoned flattened rice in the baking tray. Avoid overlapping
    • Bake the flattened rice for 15 minutes
    • Take out from the oven and mix well, bake again for 15 minutes
    • Mix well and bake again for 10 minutes or till the flattened rice turns crispy, Transfer it to a separate bowl
    • In a flattened rice marinated bowl add pori, turmeric powder, 2 teaspoon of oil and salt; mix everything  well
    • Use the same baking sheet but grease it with extra oil
    • Bake for 12 minutes or till poha turns crispy
    • Mix well and add to the flattened rice marinated bowl 
    • In the used bowl add cashew, peanut, curry leaves, walnut and 2 teaspoon of oil; mix well 
    • Bake for 10 minutes
    • Mix everything well and bake for 6 minutes or until nuts and curry leaves turn crispy
    • Combine roasted flattened rice, poha and nuts
    • Add 1 teaspoon of coconut oil and mix well
    • Spread them in a baking tray
    • Bake again for 10 minutes. Baked aval mixture is ready
     
    • « Go to Previous Page
    • Page 1
    • Interim pages omitted …
    • Page 111
    • Page 112
    • Page 113
    • Page 114
    • Page 115
    • Interim pages omitted …
    • Page 125
    • Go to Next Page »

    Primary Sidebar

    Vidya's portrait in a circle

    Hi, I am Vidya Srinivasan. Thanks for visiting my page.

    Discover traditional Indian recipes with a modern twist - Indian vegetarian recipes, South Indian recipes, and simply the best Indian recipes you can find online. Sign up to stay tuned for my updates!

    More about me →

    Let's Connect

    • Facebook
    • Instagram
    • Mail
    • Pinterest
    • RSS Feed
    • Twitter
    • YouTube

    Sign Up

    Sign up to my Newsletter and receive my new recipes straight into your e-mail box!

    Featured on Google for Publishers

    Click on the image to read more

    Hot Beverages recipes

    • Ulundhu Kanji | Uluntham kanji
    • Hot Apple Cider | Spiced Apple cider
    • Kashayam | Herbal tea
    • Kashmiri Chai | Pink tea | noon tea

    click to see more

    See More →

    Footer

    ↑ back to top

    Shortcuts

    • About Vidya
    • Privacy Policy

    Traditionally Modern Food retina mobile menu logo
    • Sign up for my recipe updates!

    Let's Connect

    • Mail
    • Facebook
    • Instagram

    Copyright © 2021 • Traditionally Modern Food

    Rate This Recipe

    Your vote:


    A rating is required
    A name is required
    An email is required